1936 Ford Five Window Coupe Street Rod Restoration 2014
|
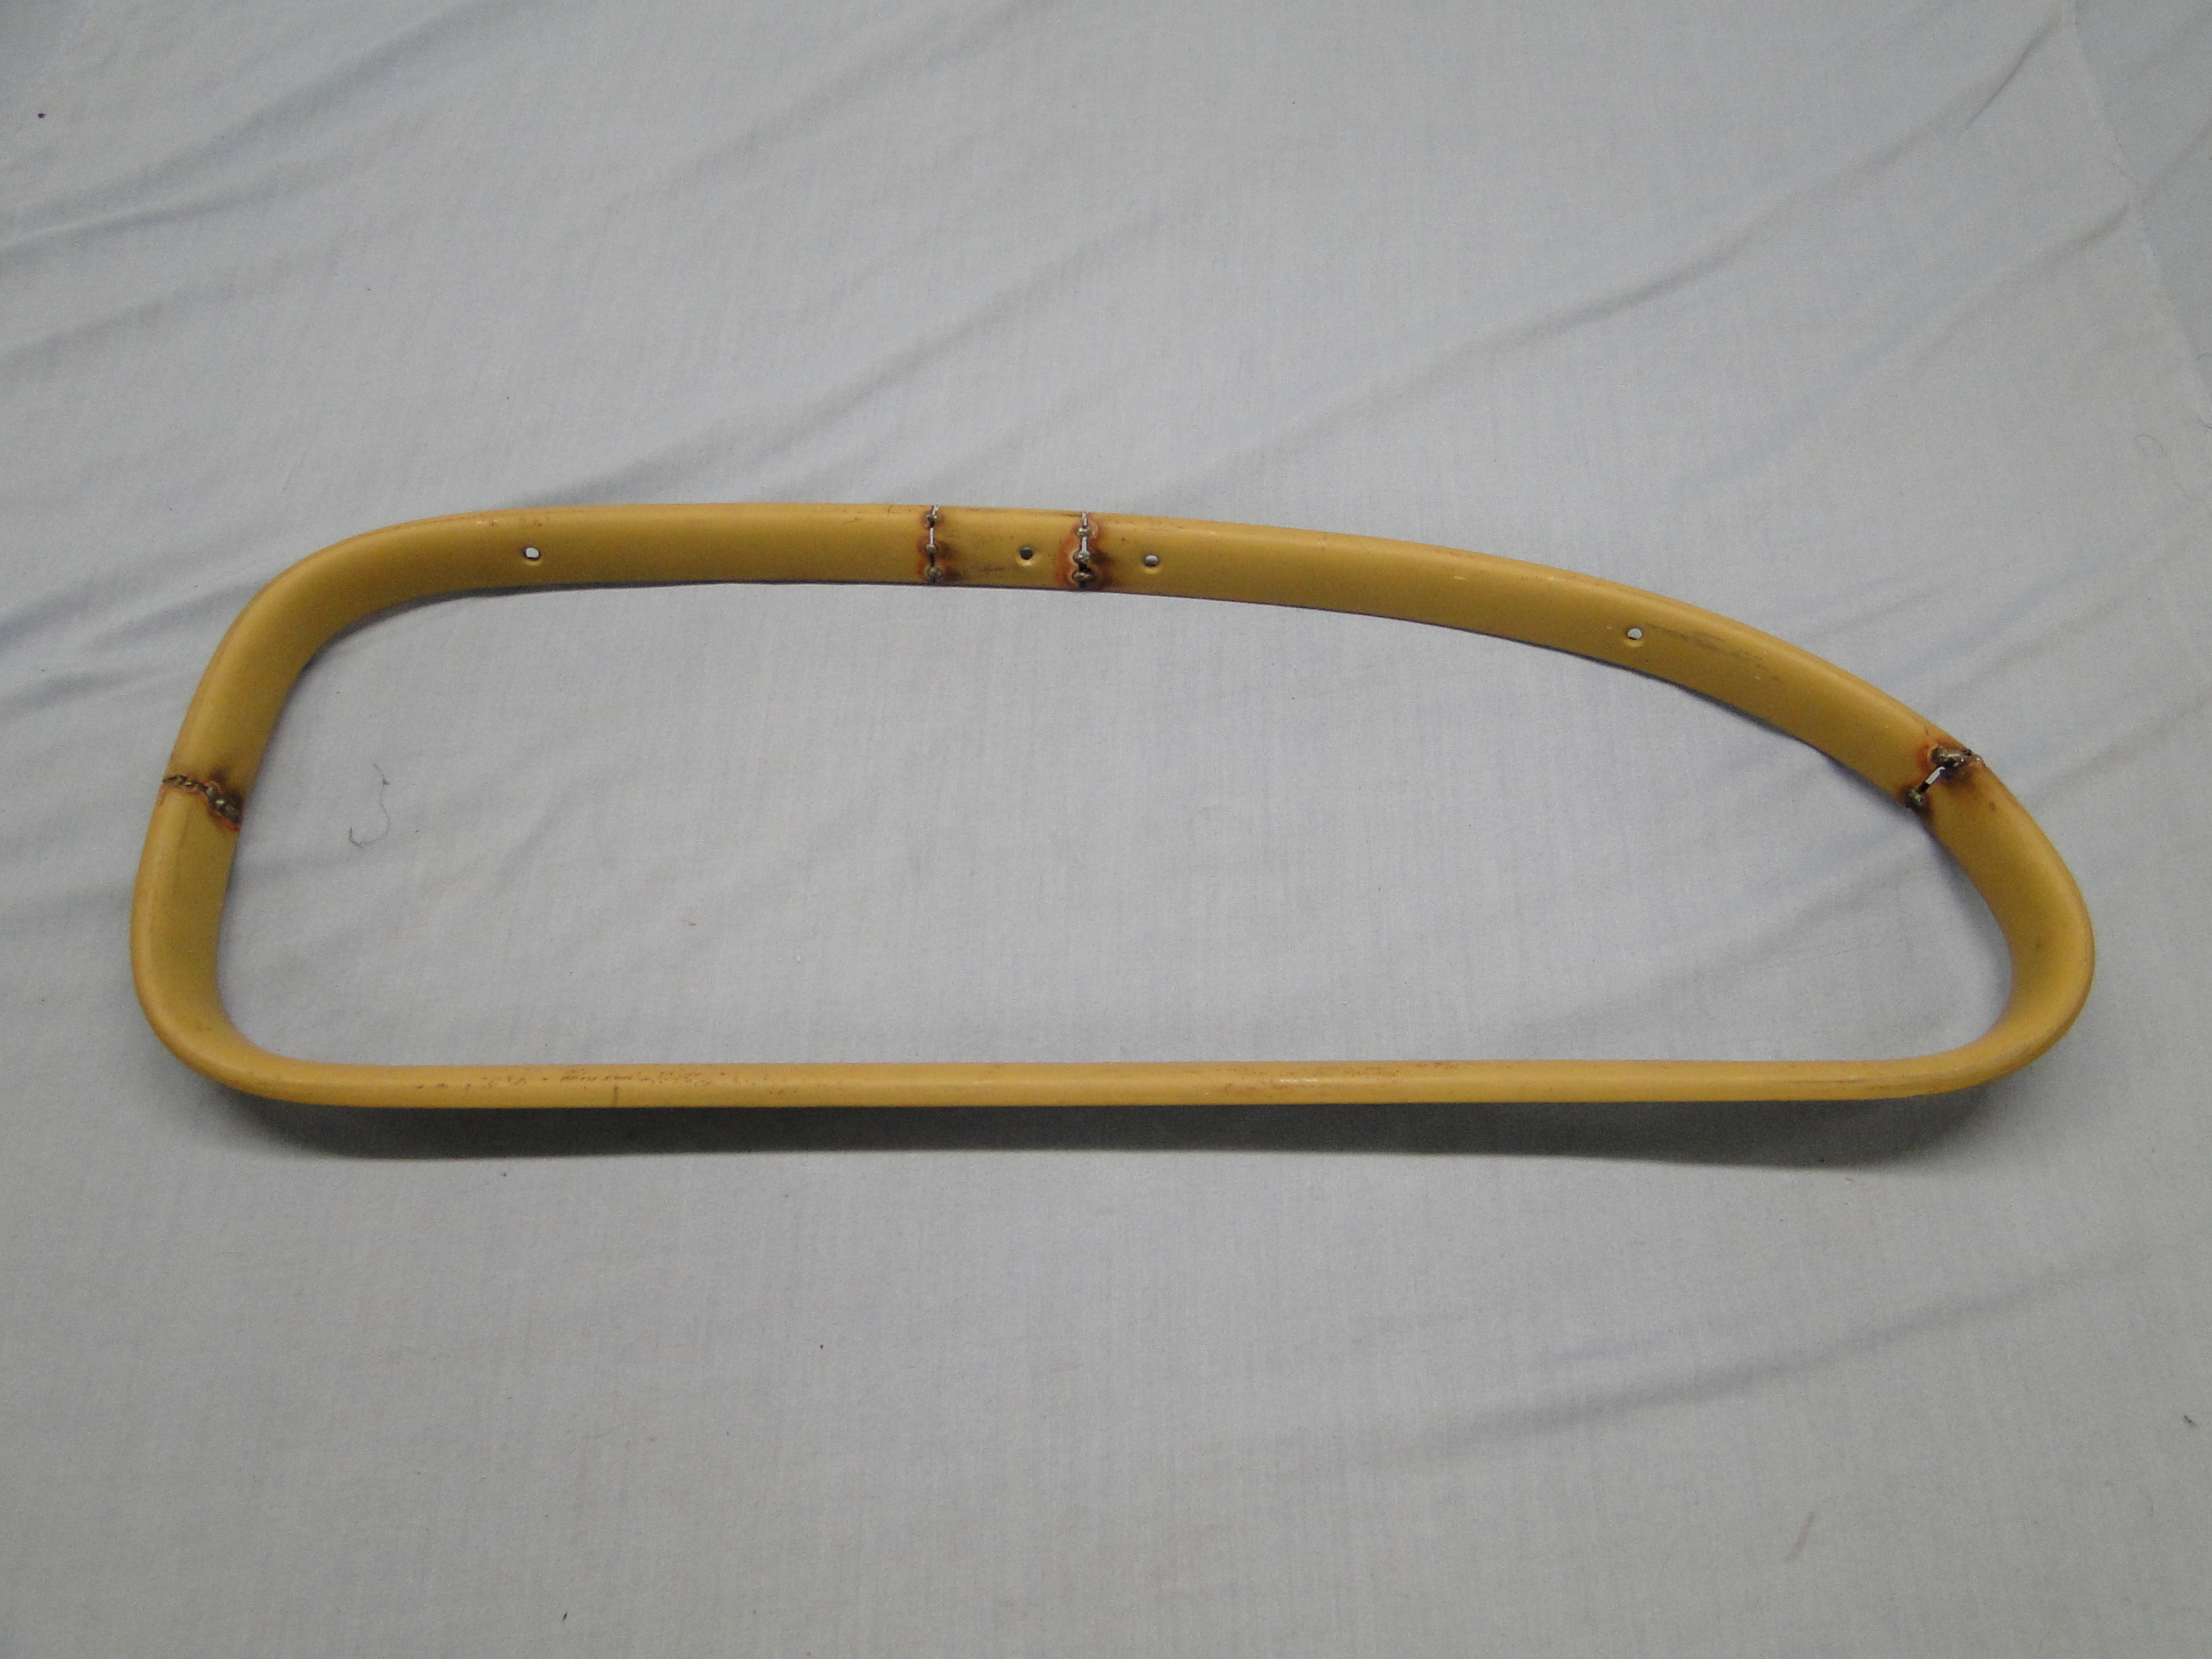
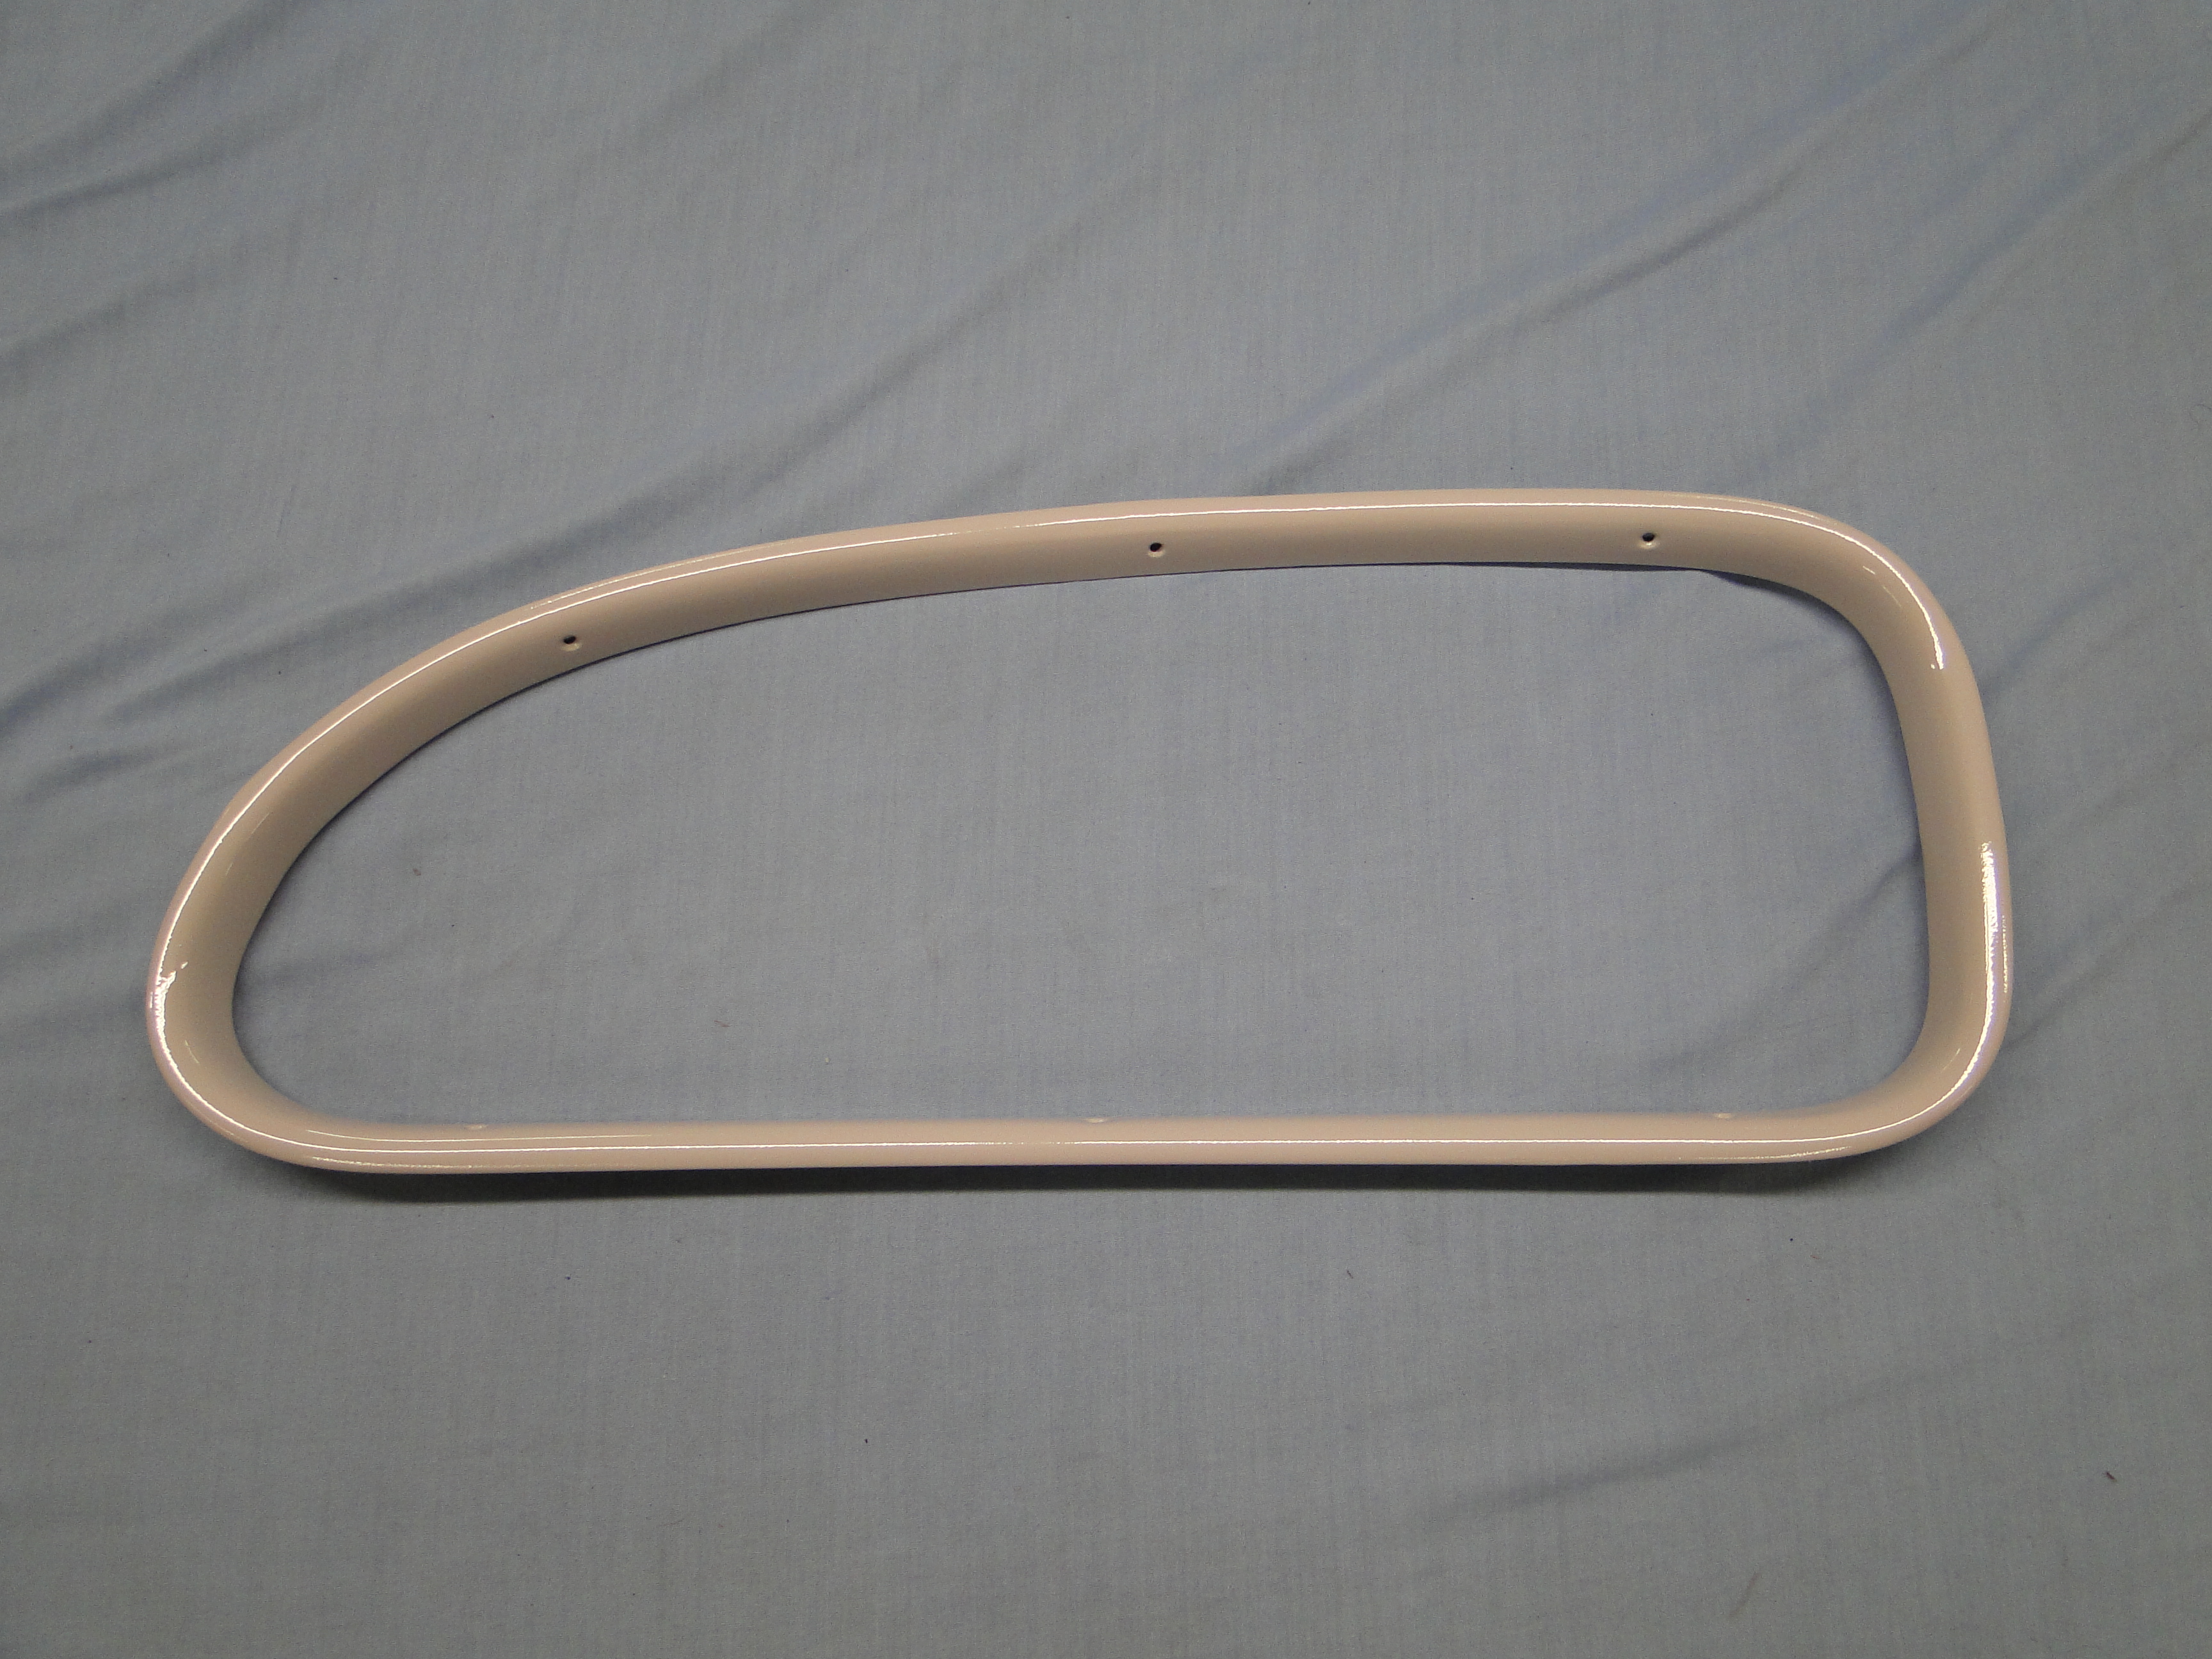
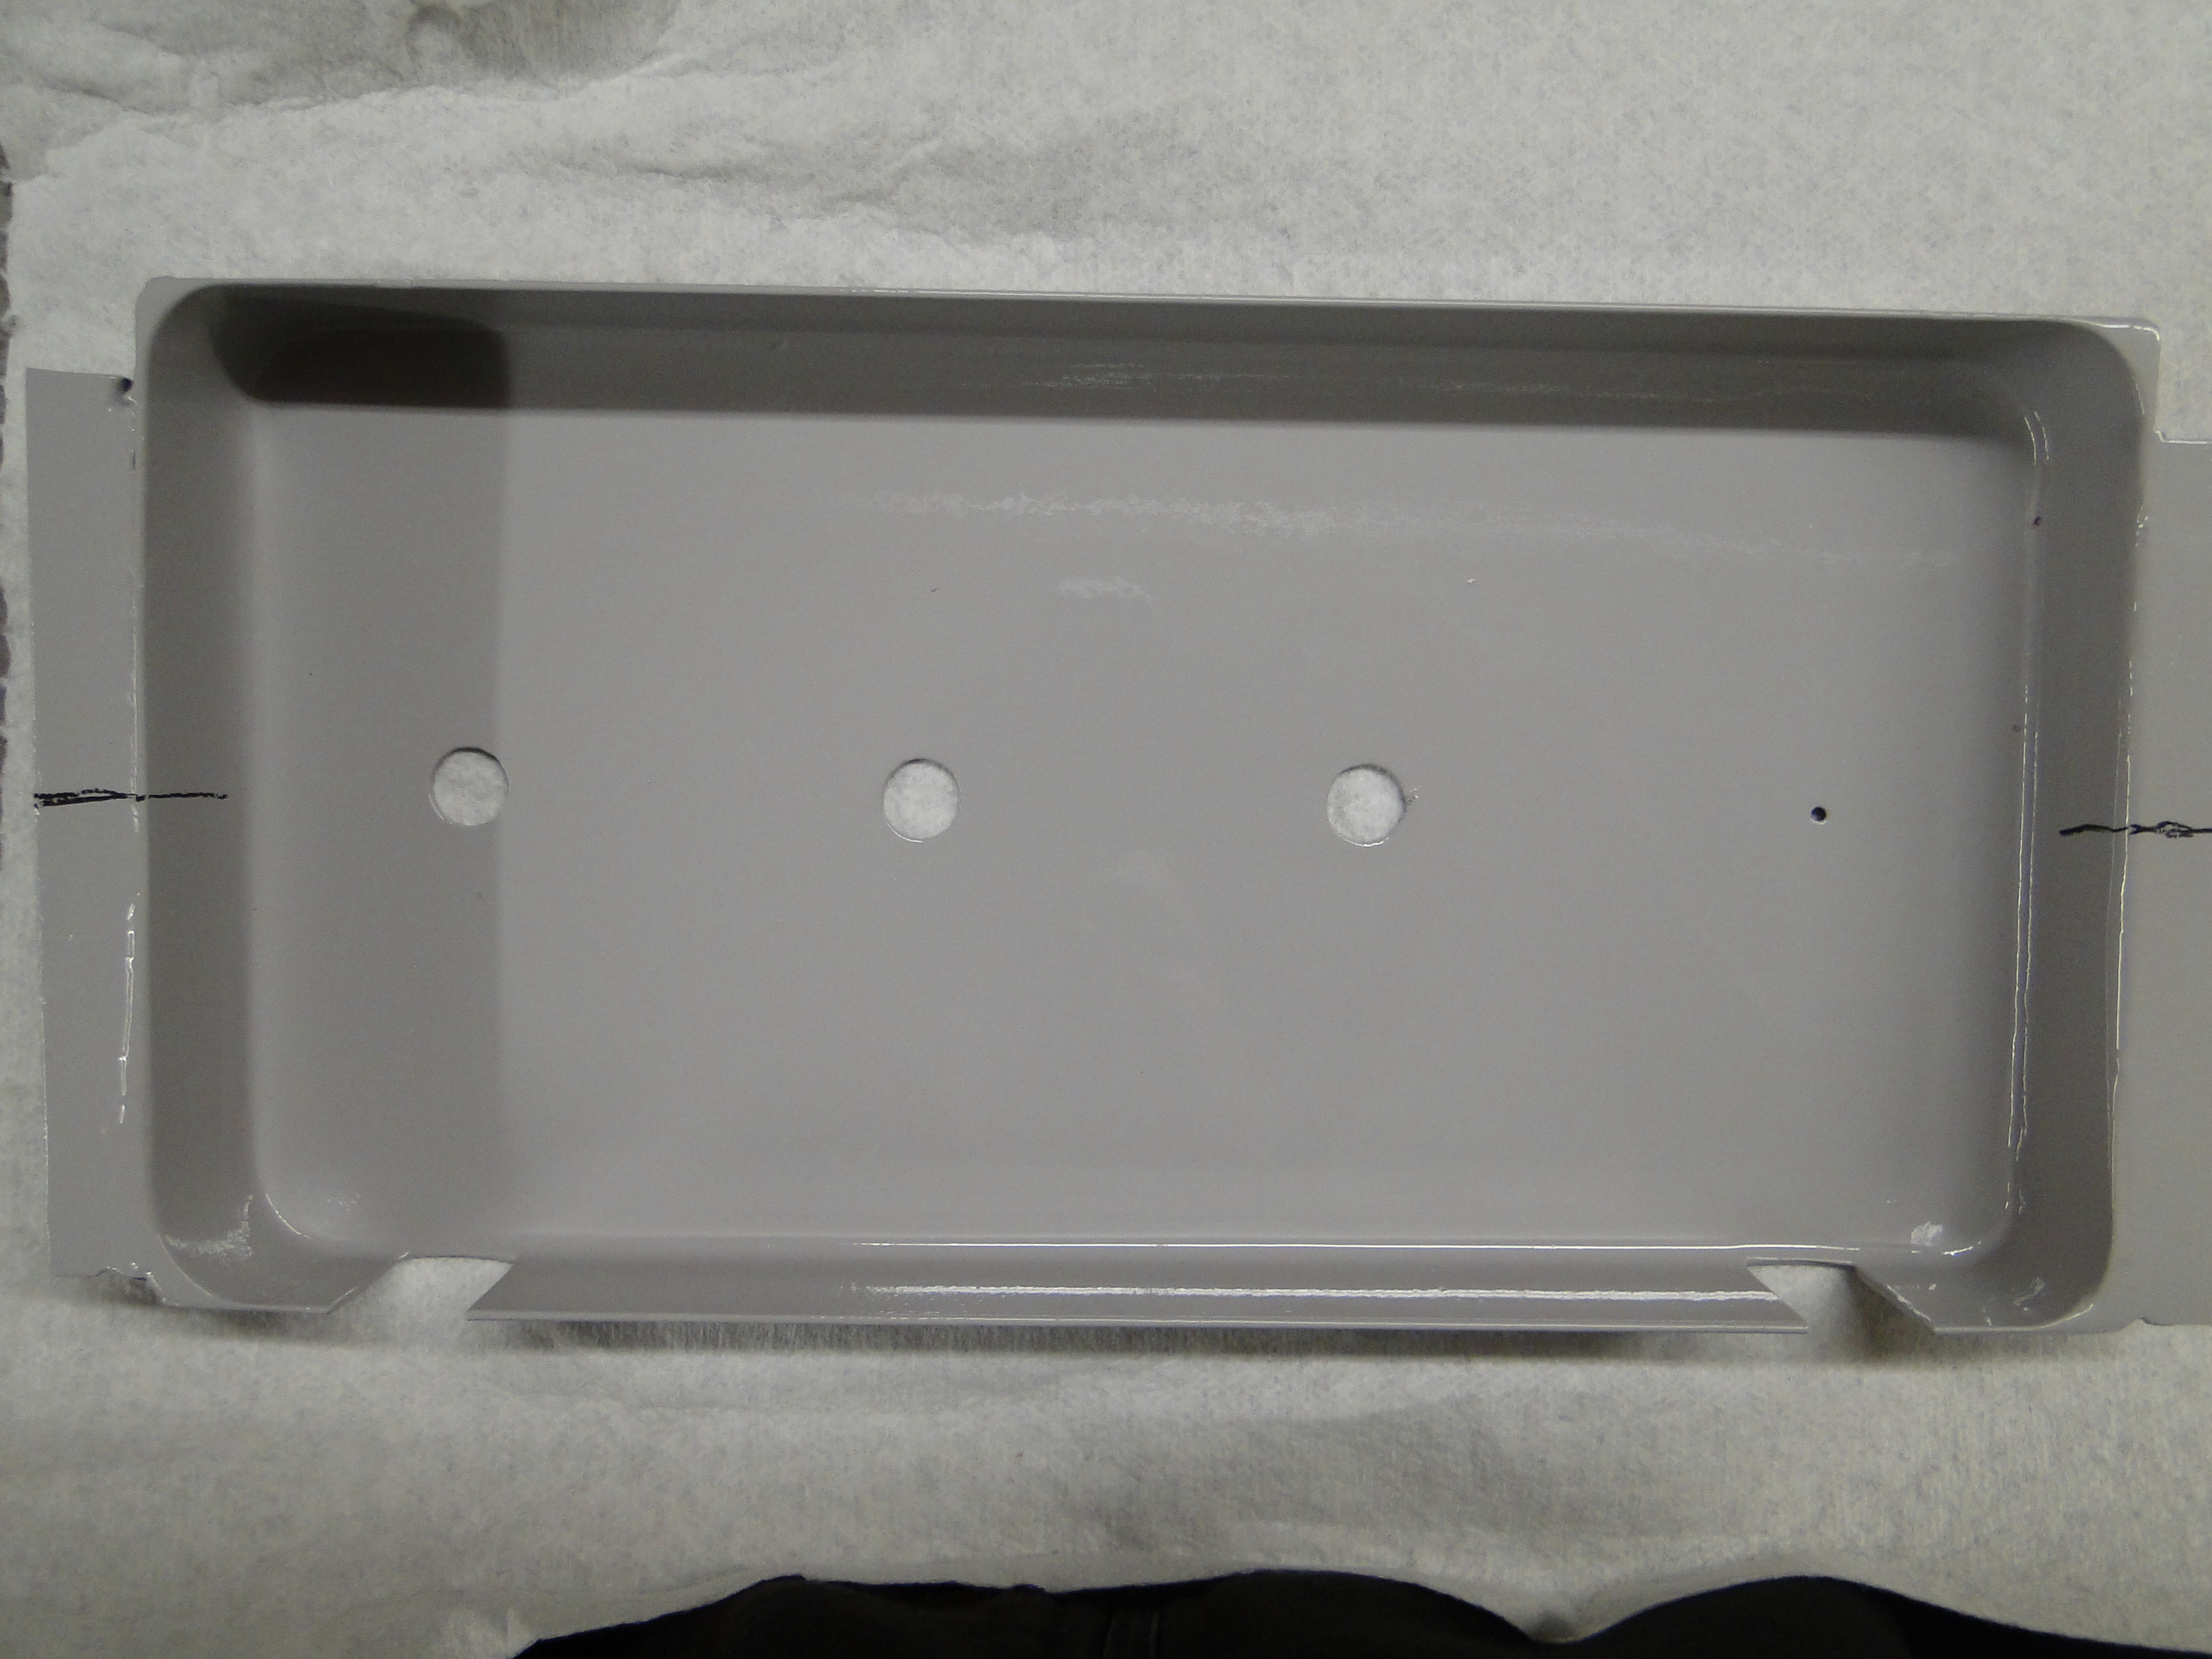
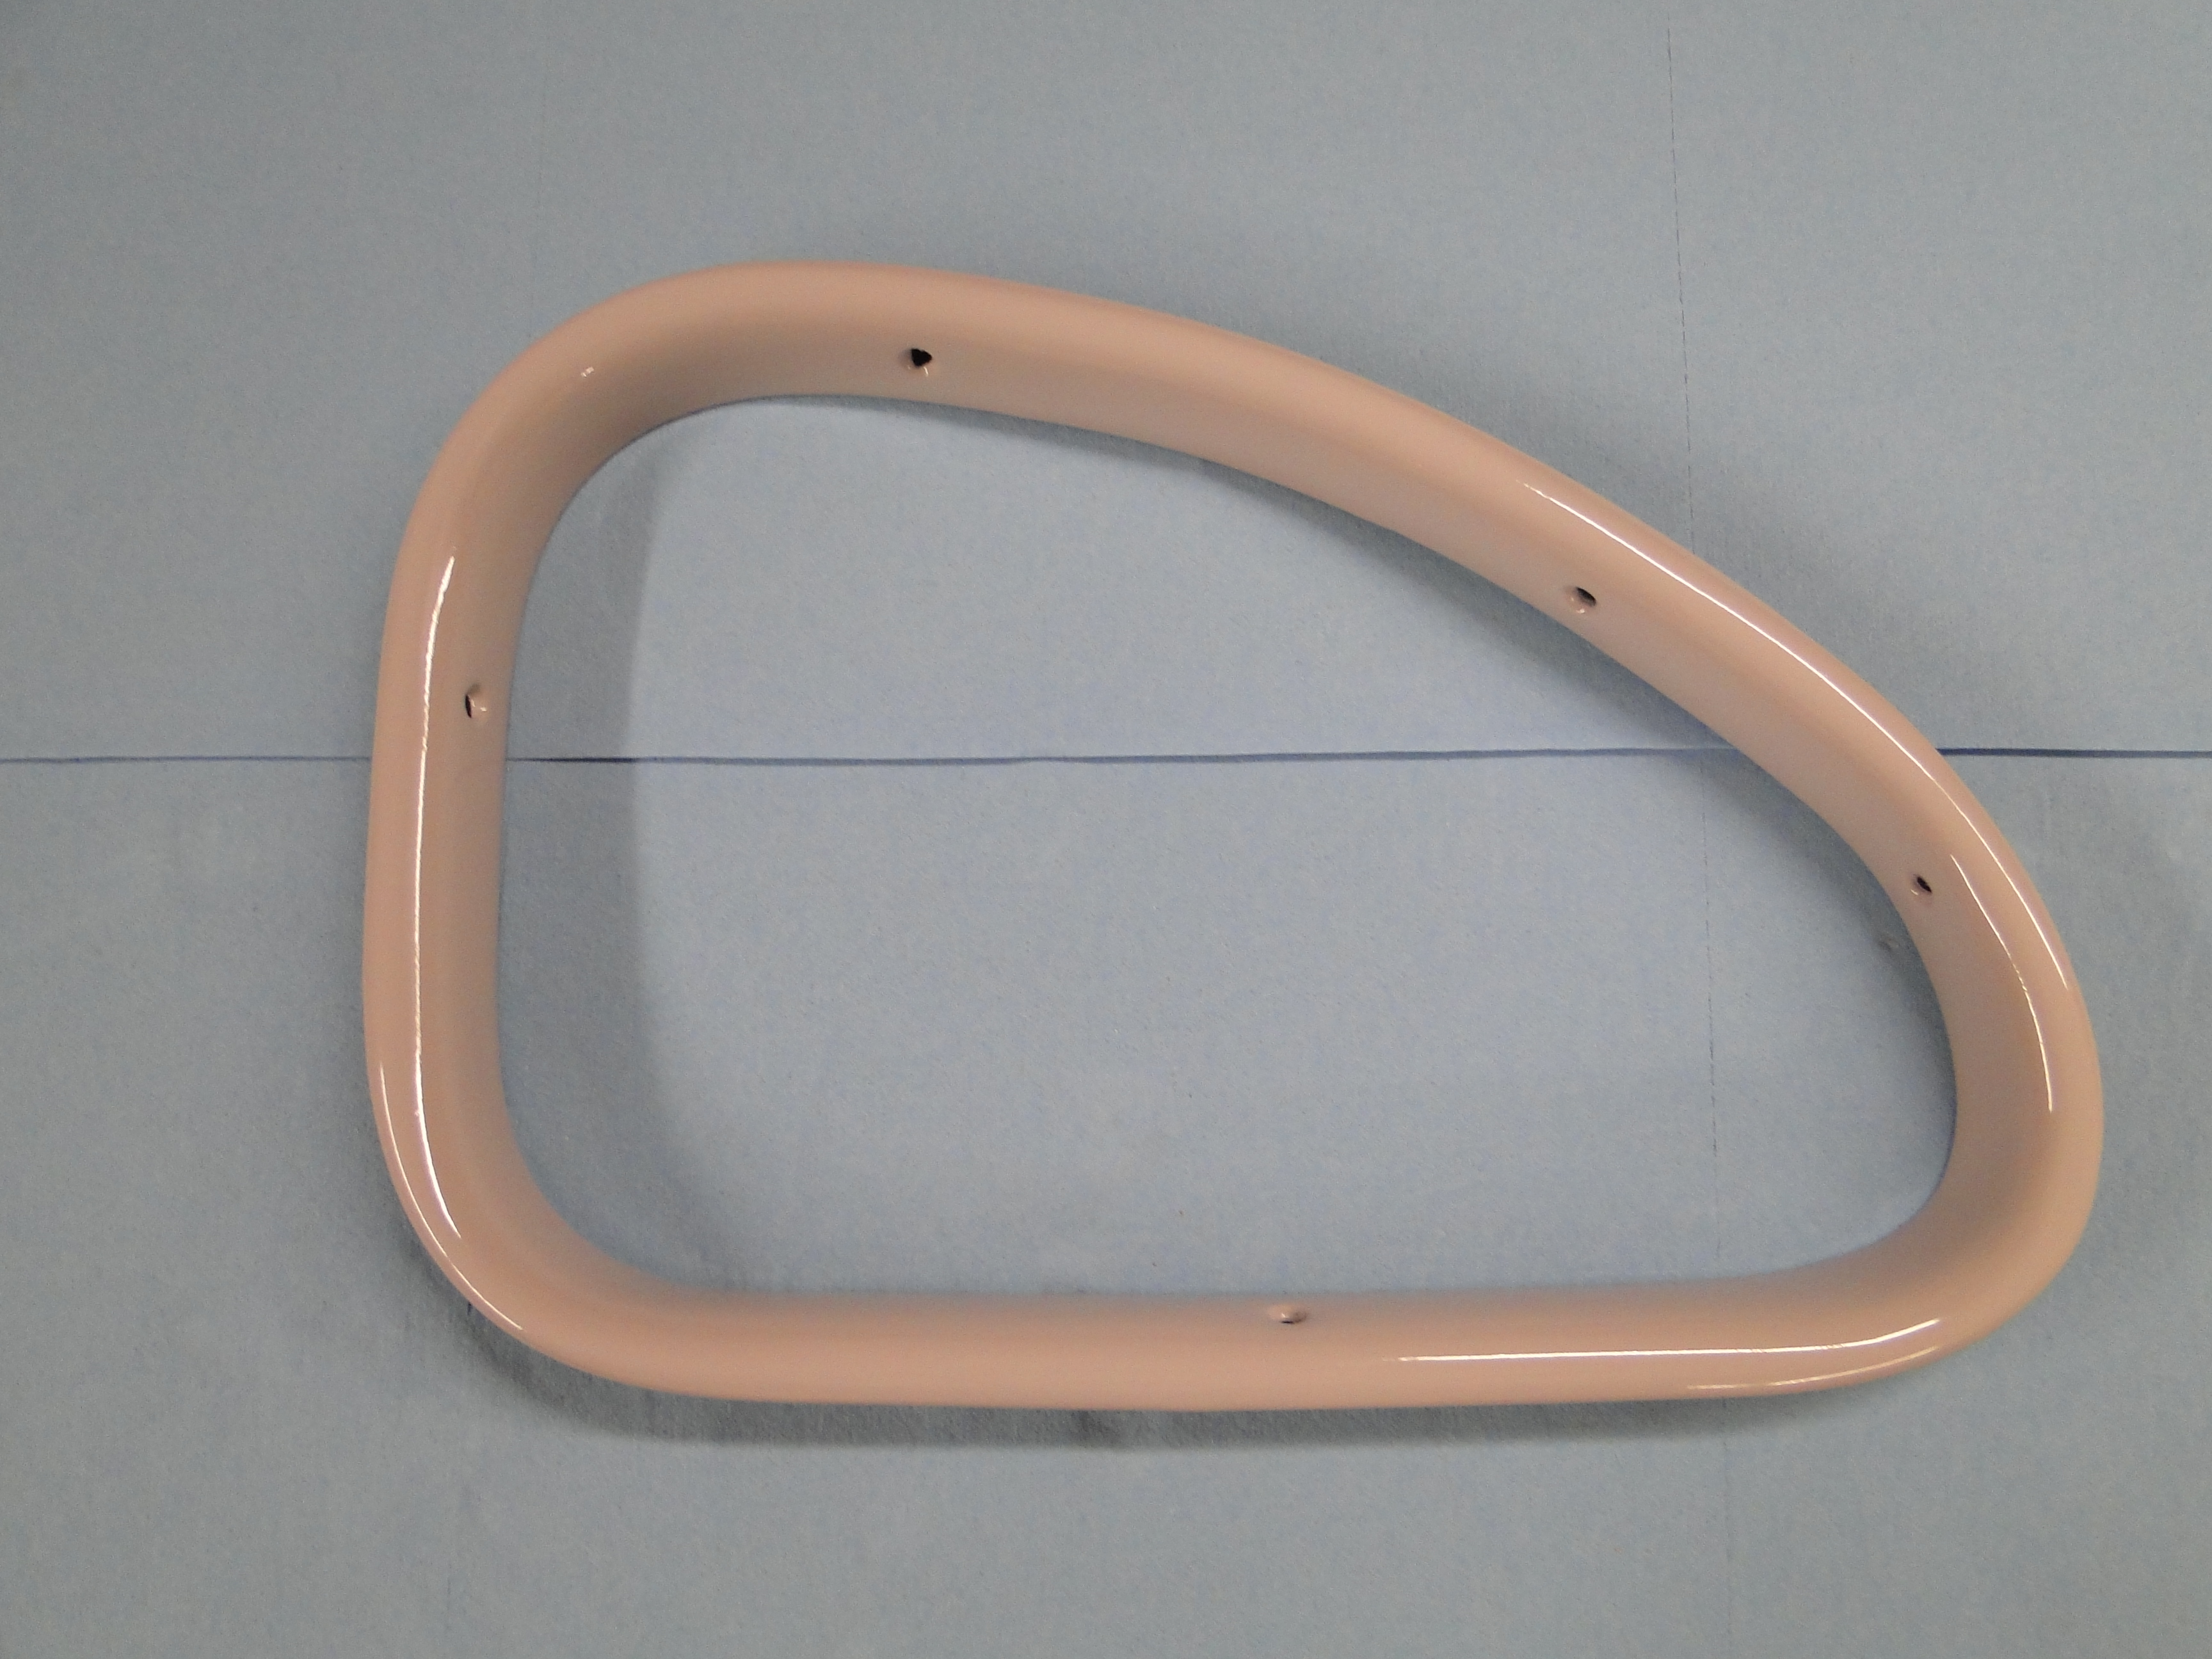
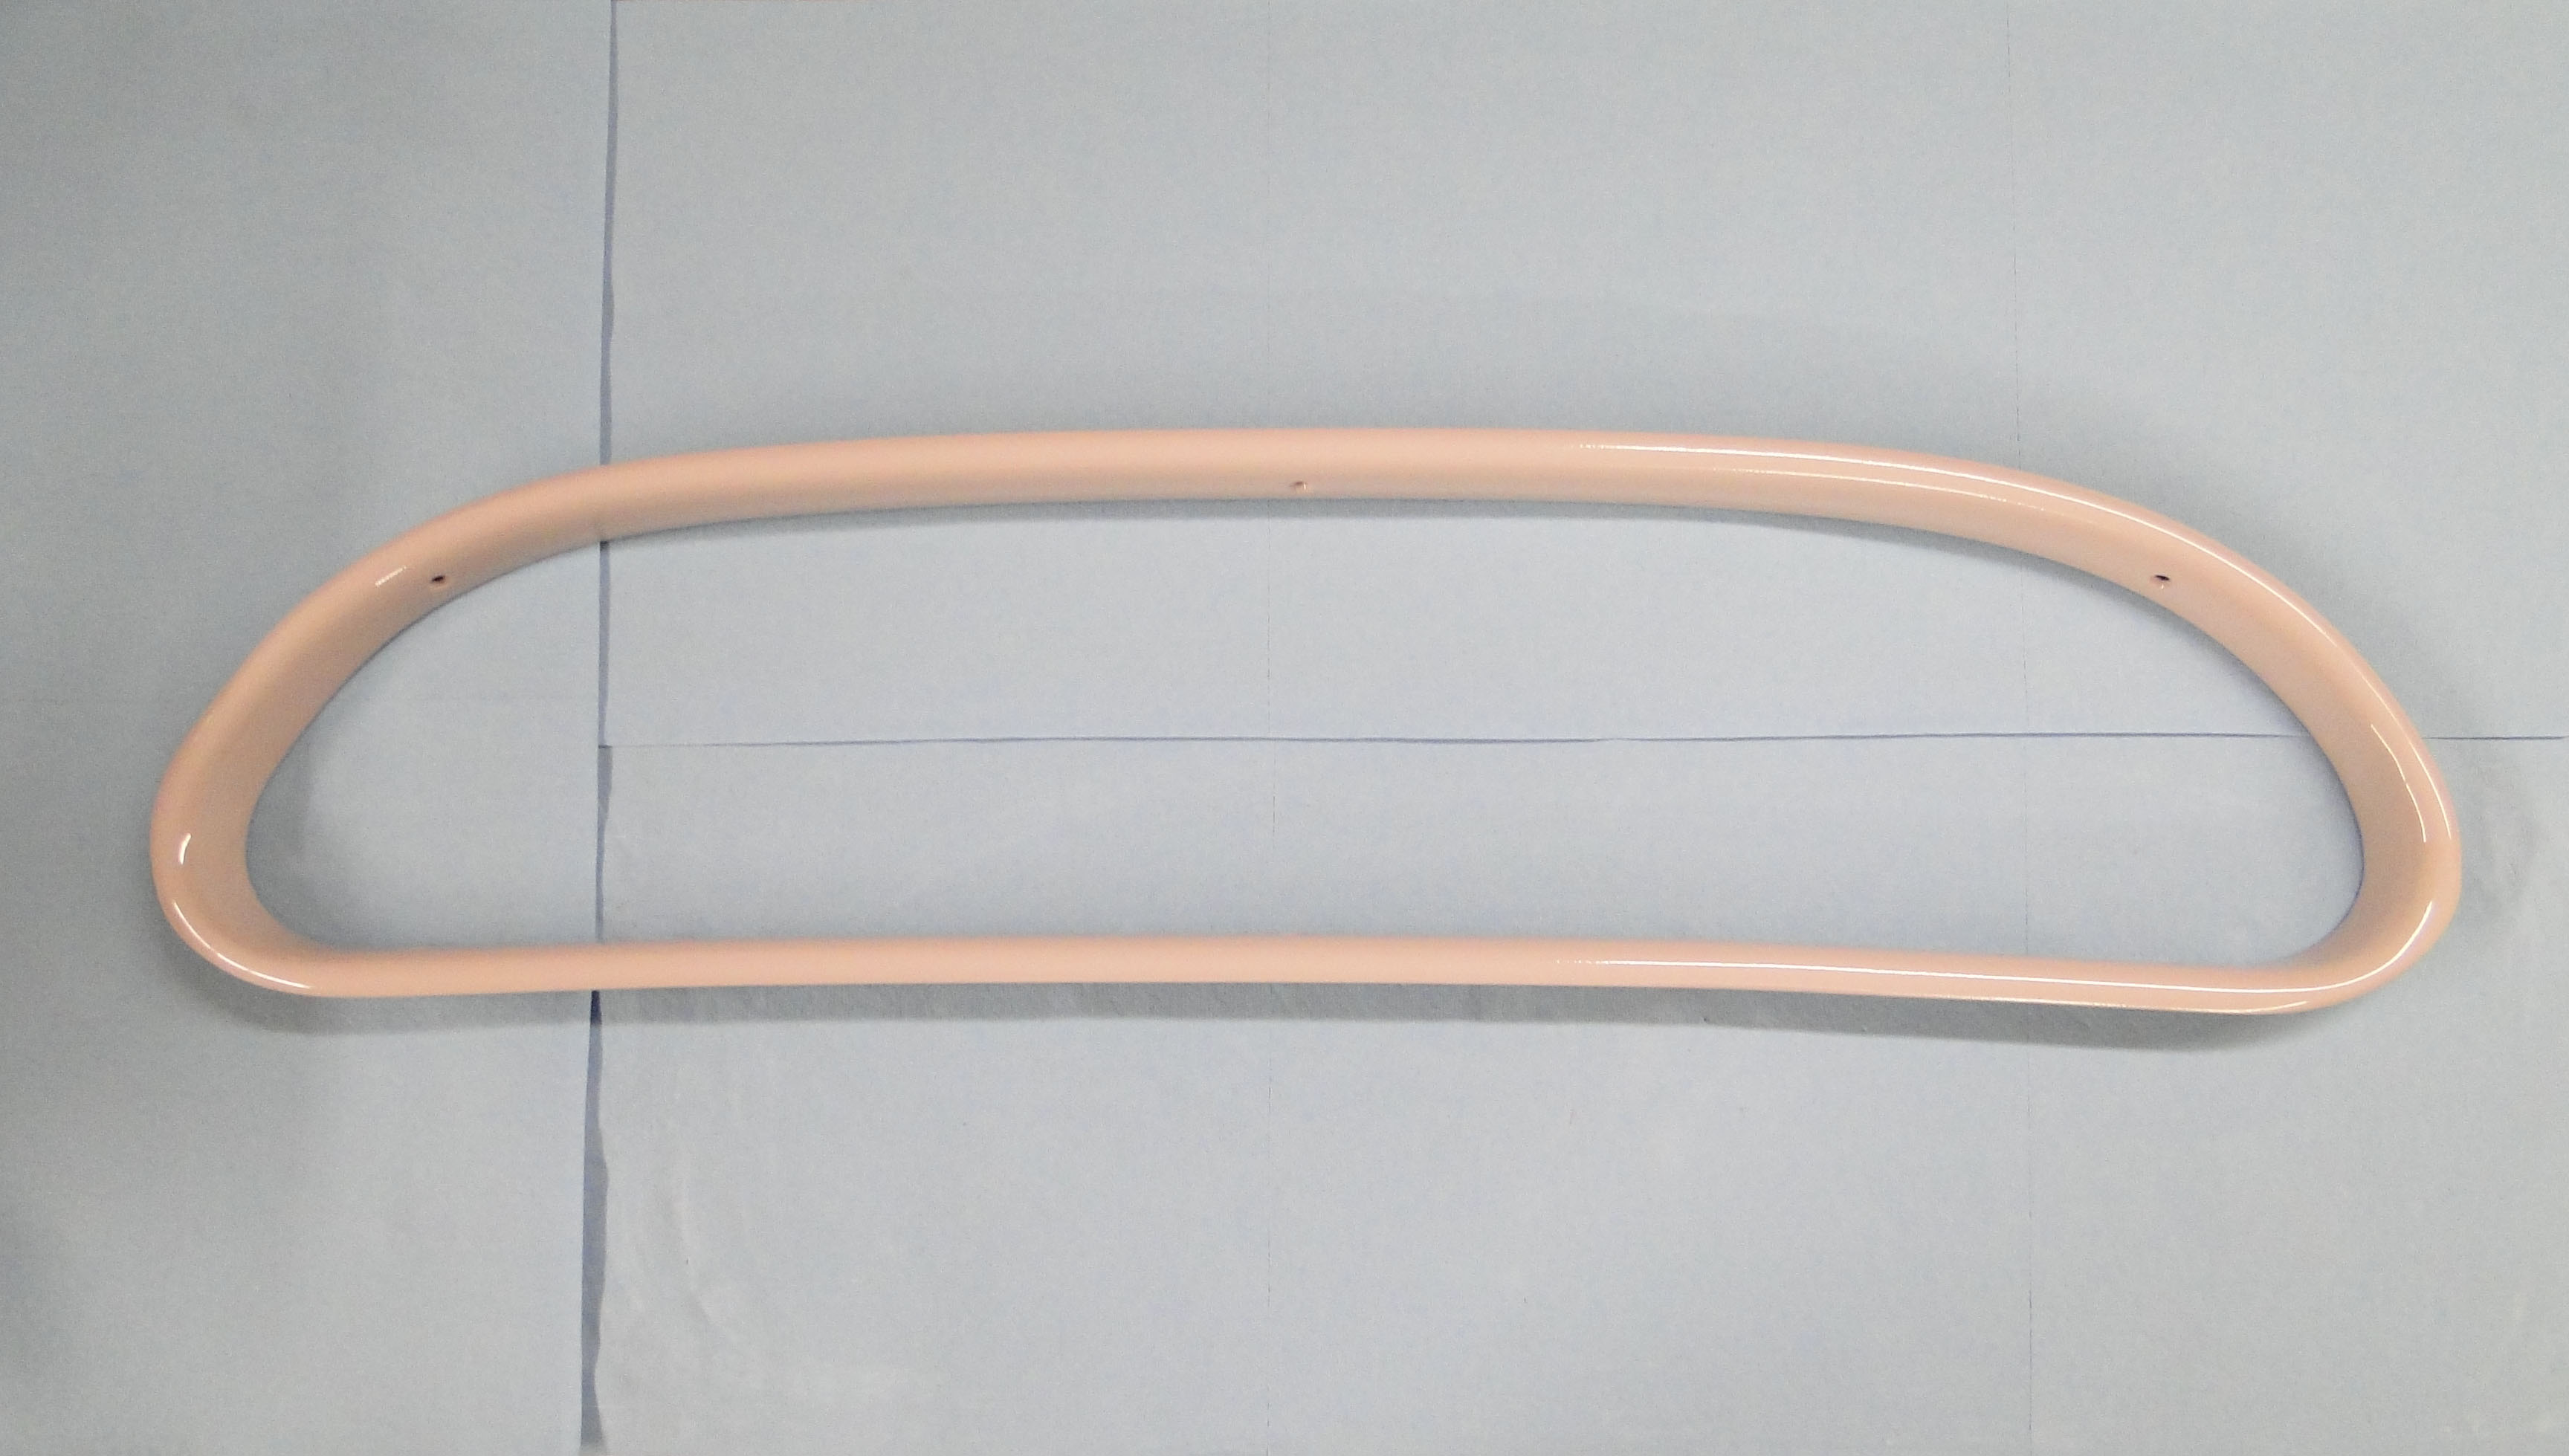
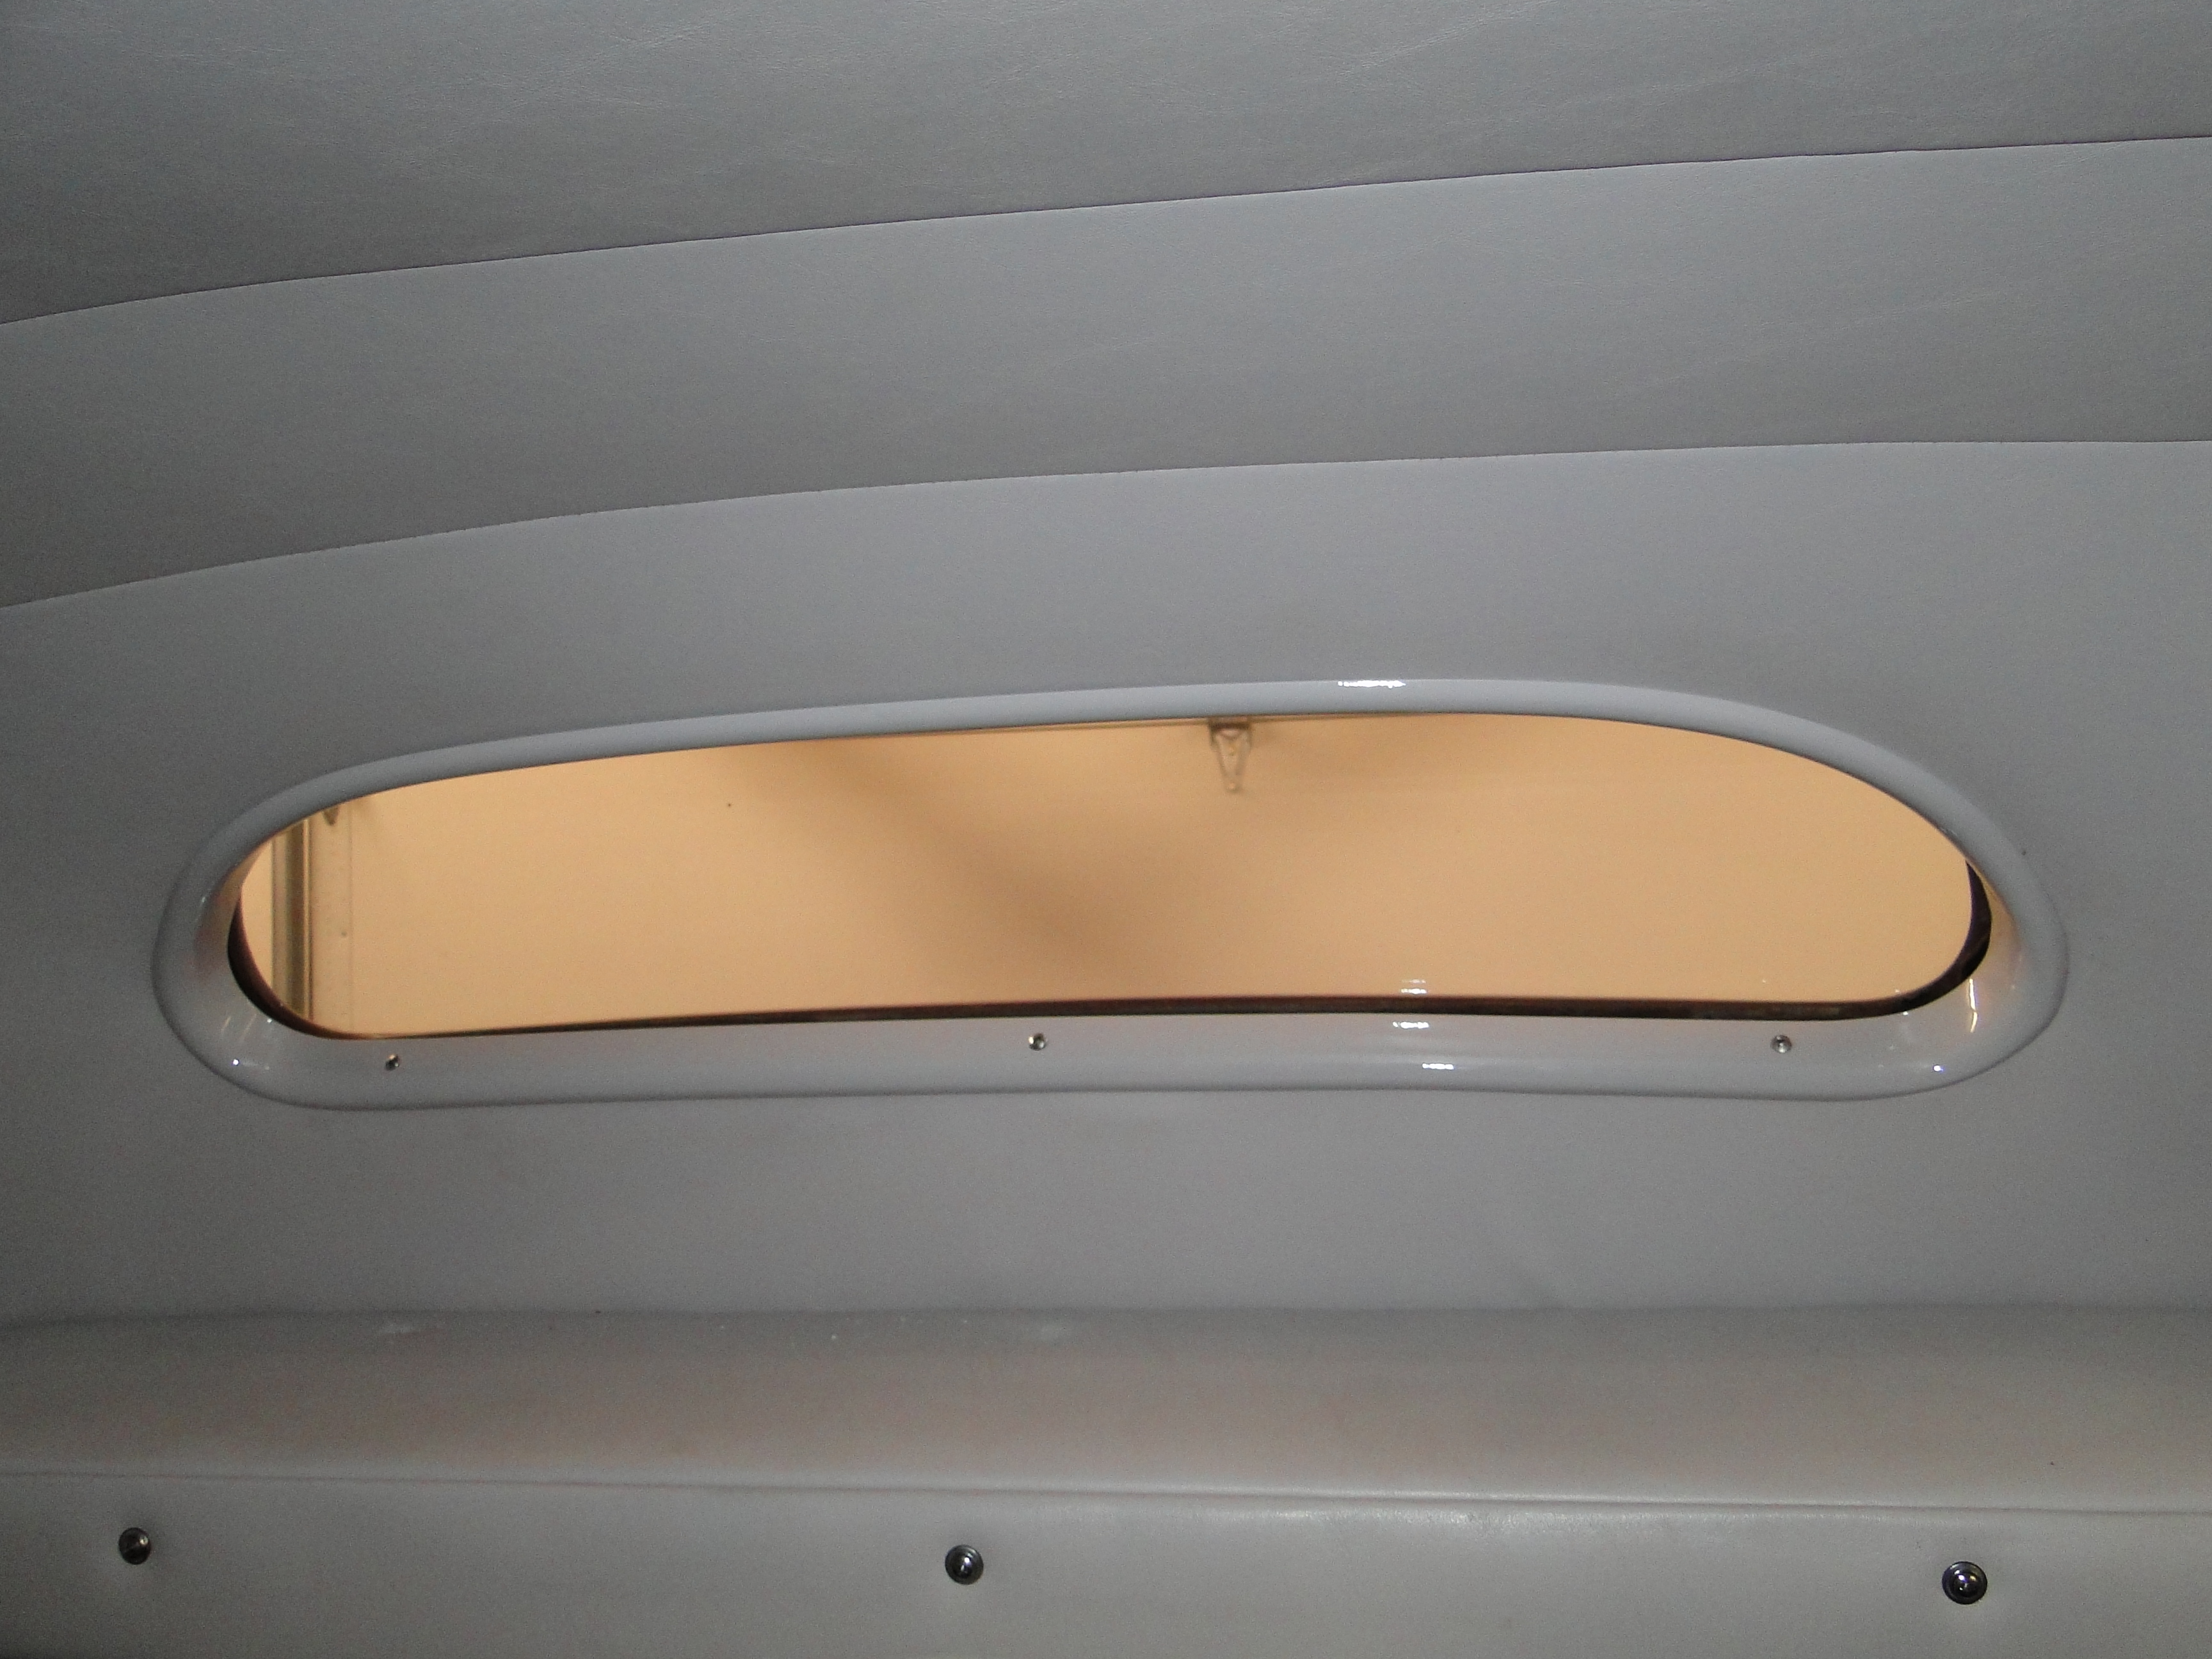
January Window Trim Test My coupe has five windows, so as a trial run, I decided to fit and paint one of the window trim pieces. This was no small task, first the roof had been lowered, and the window openings were narrowed. Once a rough measurement was determined, the trim piece had to be cut in quarters so it could be reduced in height and width. Then it needed to be tack welded back together for fit verification on the car. After I was happy with the fit, the welding, and grinding of the welds began. When that was completed, a little old fashioned body work was needed in order to hide the seams. Then I could paint them. The guys at API matched the interior color perfectly, see before and after photos below. |
||
Click any picture to enlarge.
|
|
|
|
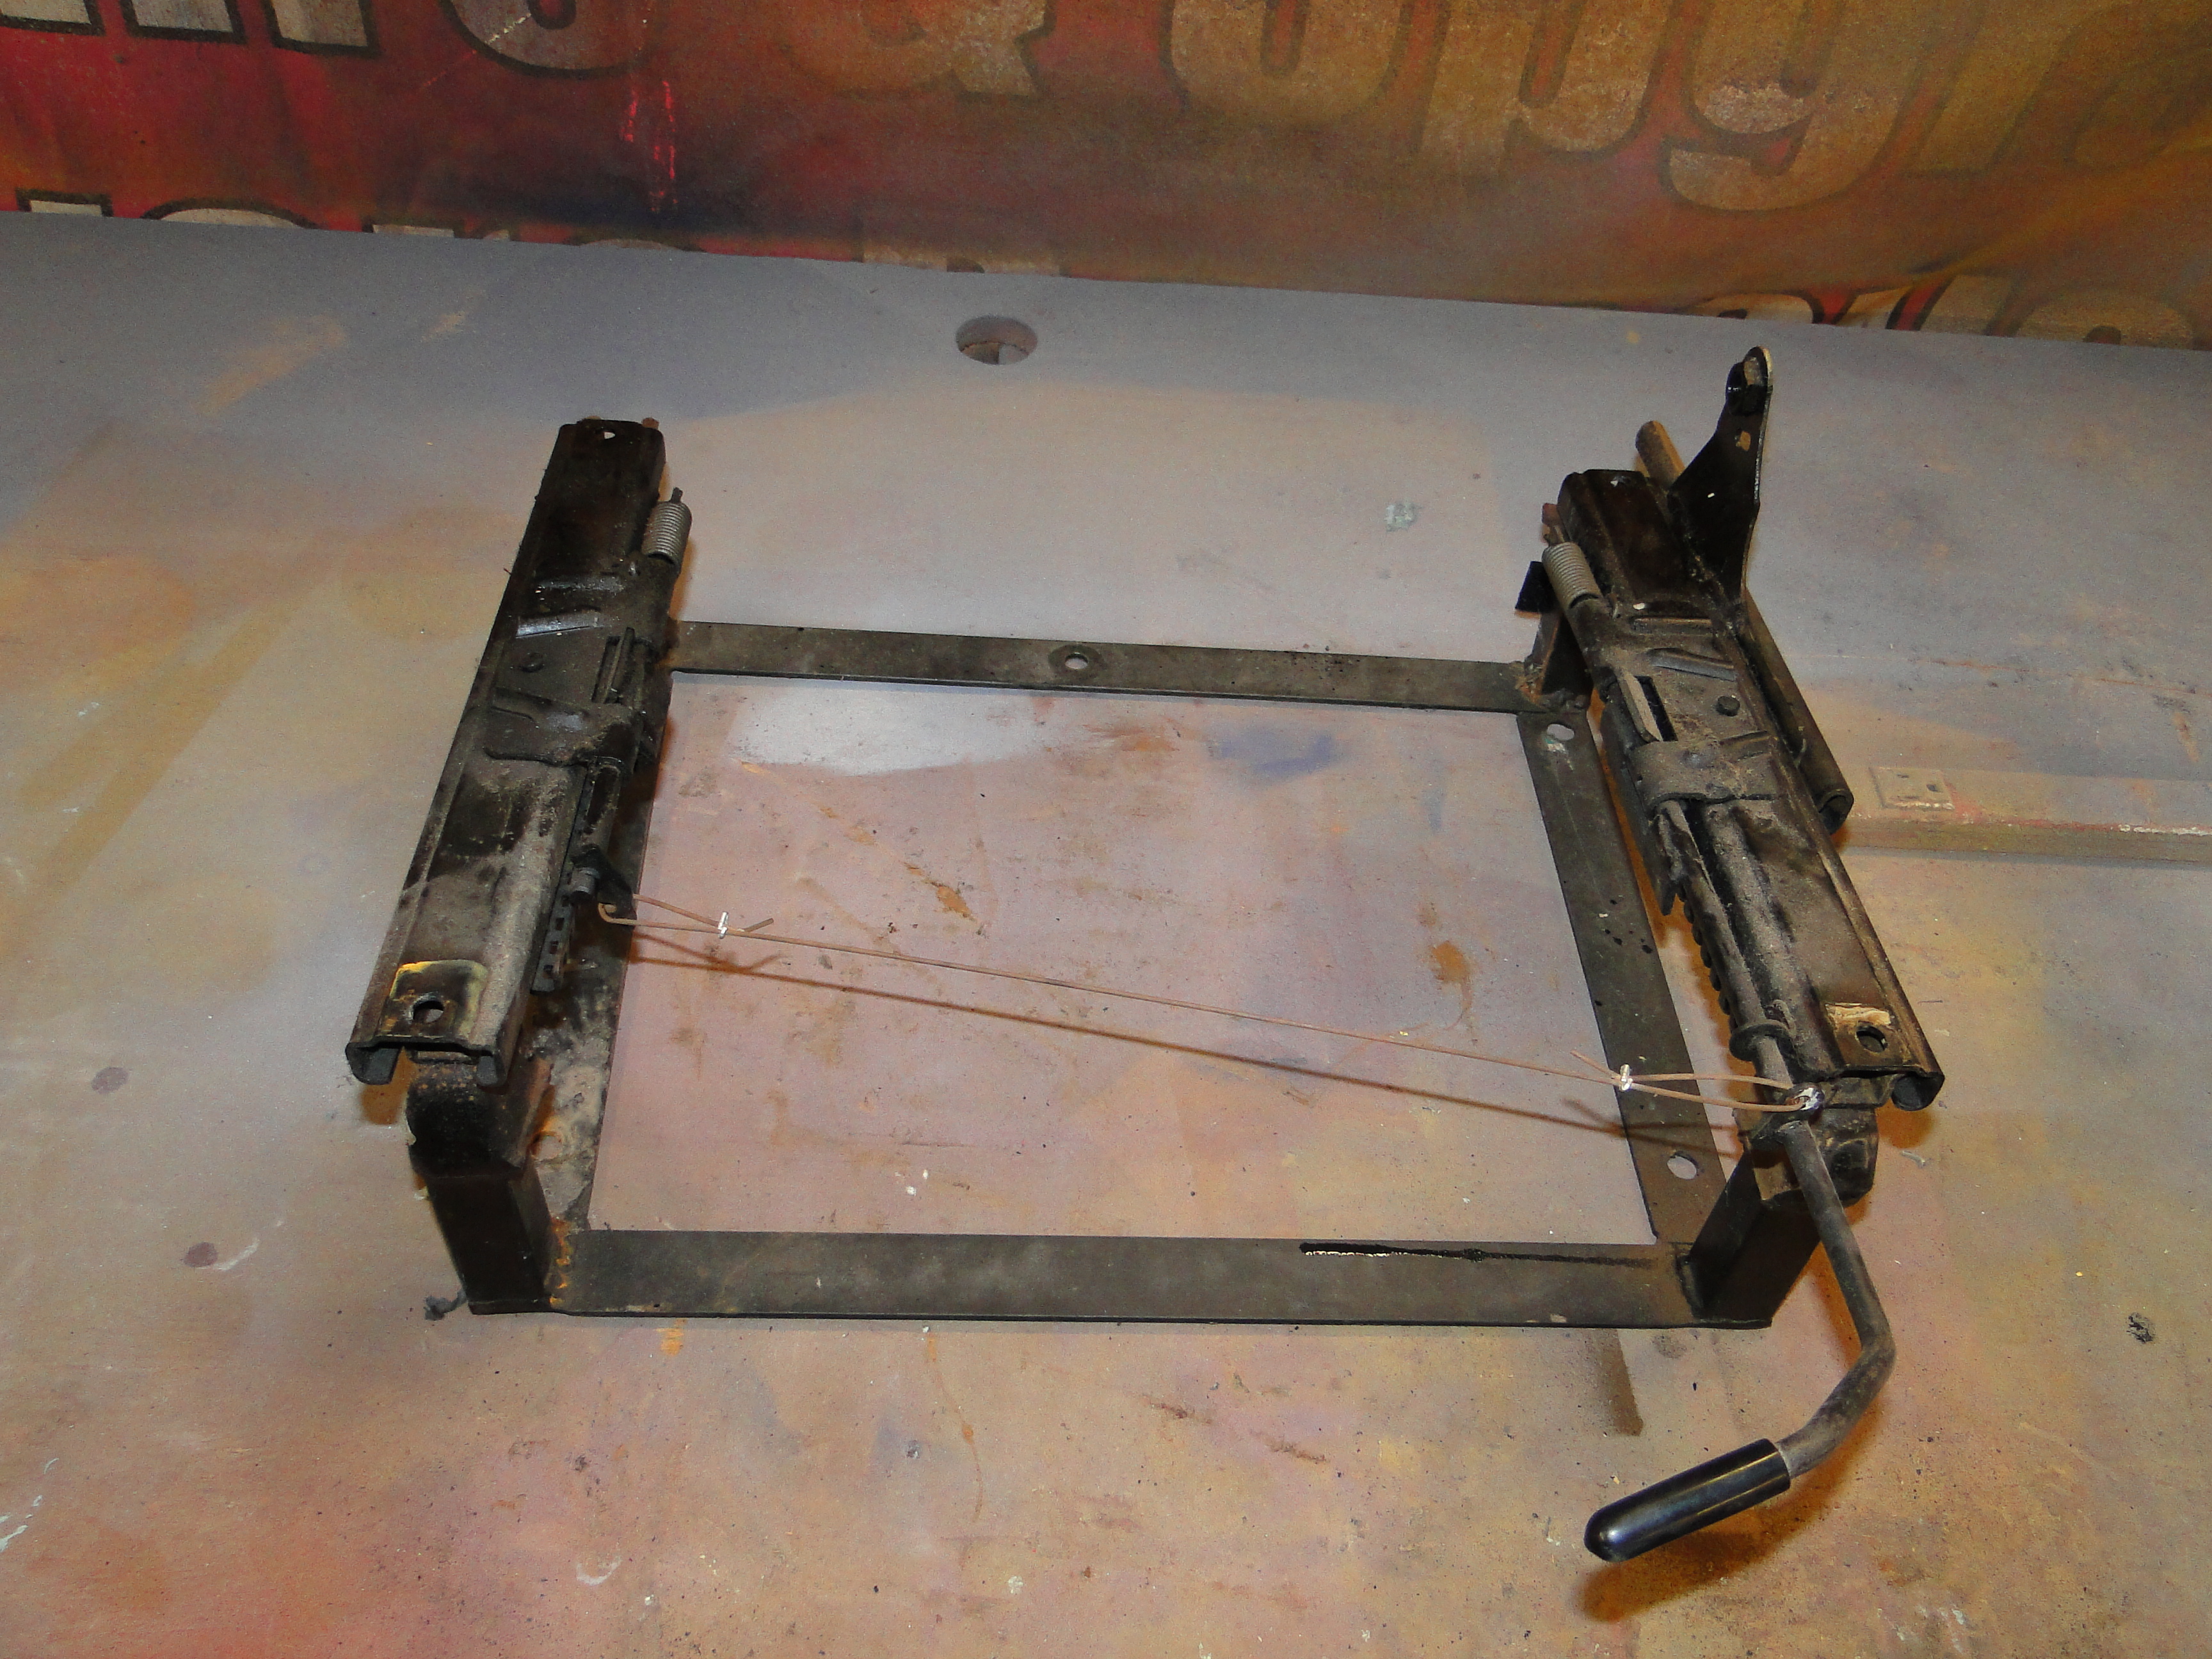
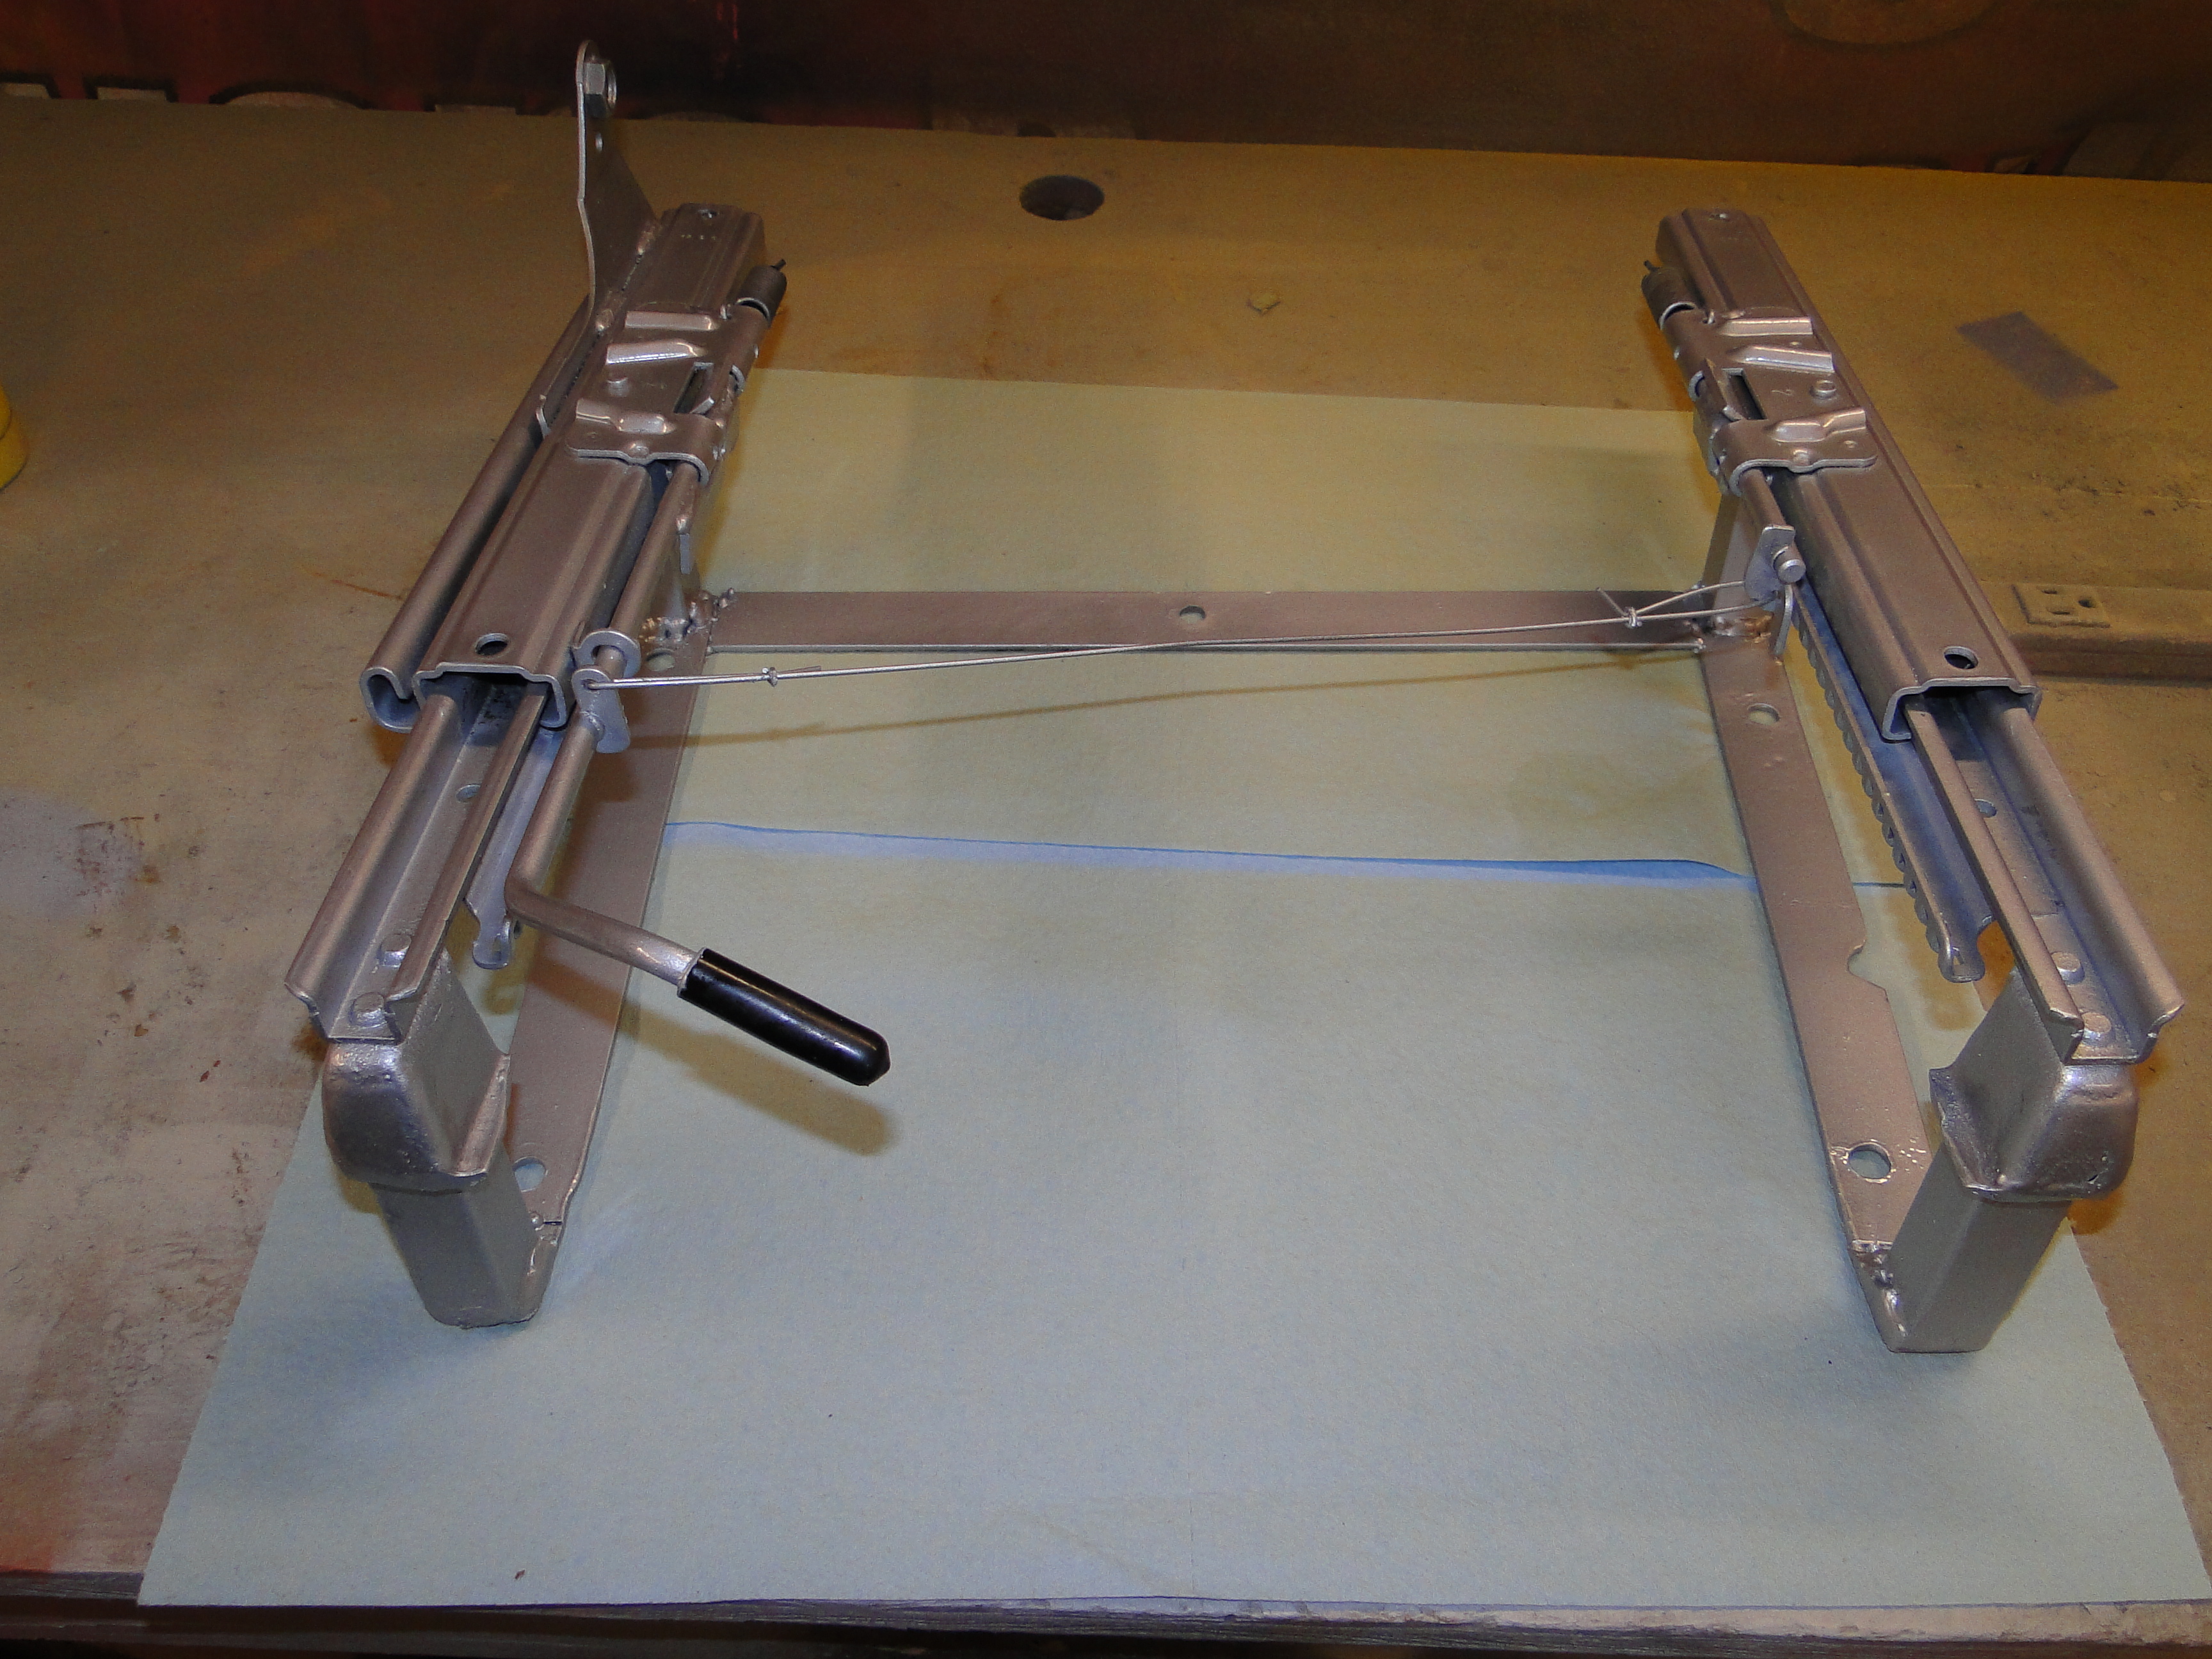
Seat Frames
I repainted the seat frames (I know no one is going to
see them, but they were just nasty looking).
Click any picture to enlarge.
|
|
|
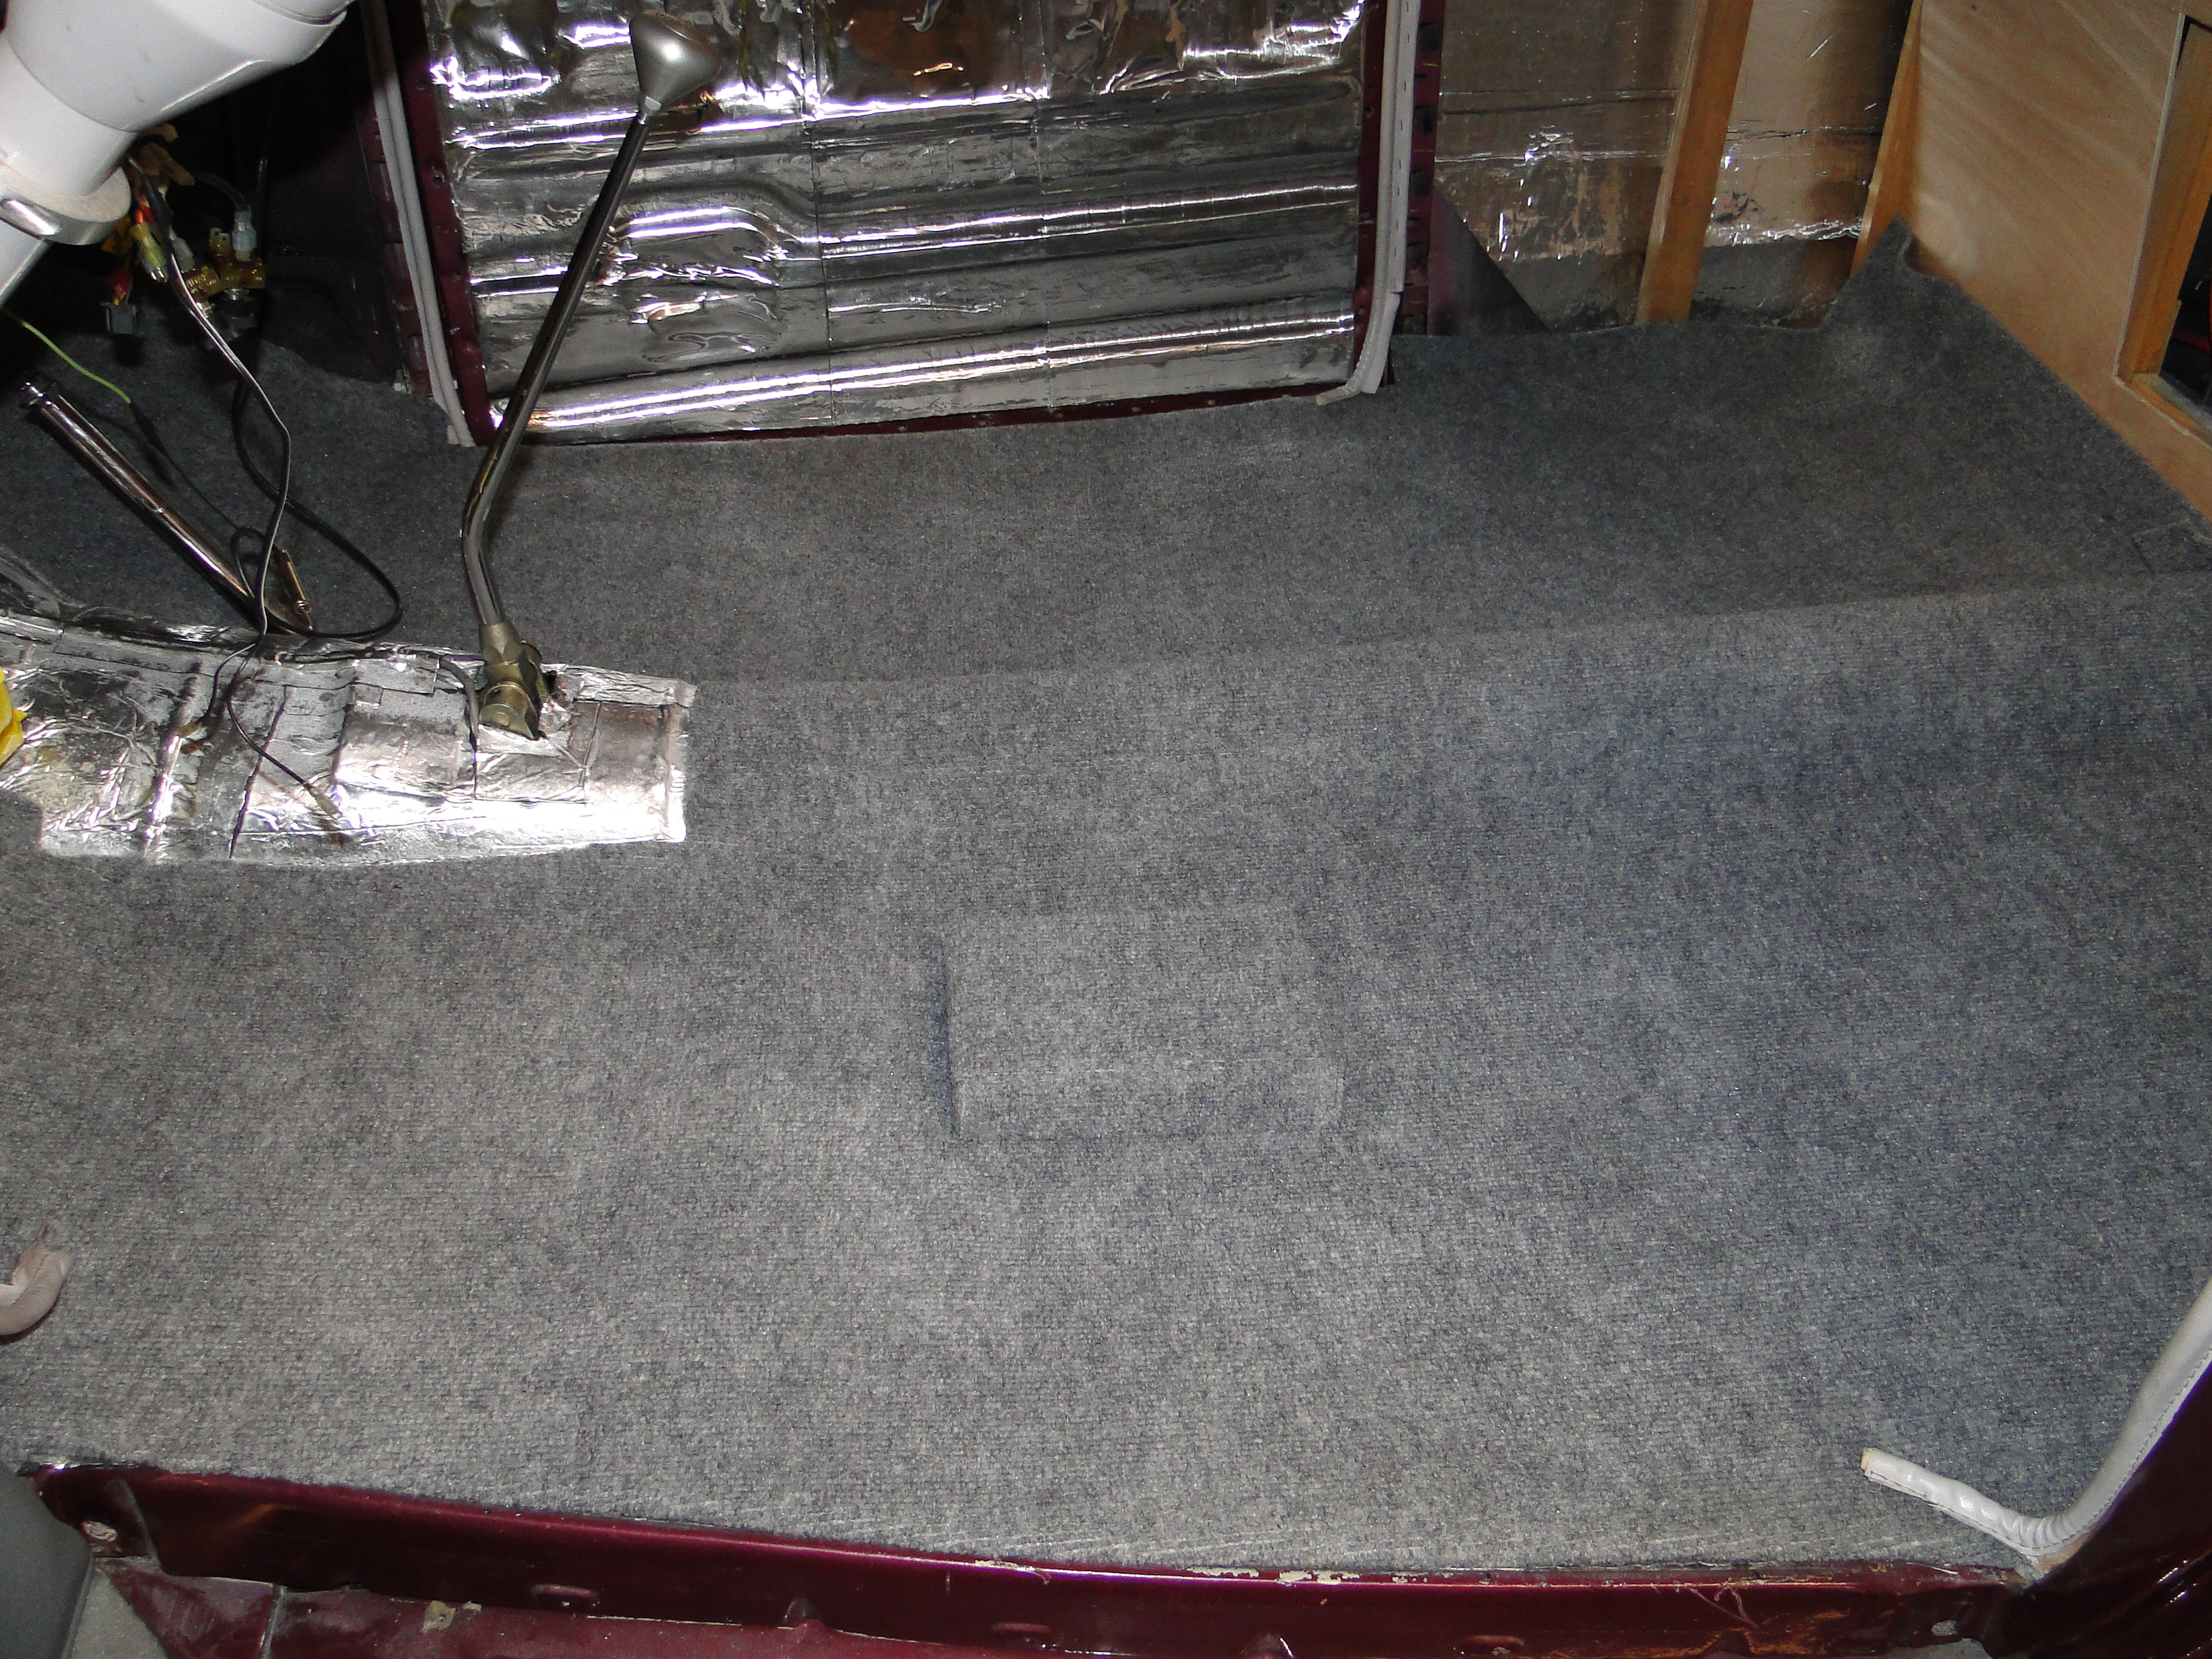
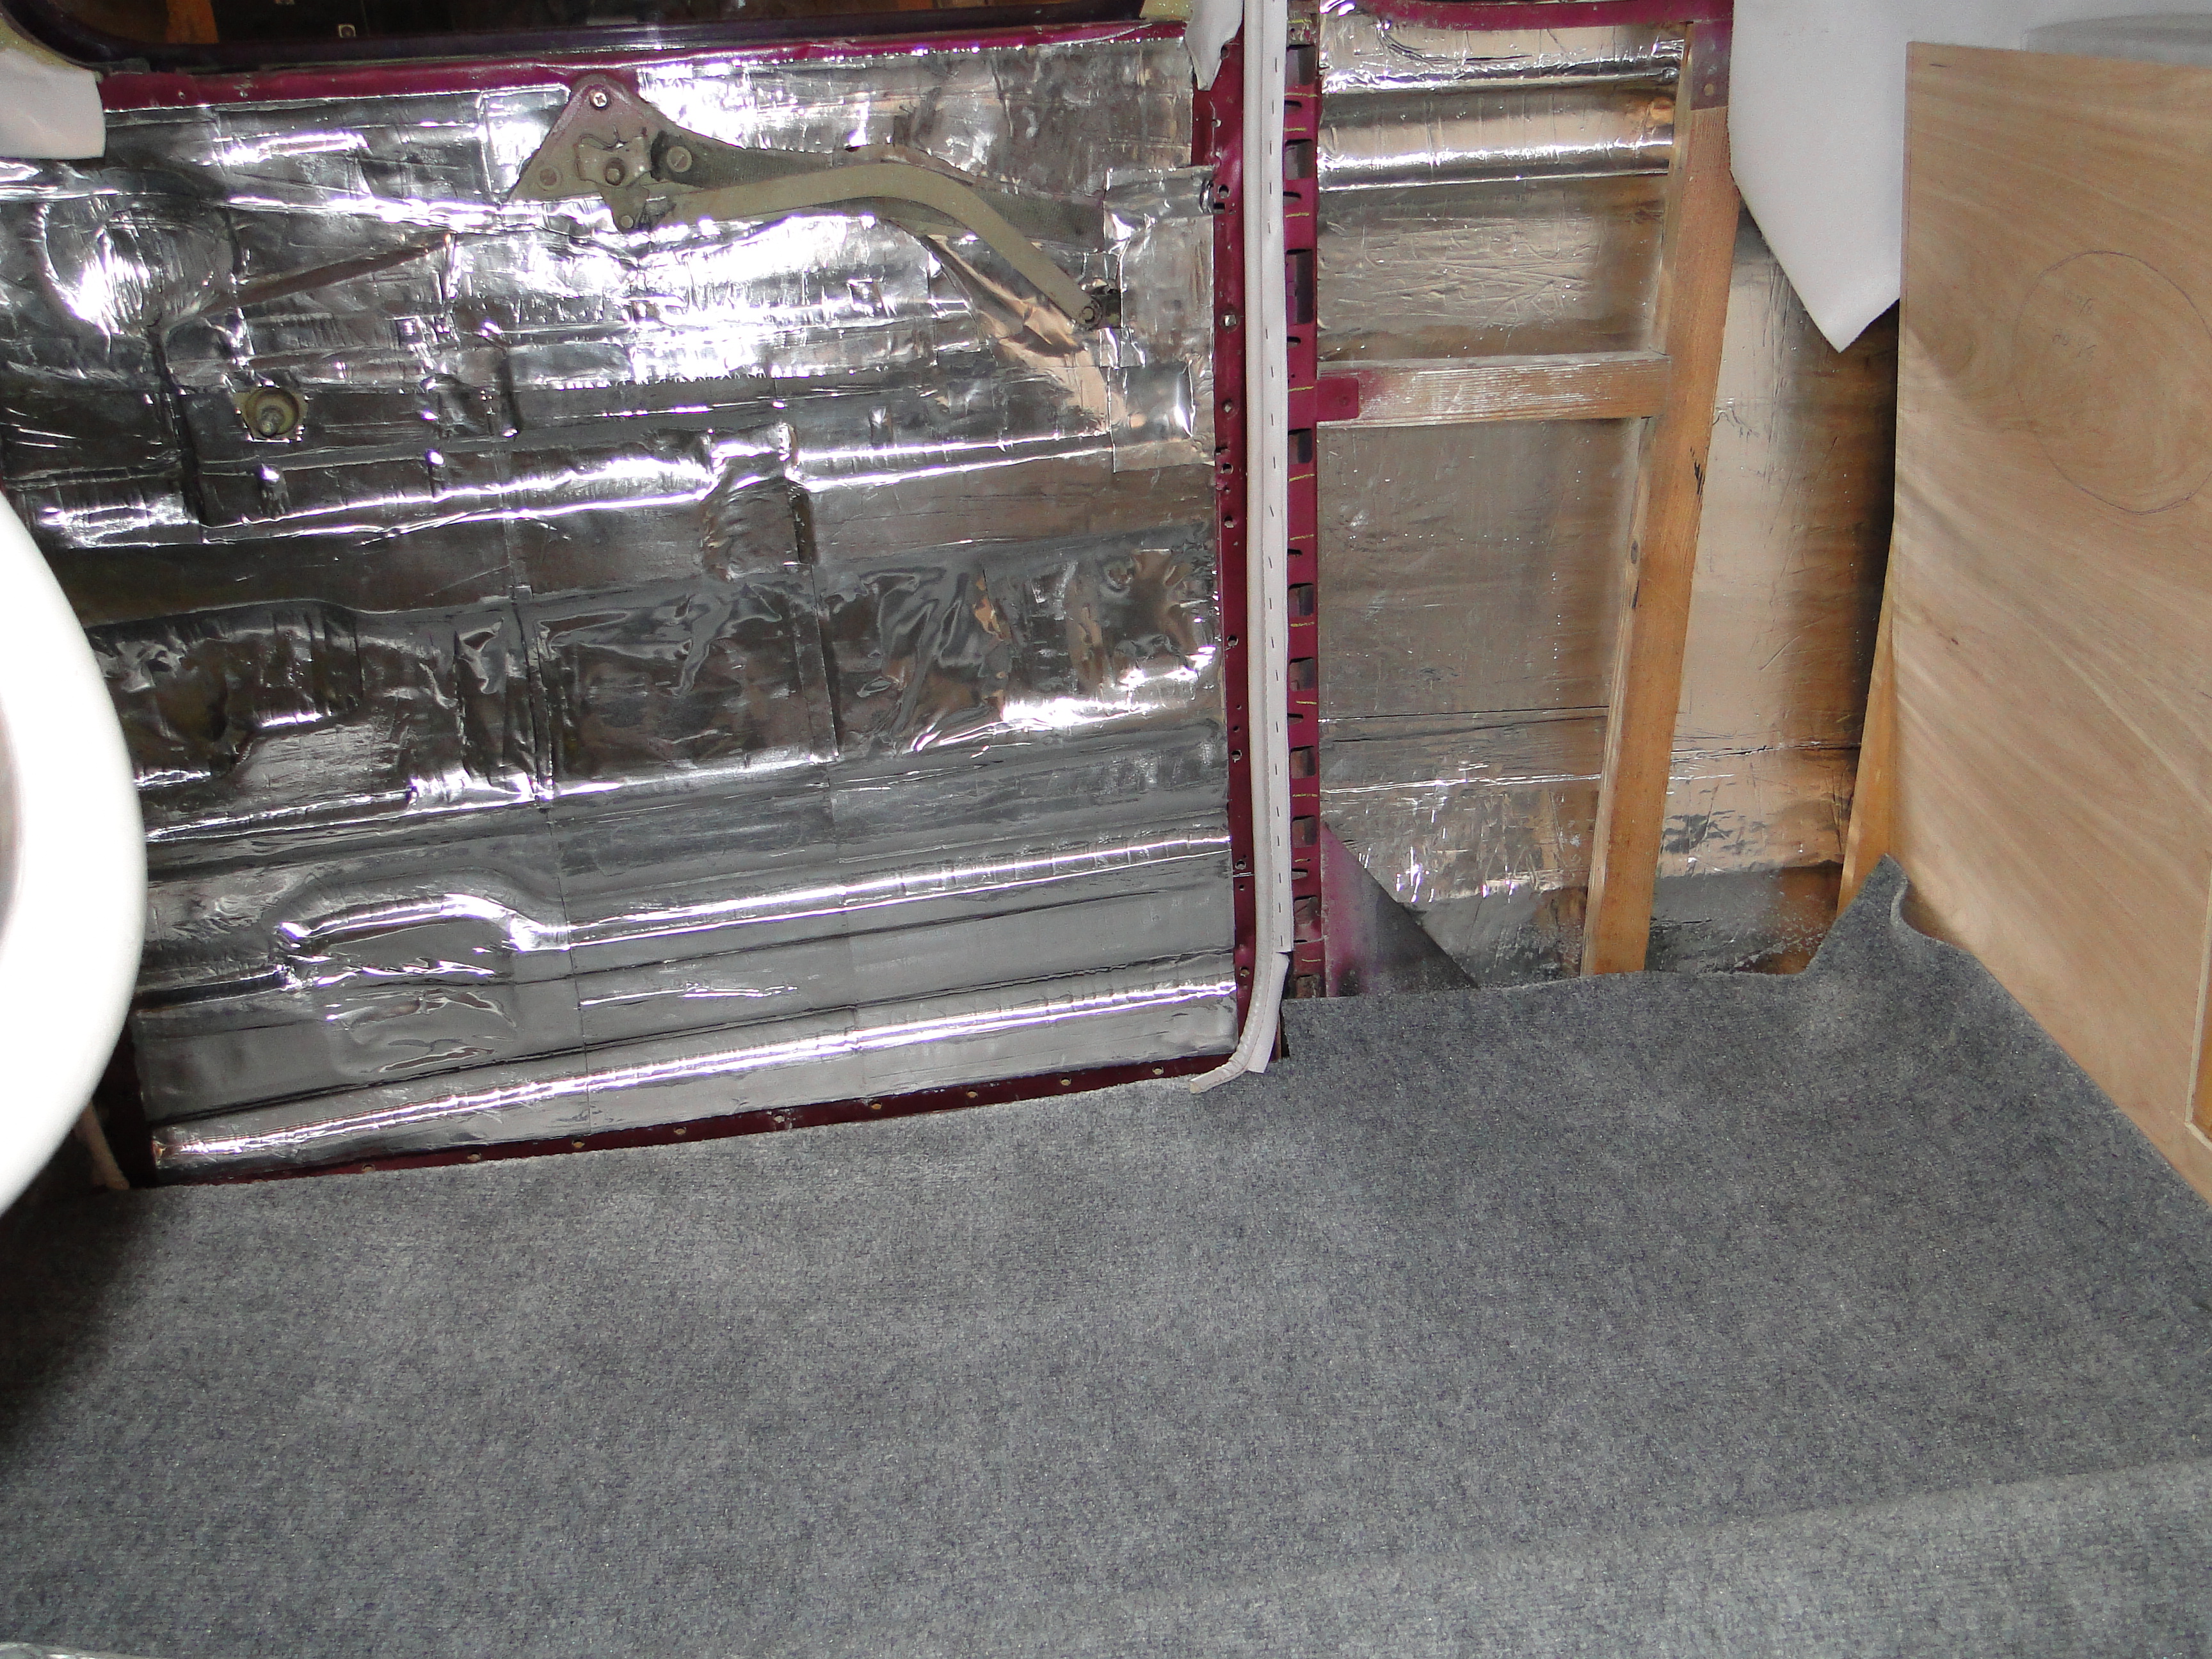
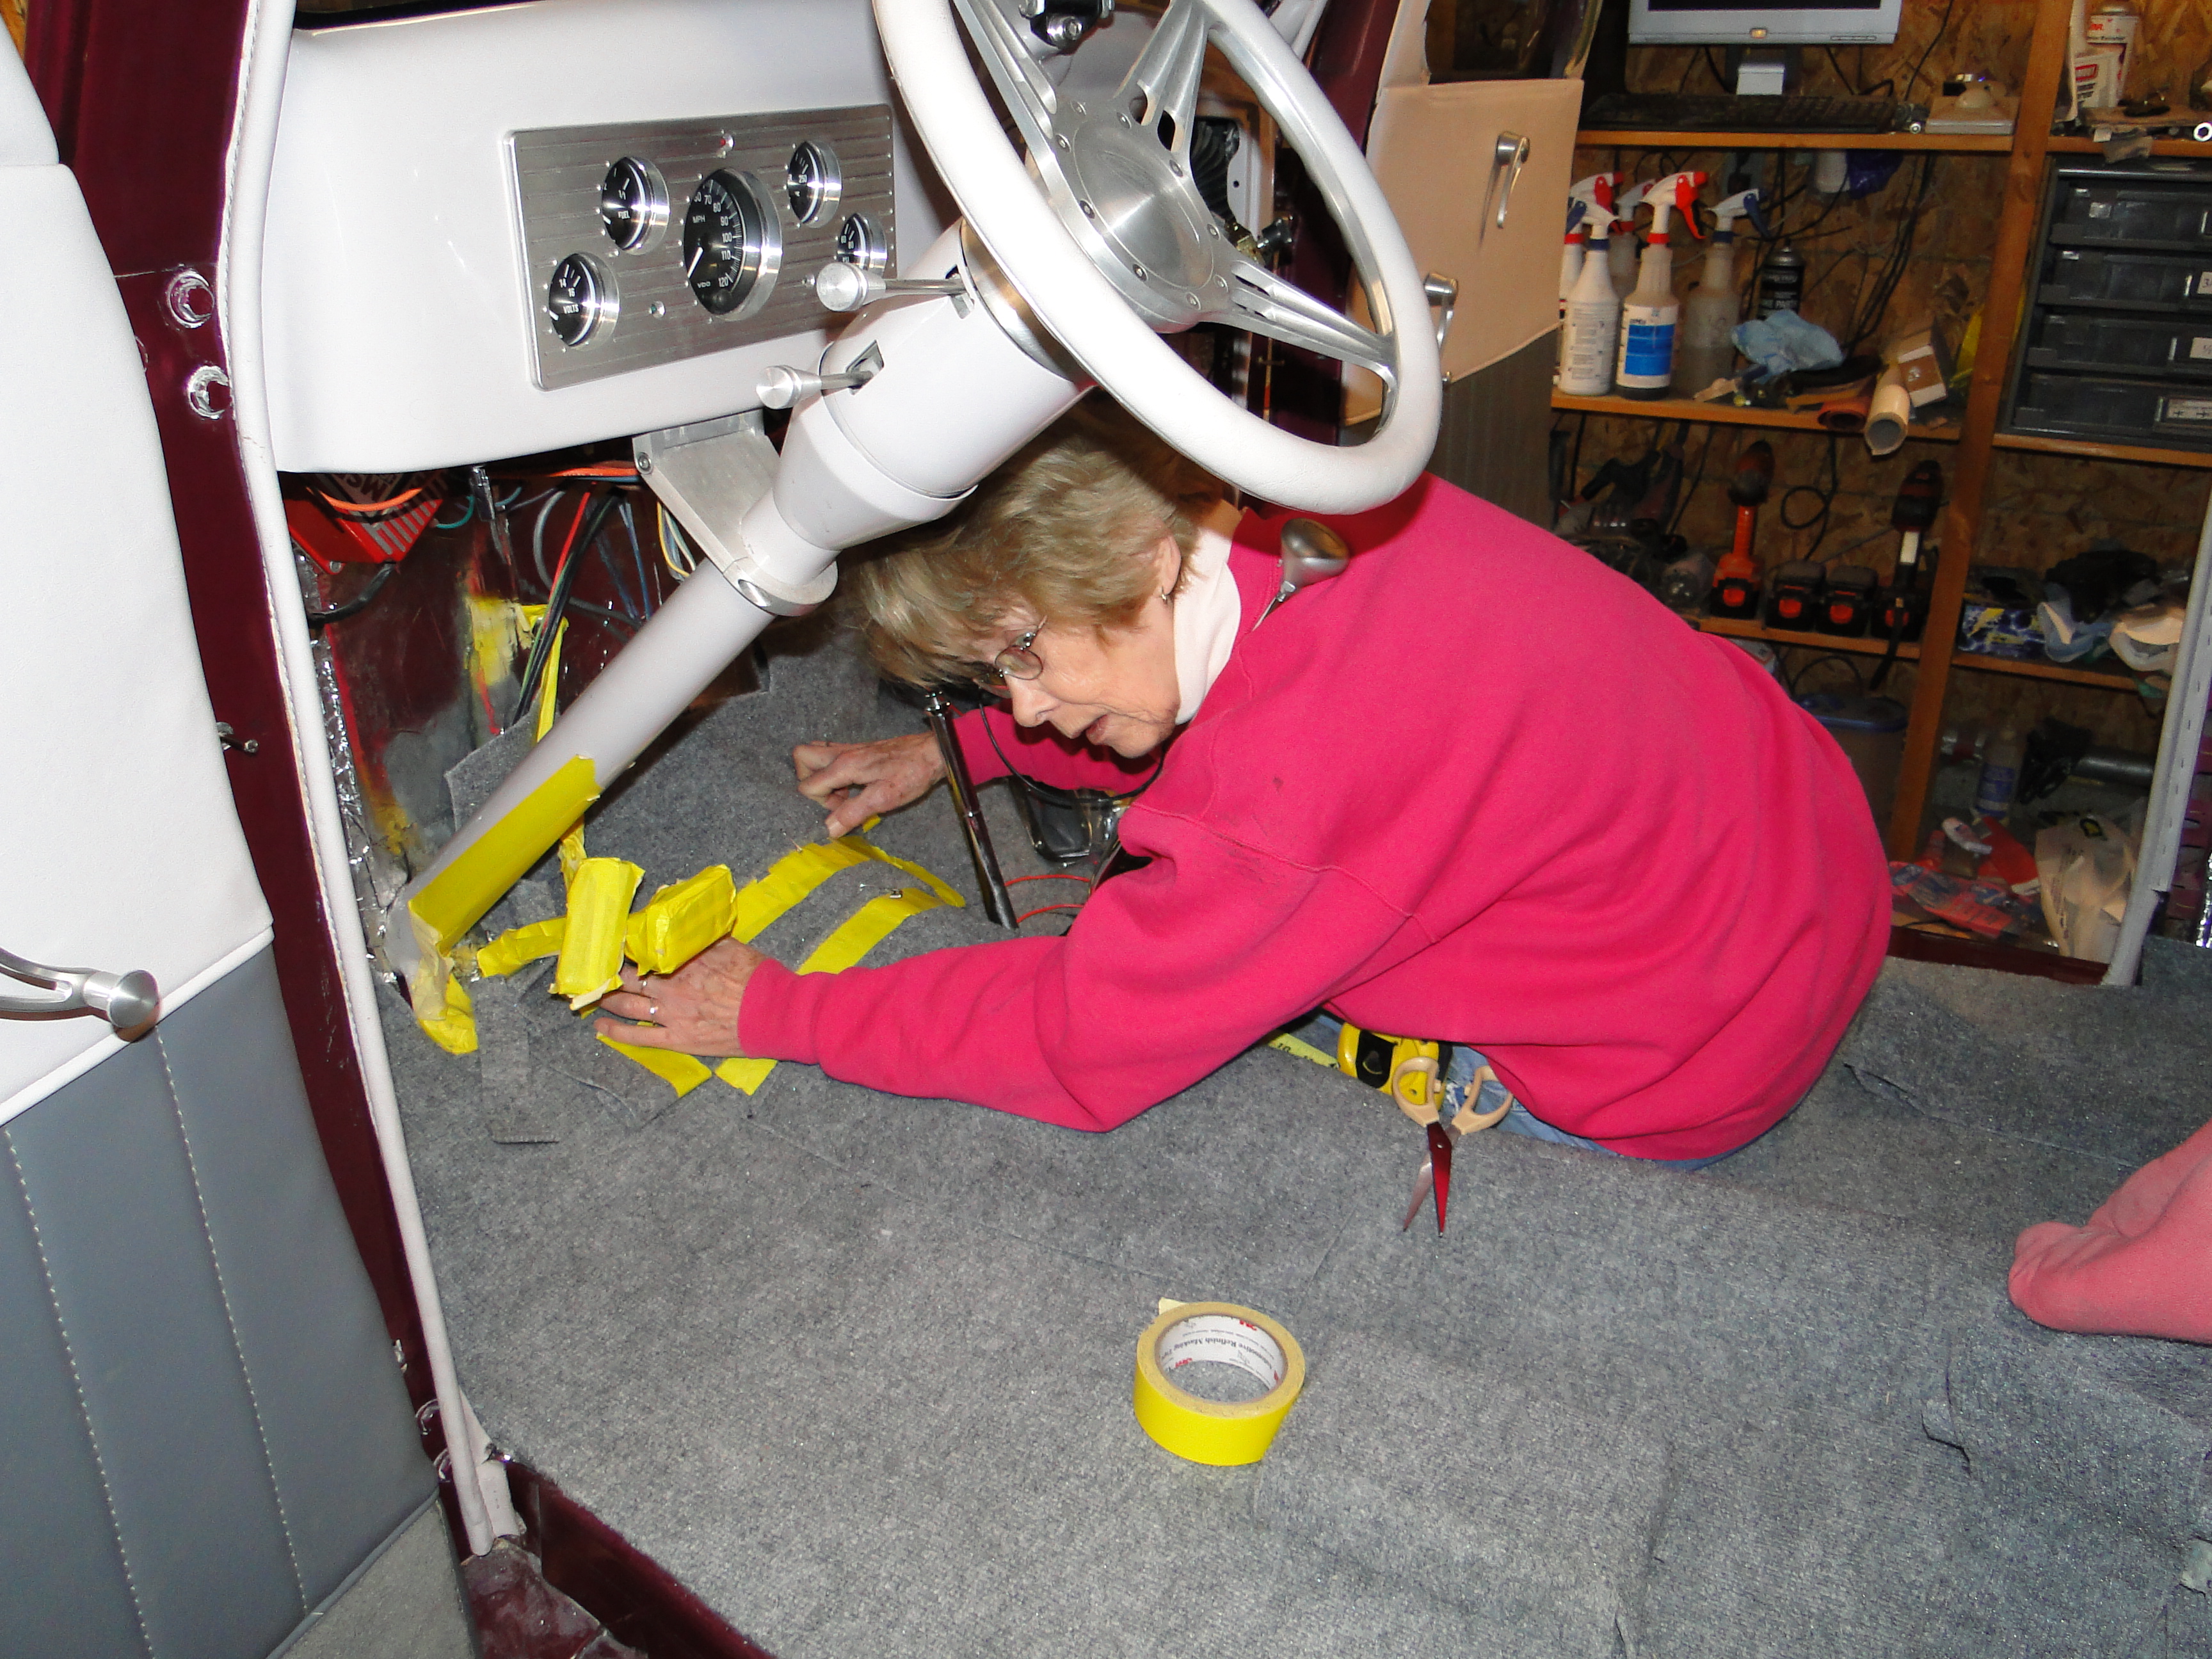
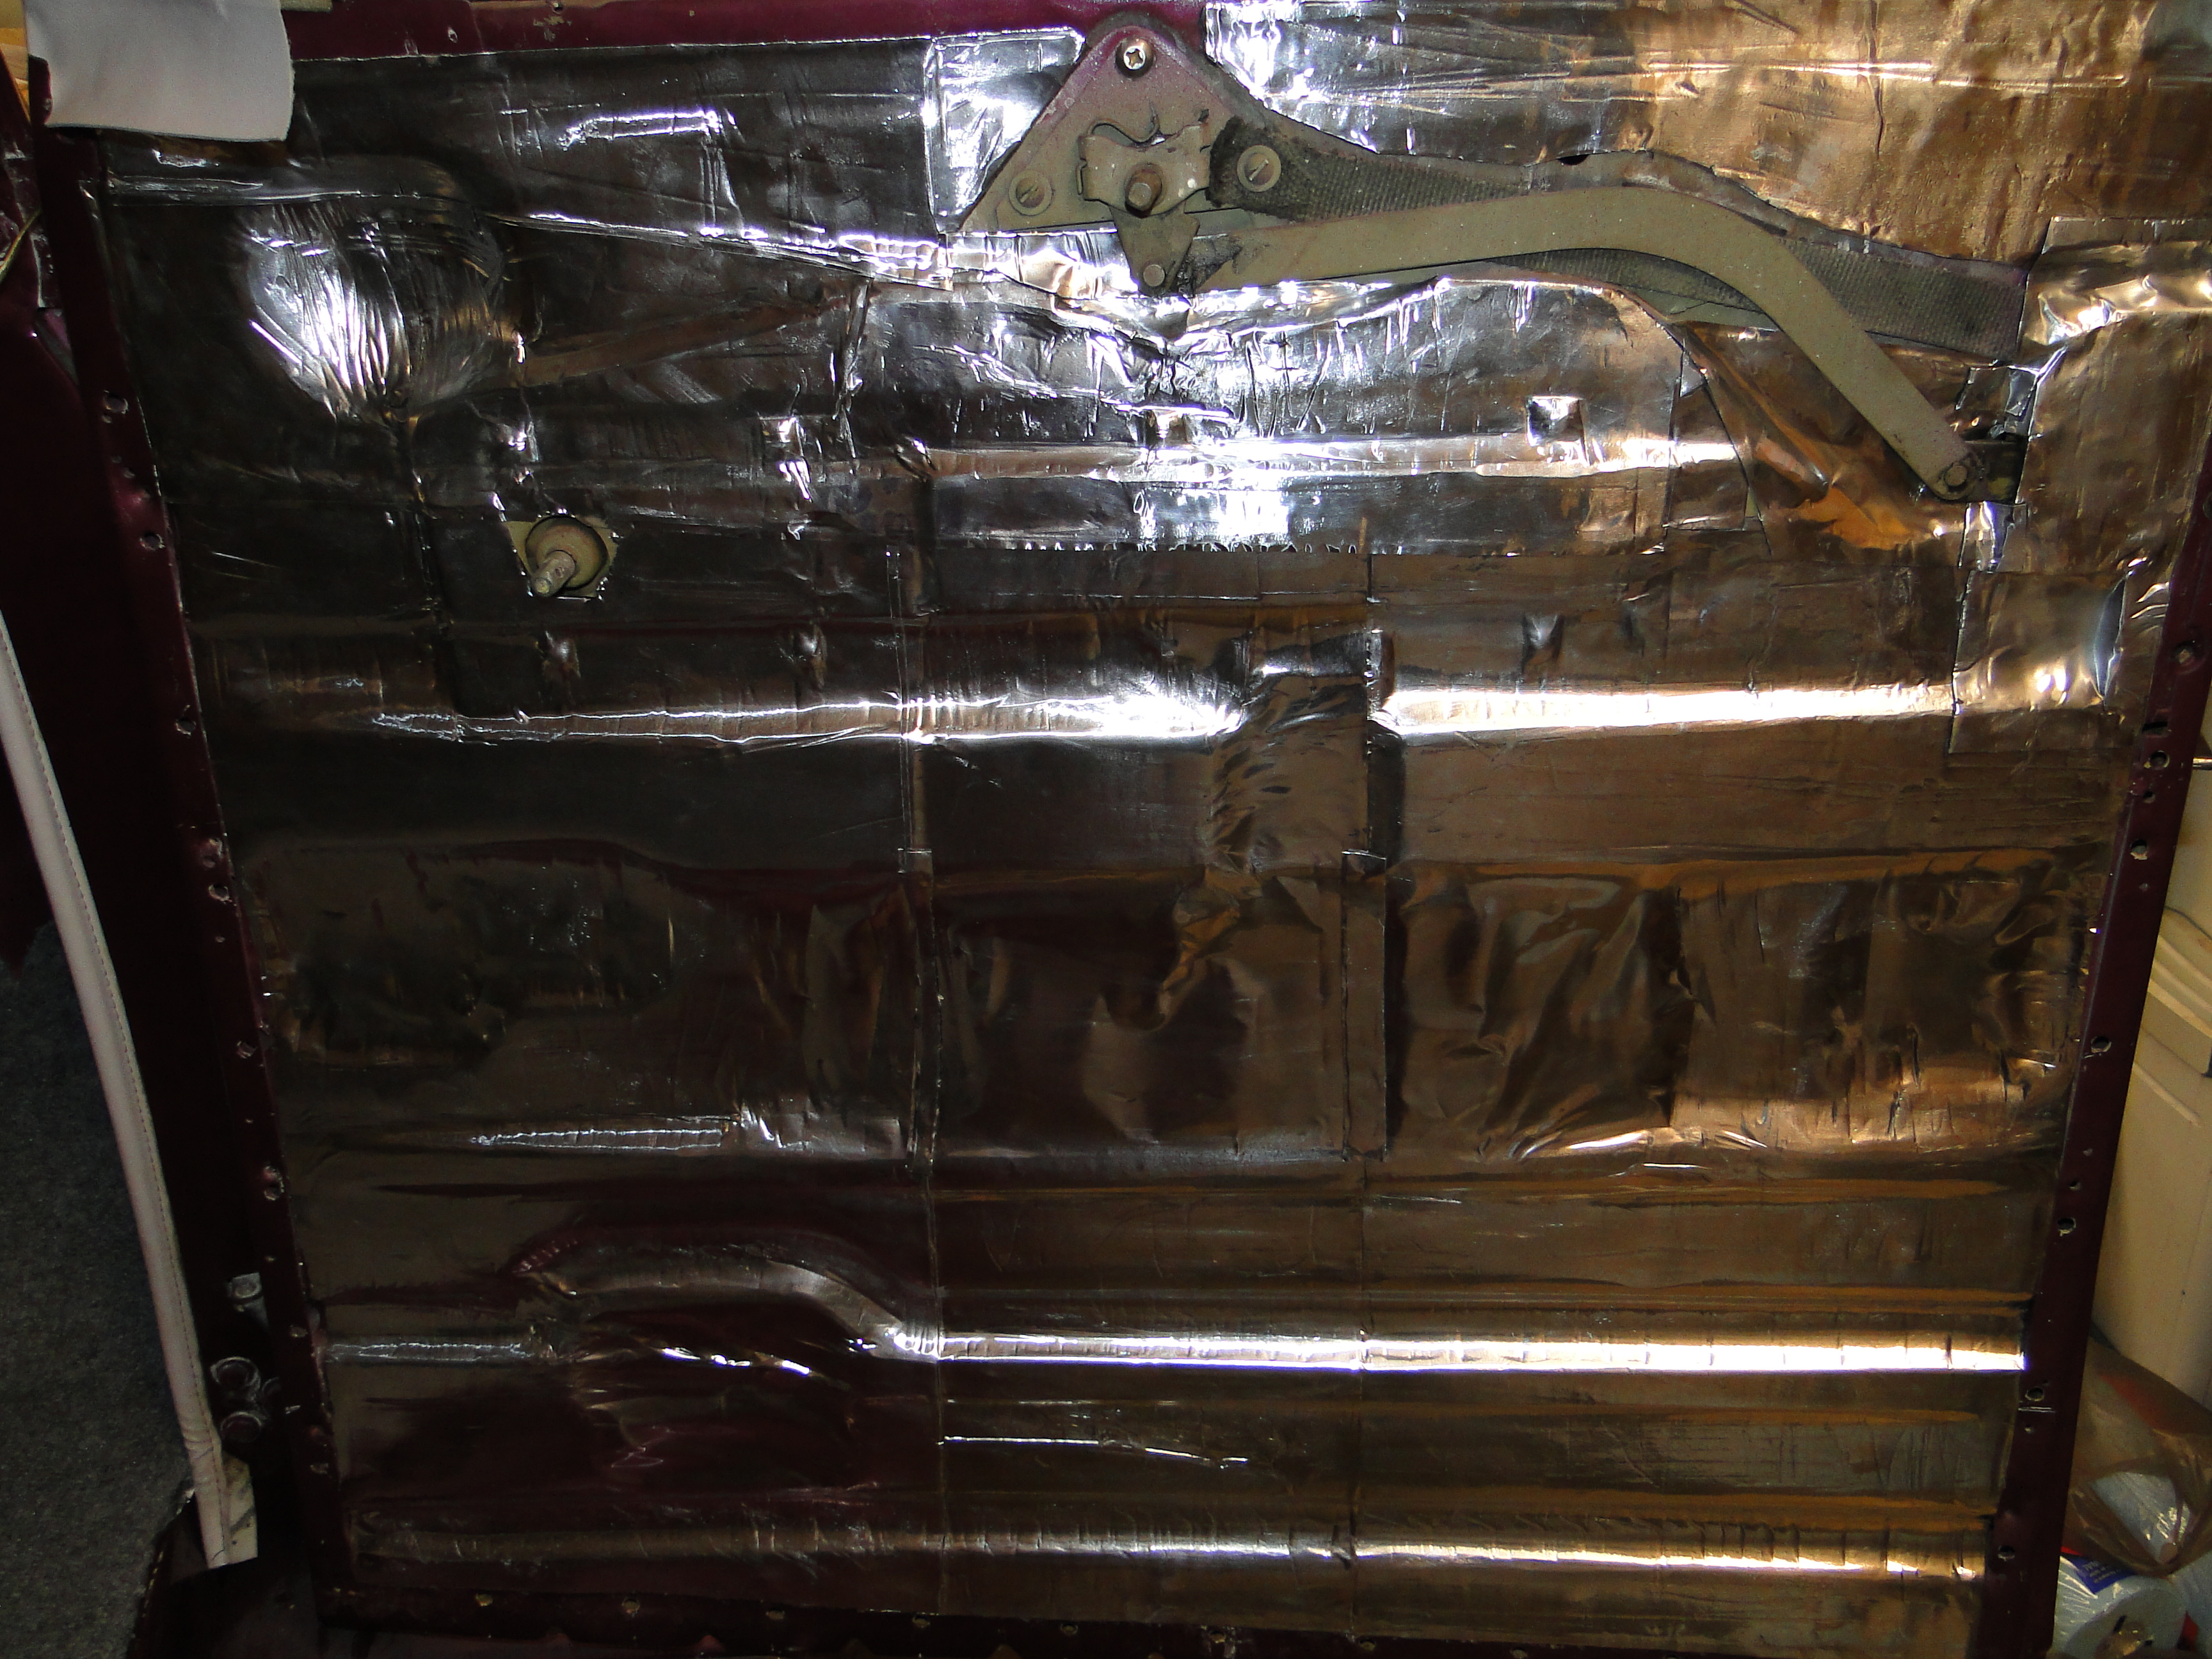
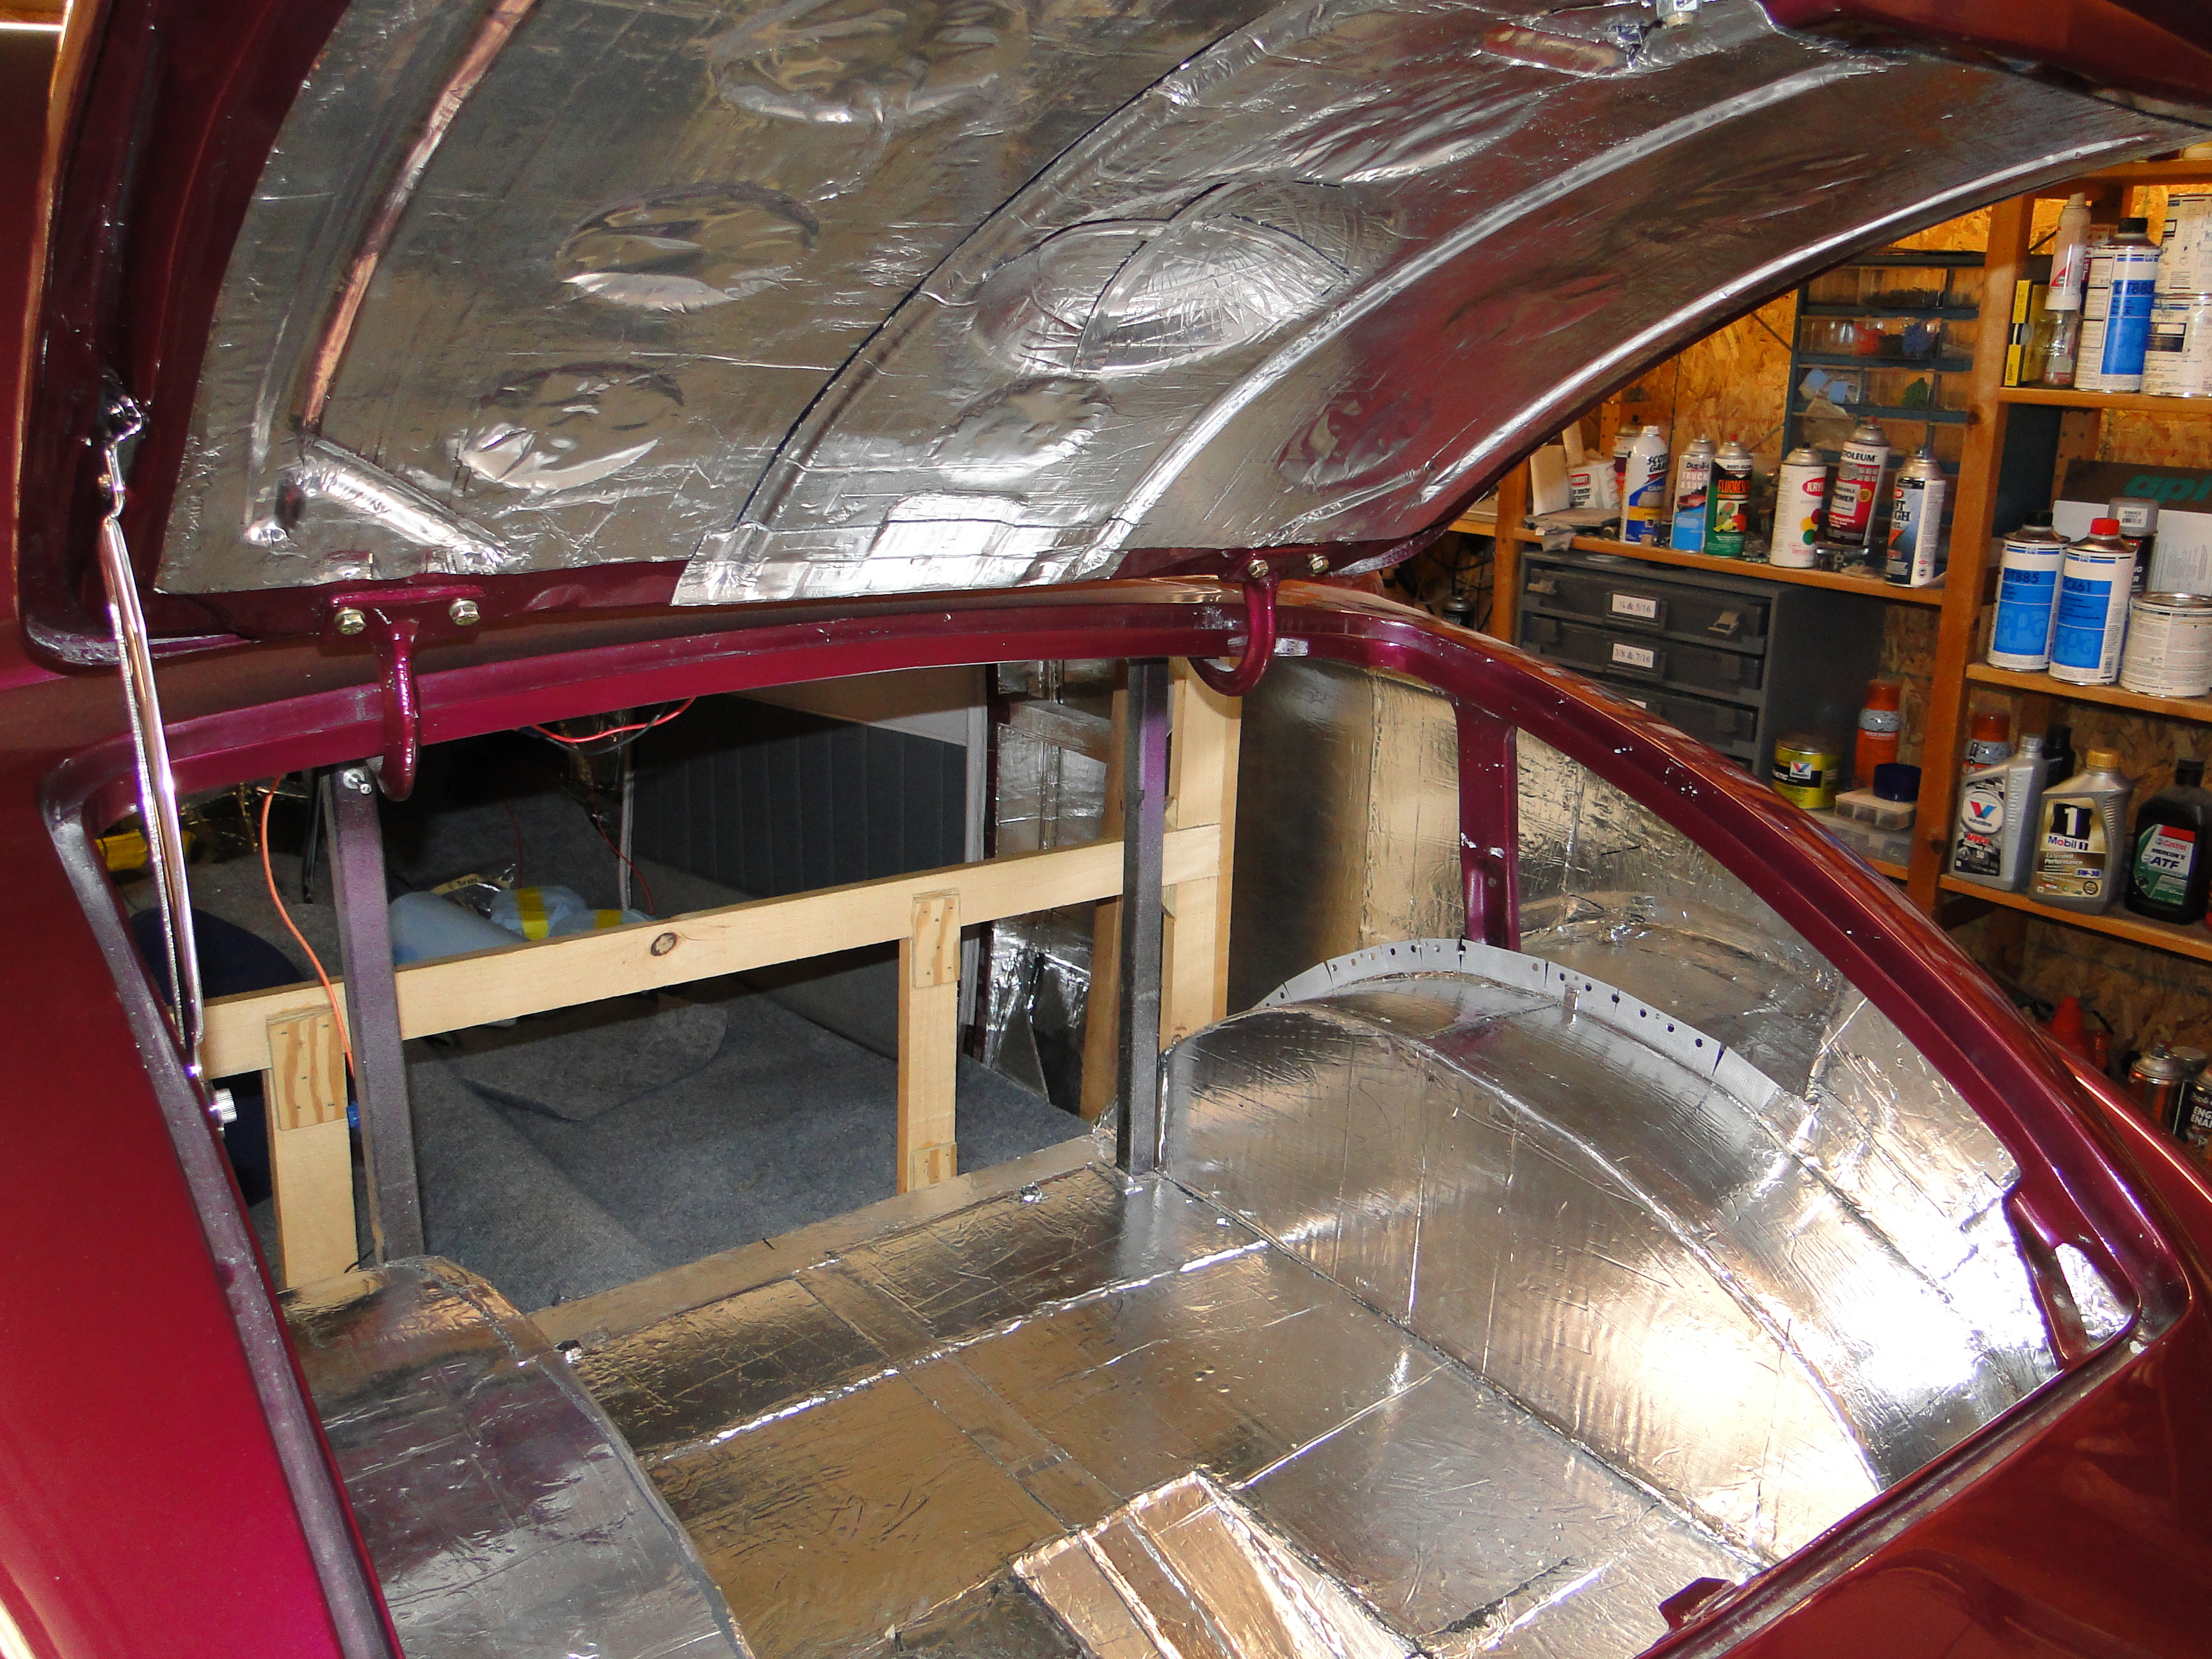
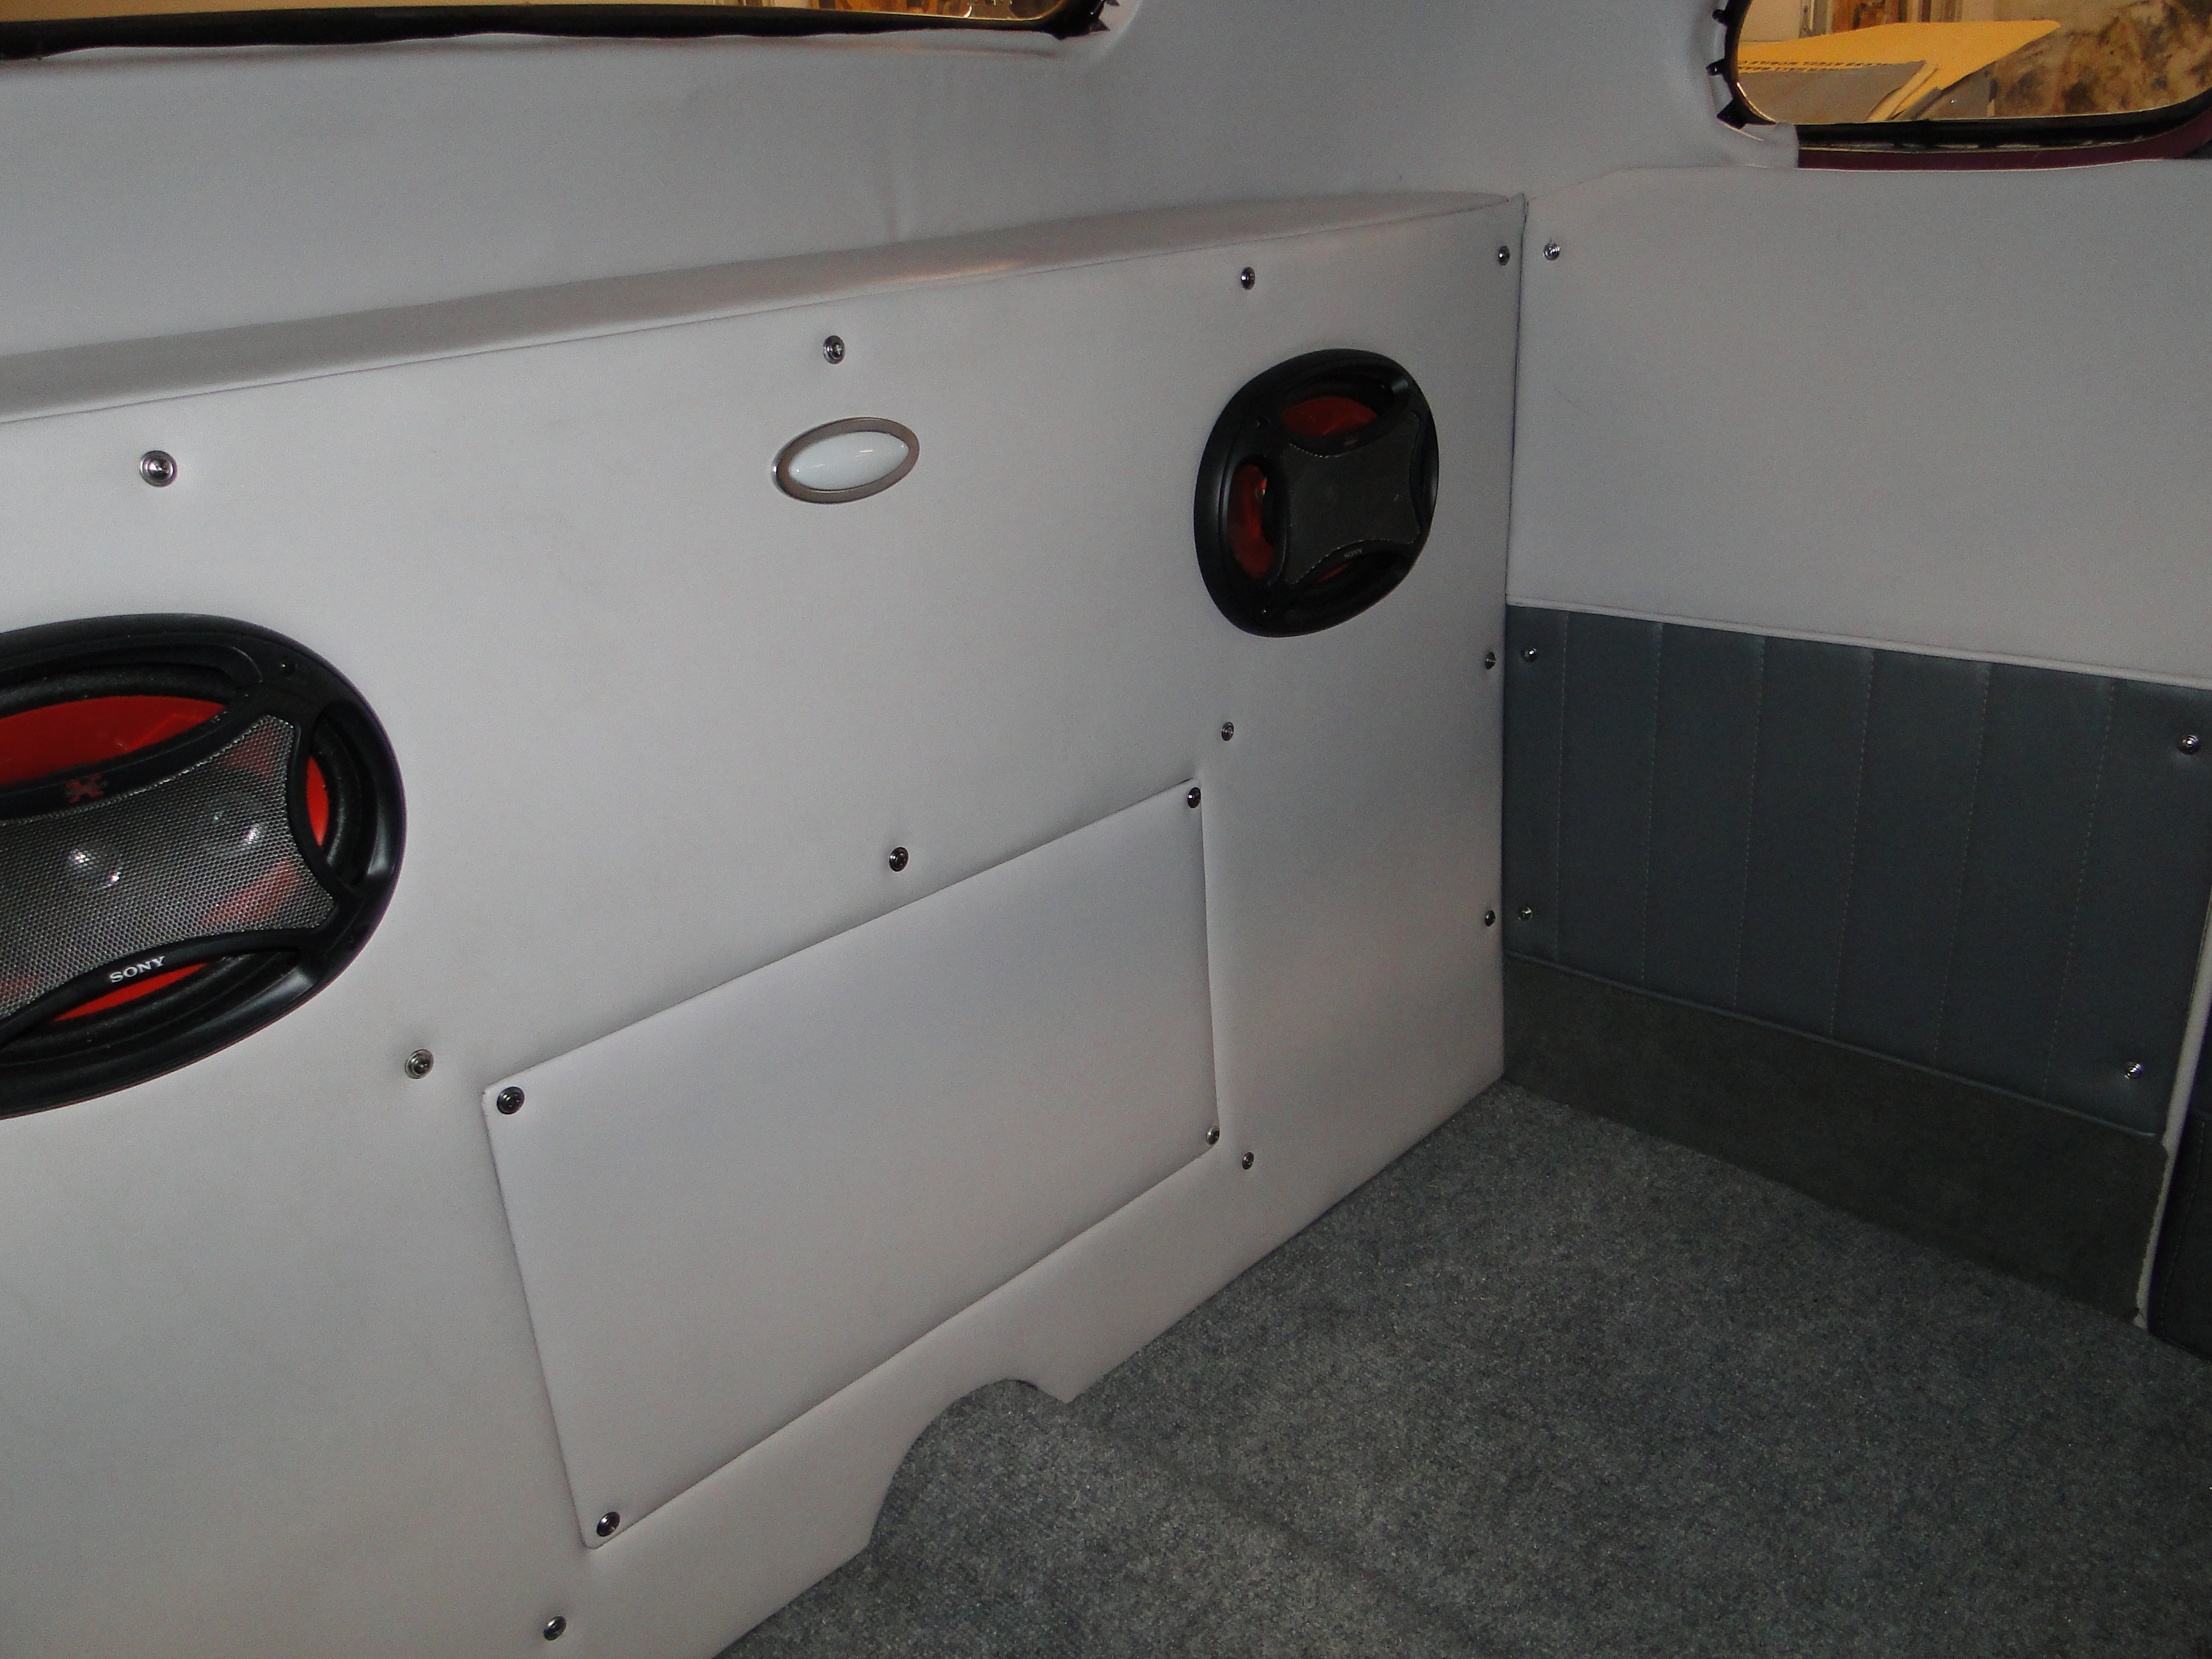
Carpet Installation And Sound Proofing
I added thick carpet pad to give the car a more luxurious feel. and installed new carpet, everyone in my family has gotten involved with this restoration, even Grandma. Then we applied more HushMat to the cab, body, and doors.
Click any picture to enlarge.
|
|
|
|
|
|
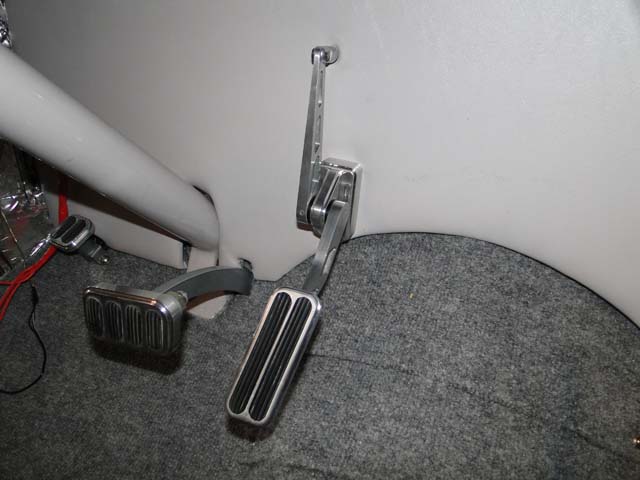
Brake Pedal Issue
When I was applying the HushMat, I noticed that the brake
pedal shaft was an odd color of brown, a quick inspection revealed that the
brown was rust, not paint. Well that just wouldn't do, so I removed the brake
pedal shaft and painted it Metallic Silver.
Click any picture to enlarge.
|
|
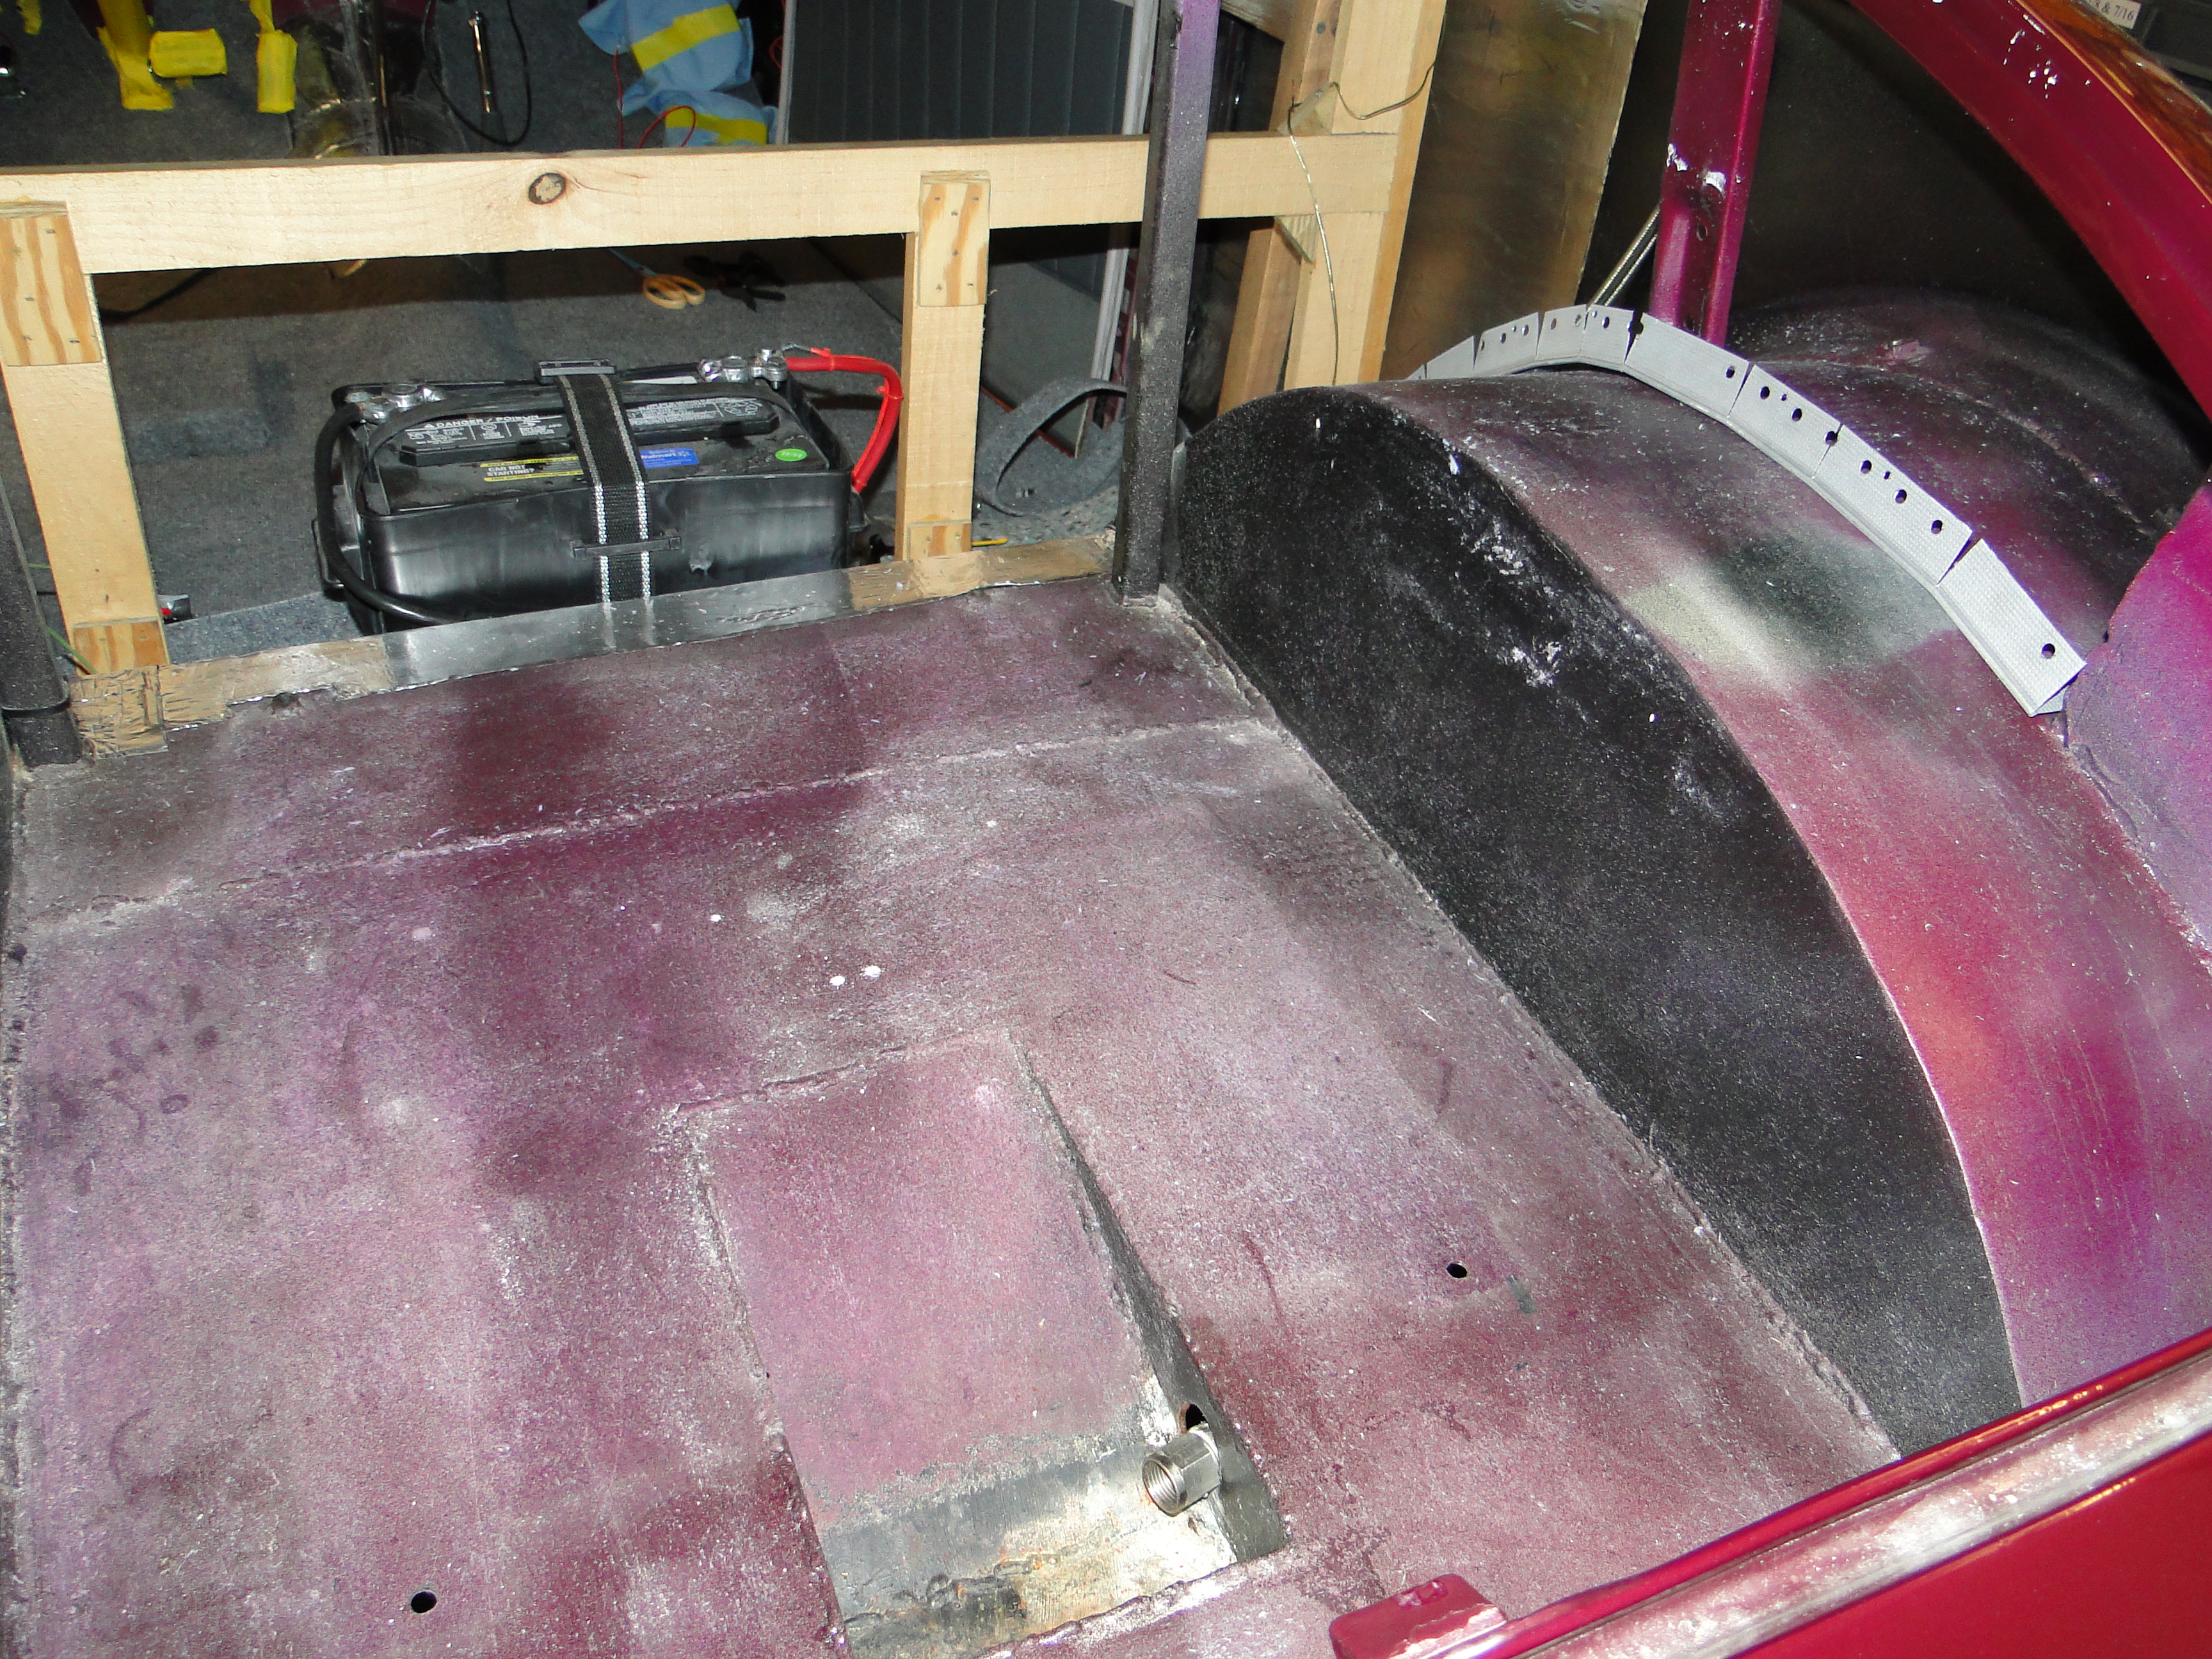
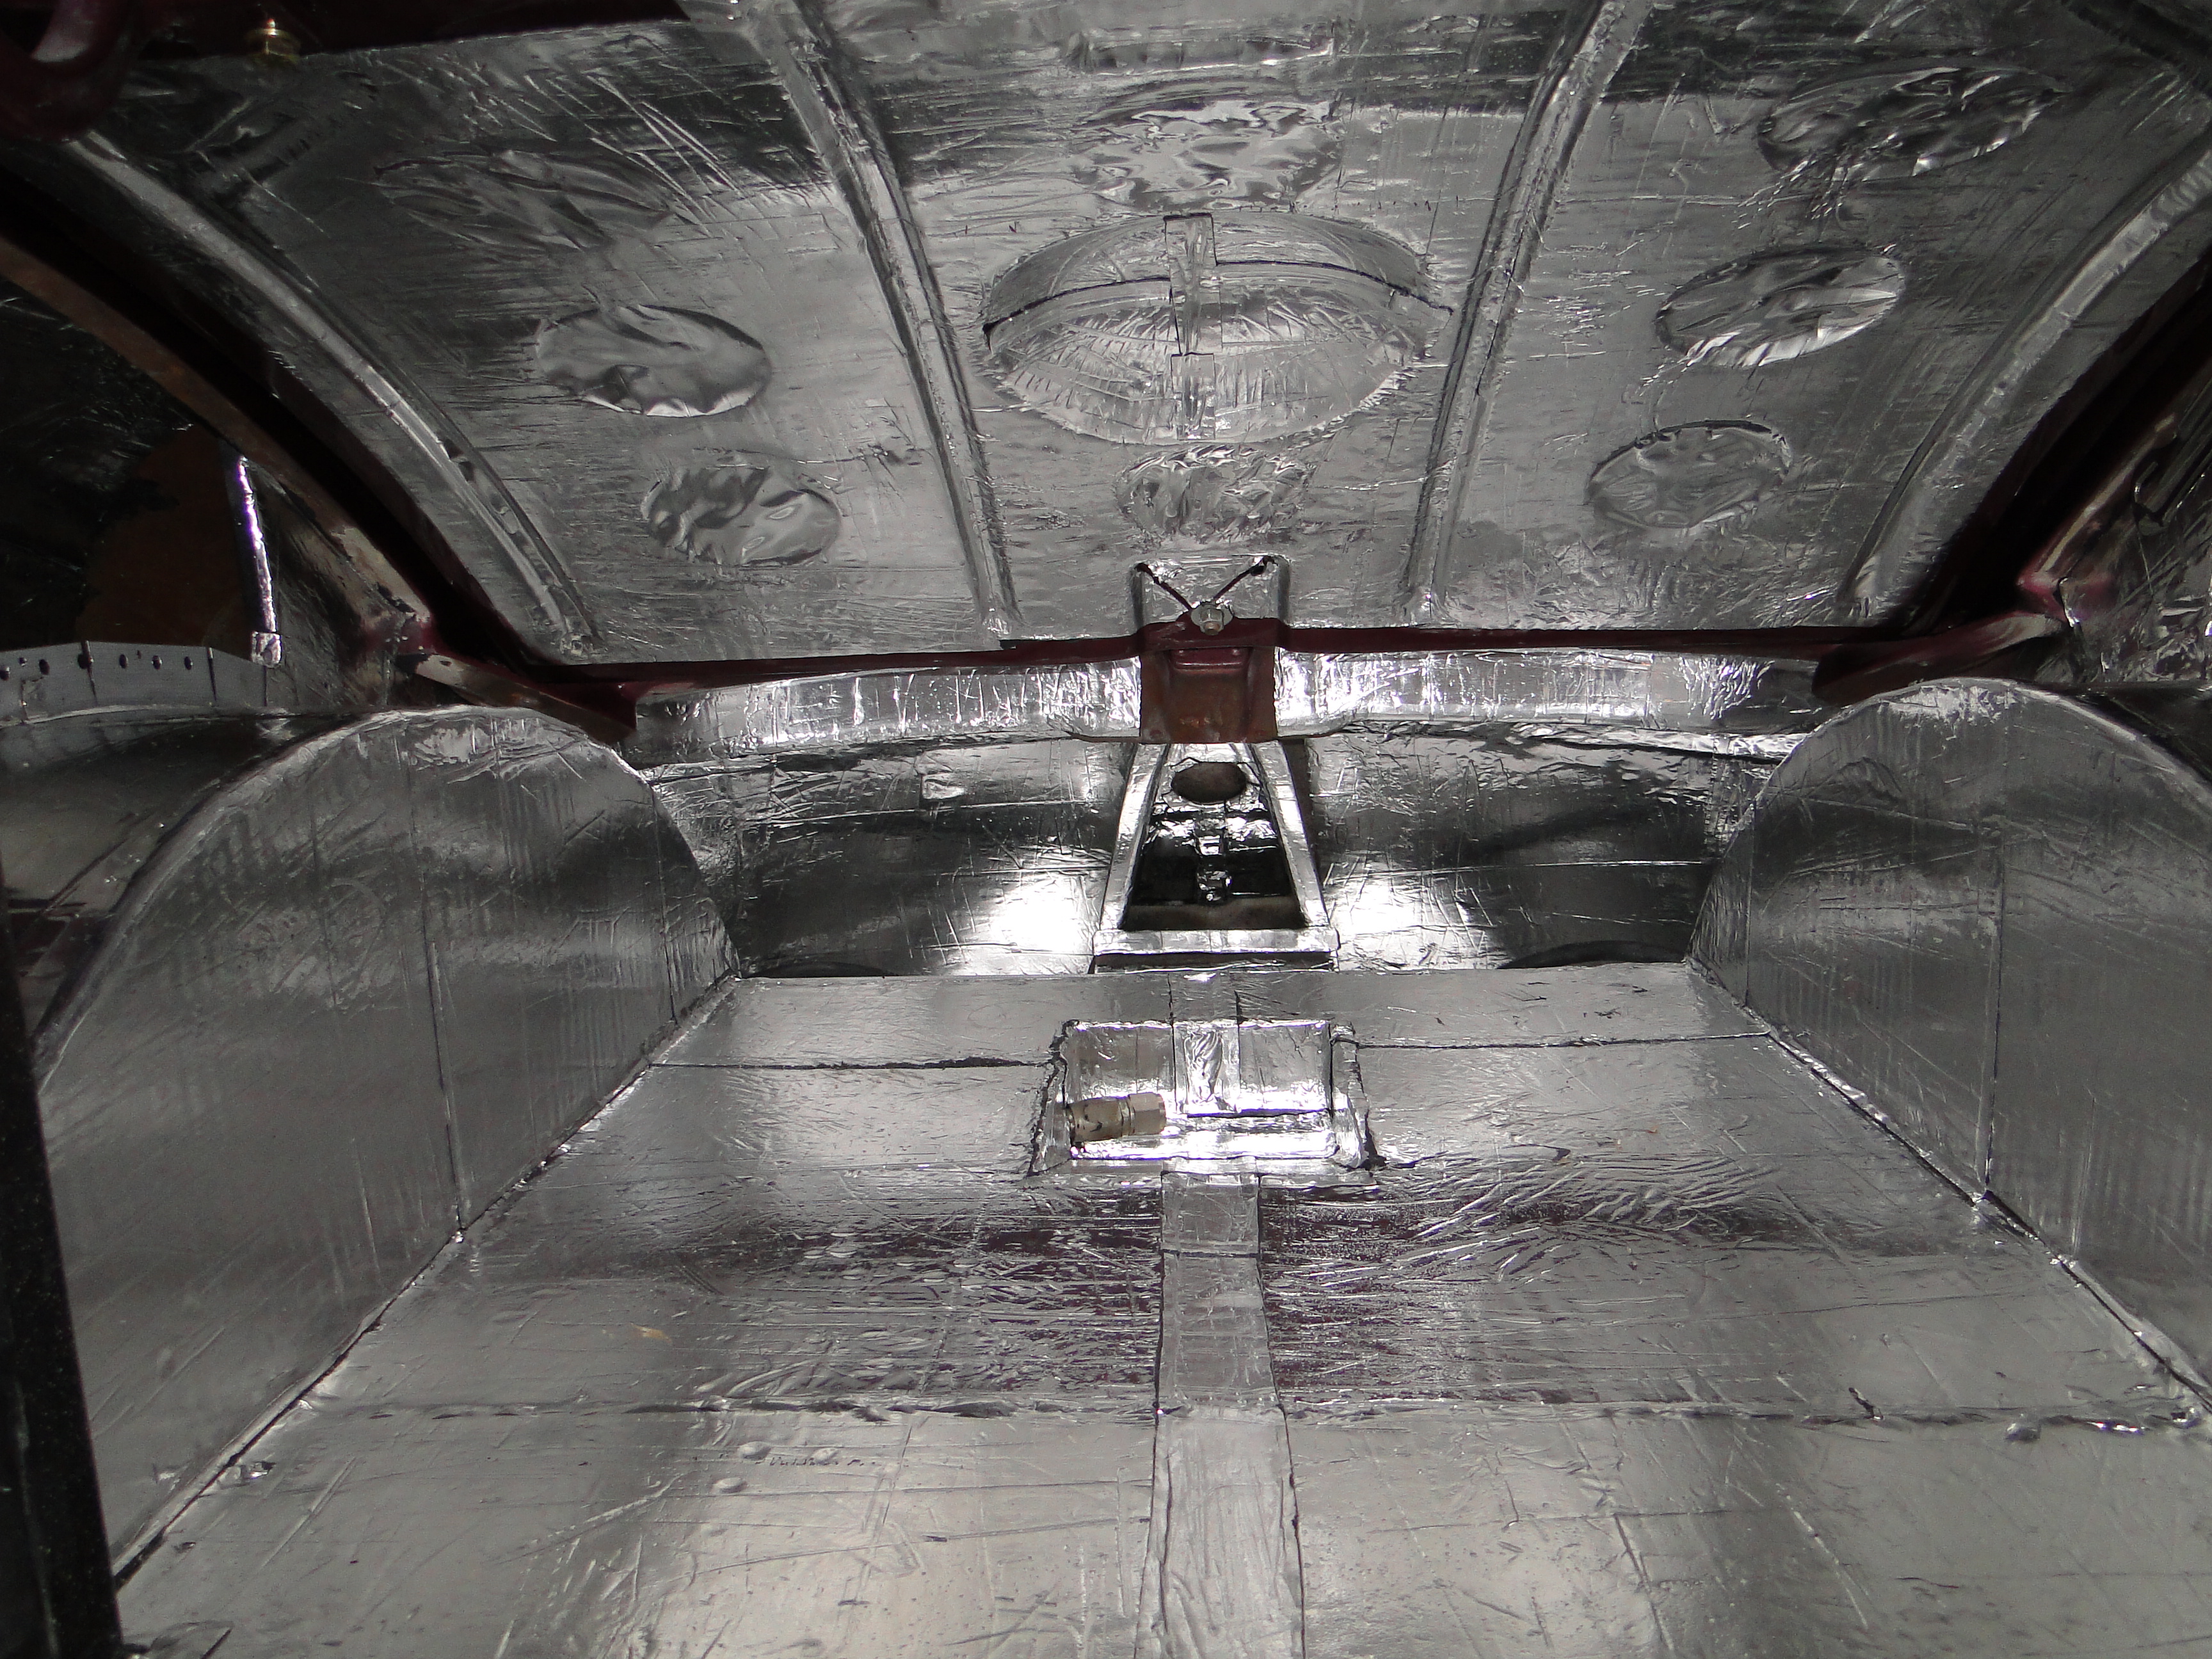
Trunk Sound Proofing
Now for the trunk, well, for what is left
of my trunk anyway. You see, my 33 inch rear slicks take up
most of the normal trunk space, and the fuel cell, which has been
removed, takes up the rest of the trunk space in the center.
We applied more
HushMat to the trunk,
floor, body, wheel wells, and lid. Oh my God, what a job
Click any picture to enlarge.
|
|
|
|
|
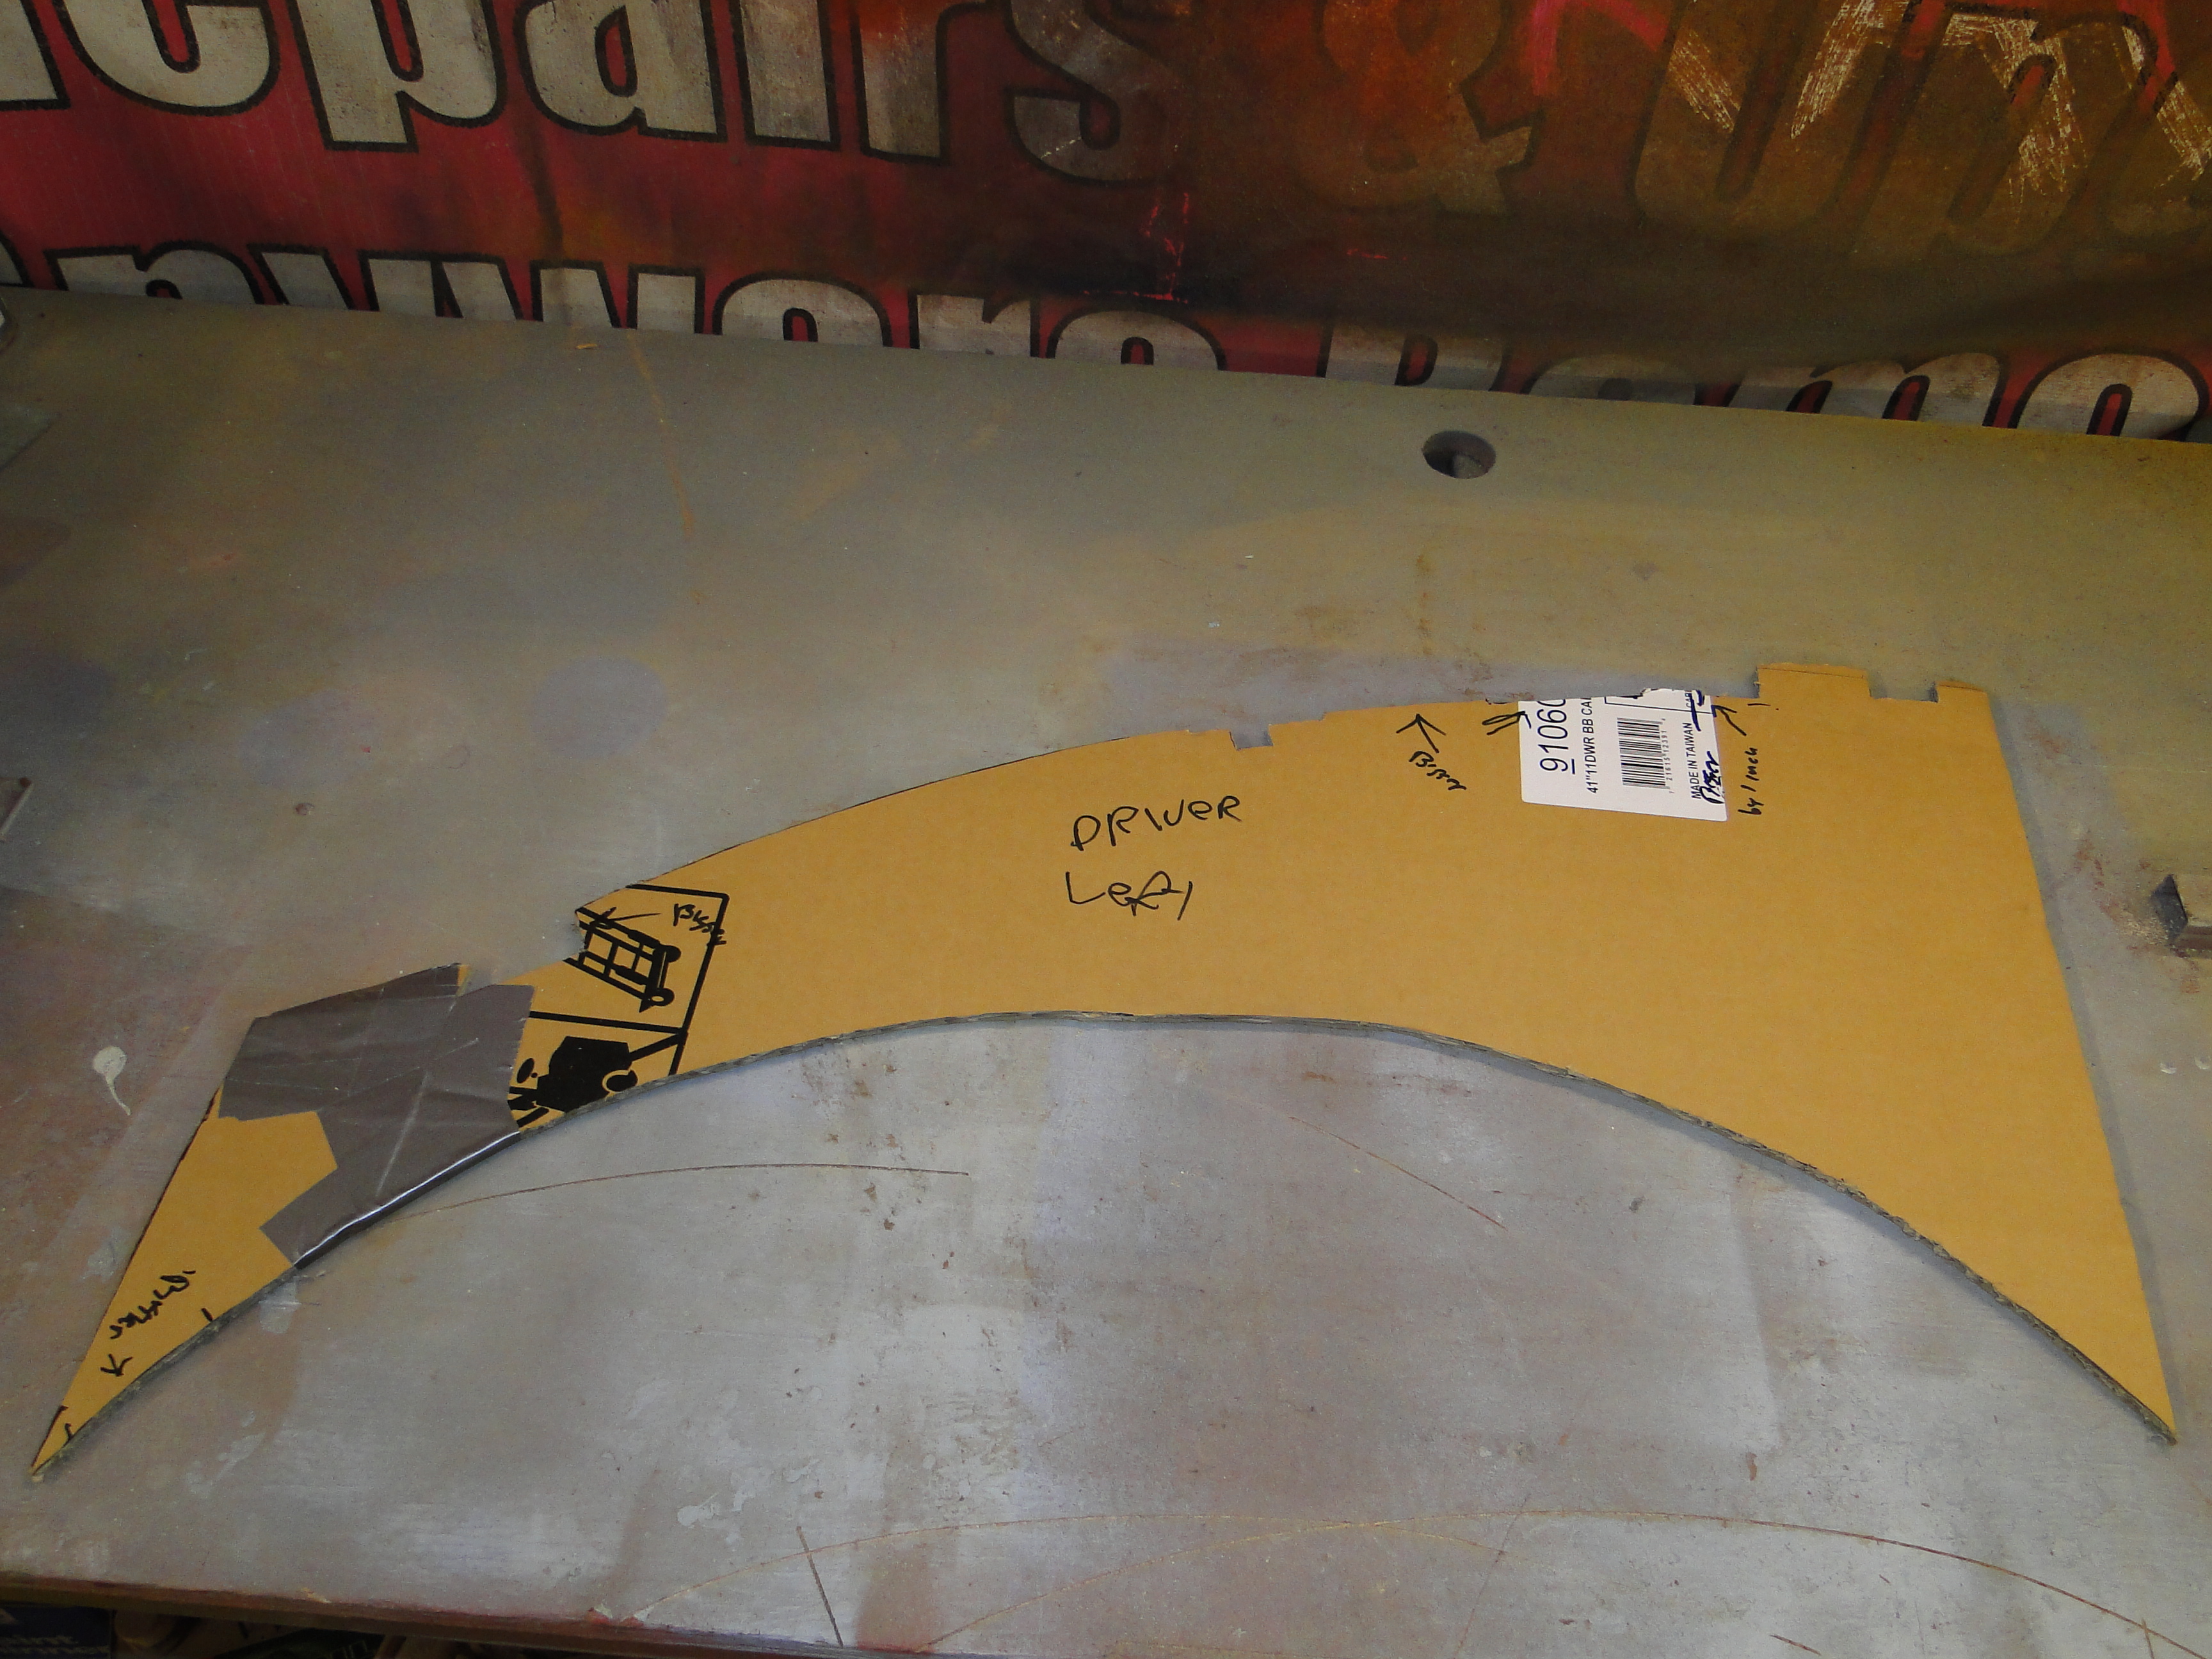
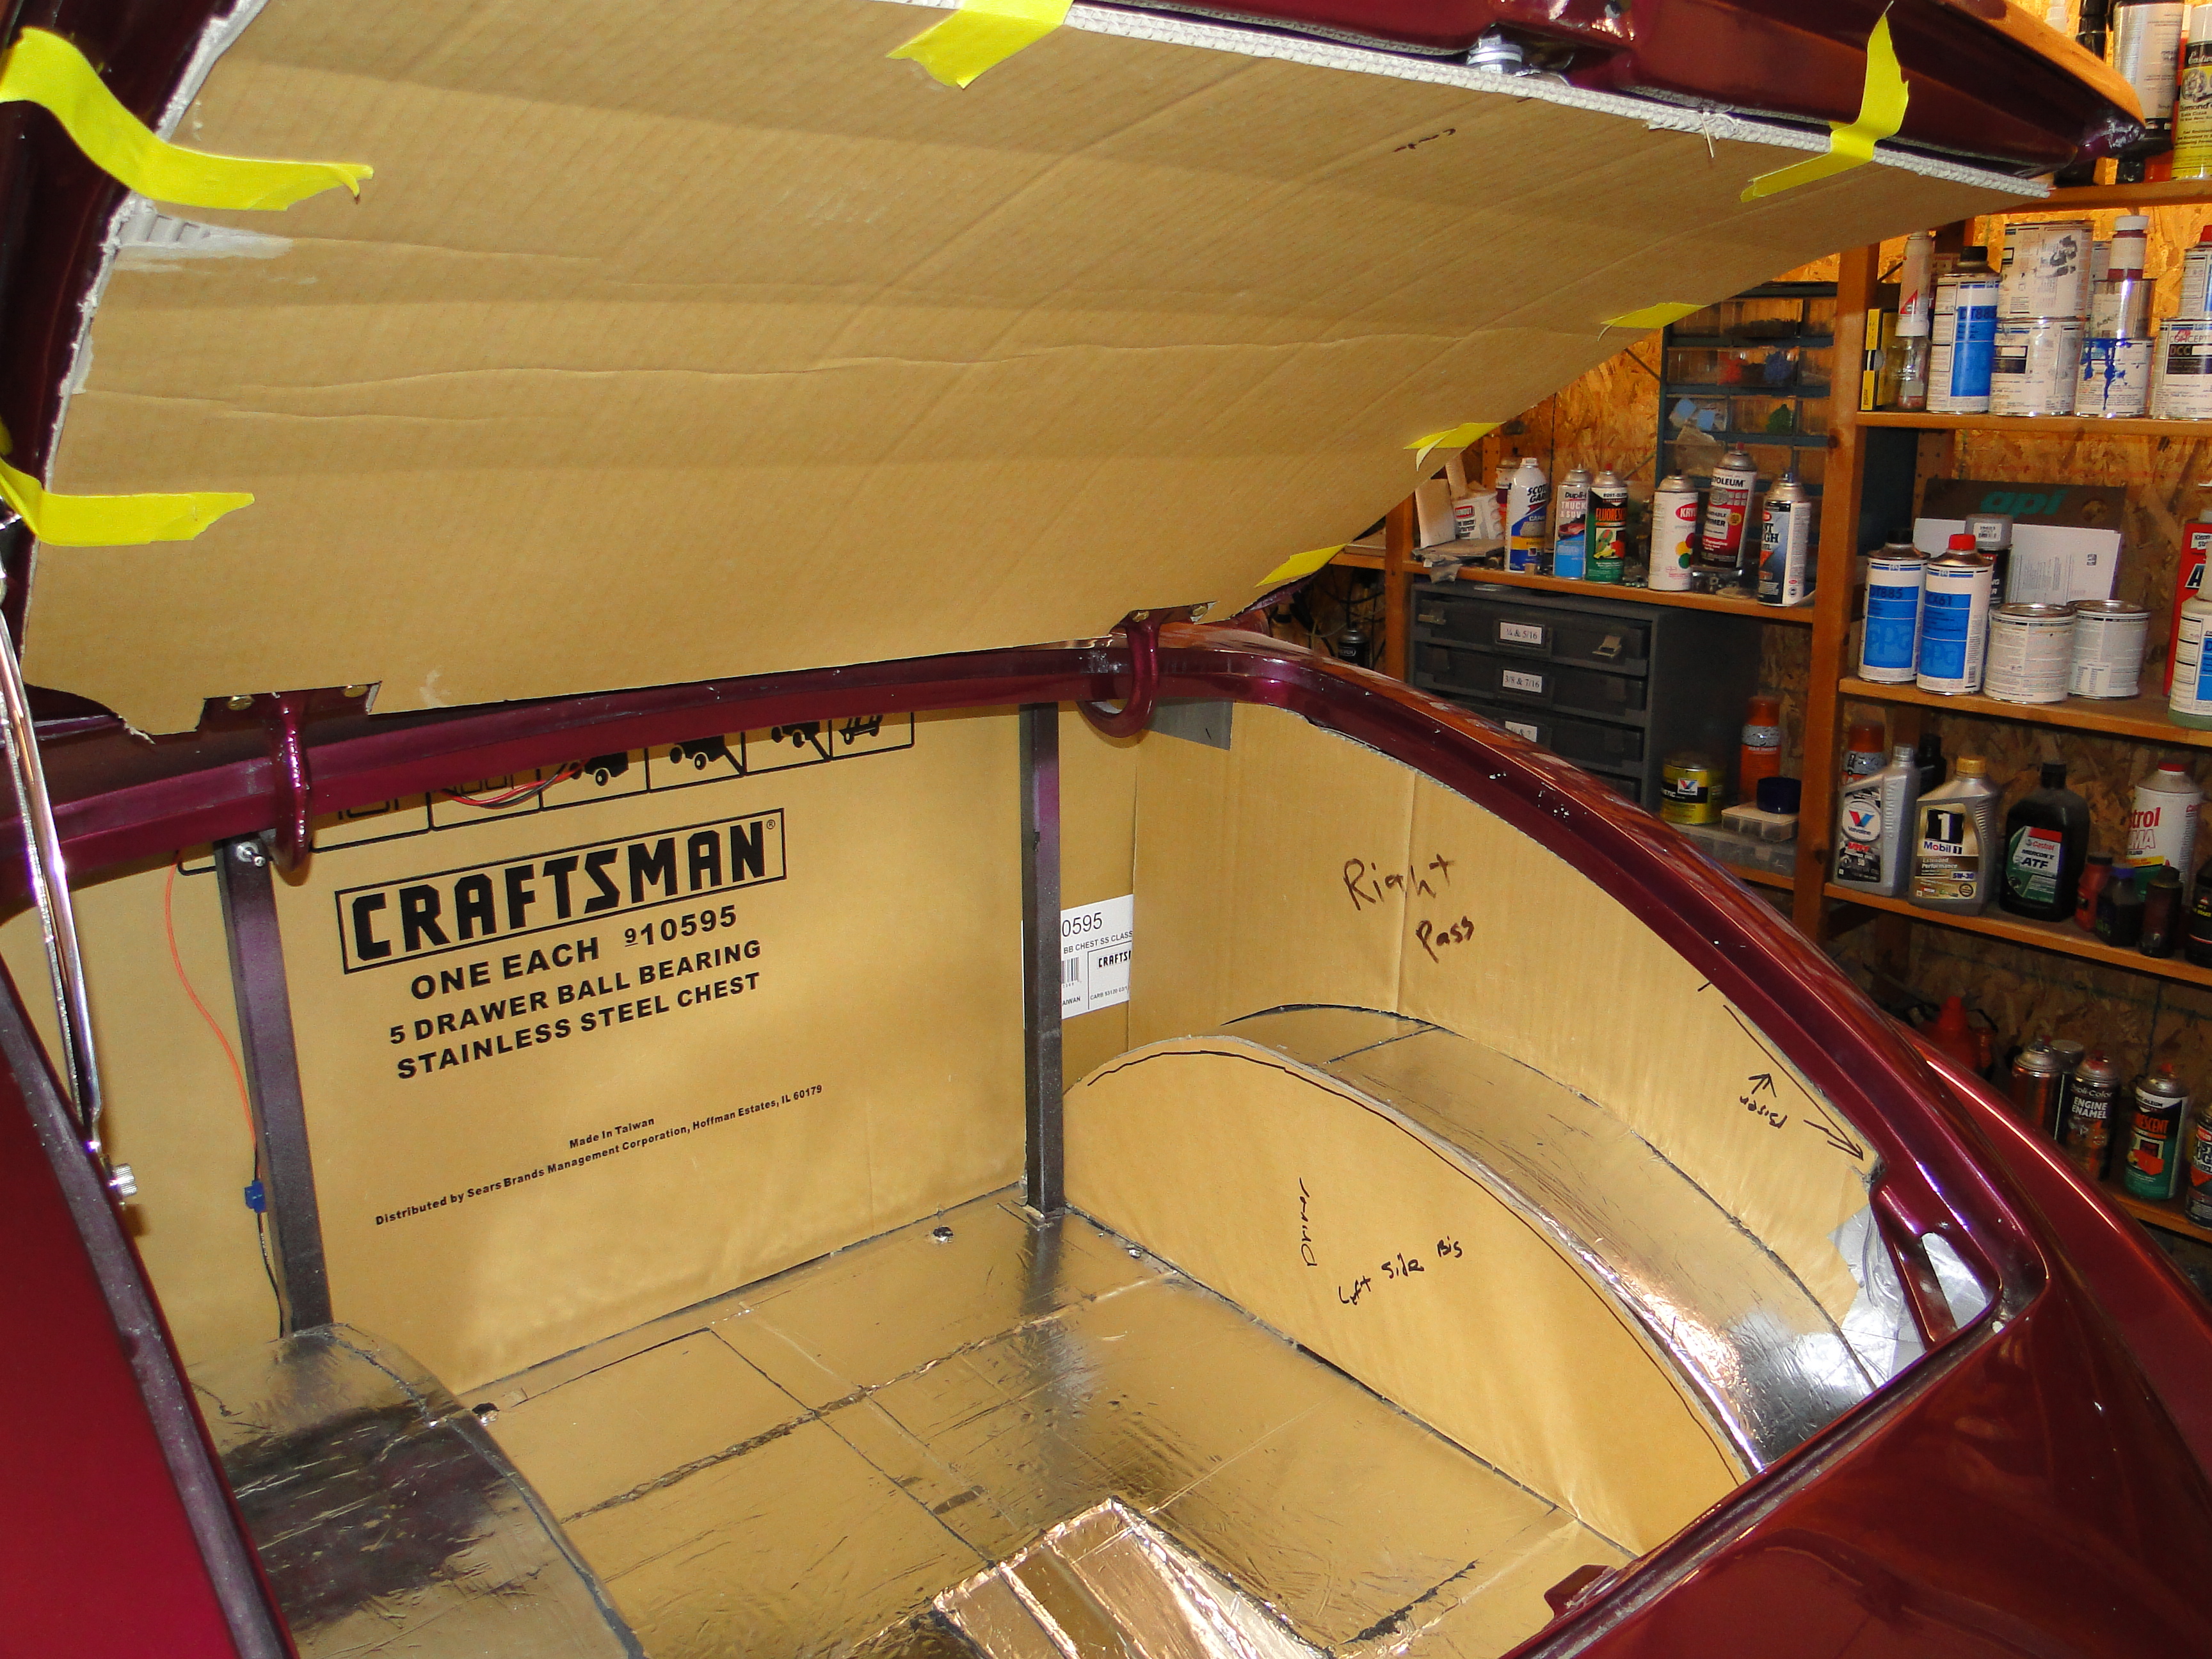
Custom Trunk Interior Panel Template Construction
Ok, I have never done this before, and I am sure someone will email me and ask why you did this or that. For me I found the thick cardboard worked better, it stayed where I put it, the cardboard could take a lot of abuse, and it wasn't overly flimsy to work with. However, with that said, it was a lot harder to cut and shape. You know its just my luck, I could not learn how to do this with simple straight edges and right angle corners. No, I have to dive in with semicircle wheel wells, and a sloping rear body contours. In addition, I had to come up with a way for the panels to mount to the top of the round wheel wells, and enter metal drywall corners (as you can see from the photo below). I used a little Right Stuff gasket sealer for my adhesive, and a lot of cuts to allow the proper bending of the dry wall corner, and Voila! A panel mount is born. Make no mistake, I have about a half of a day in each one of the five cardboard template panels. See cardboard test fit photos below.
Click any picture to enlarge.
|
|
|
|
|
|
|
February
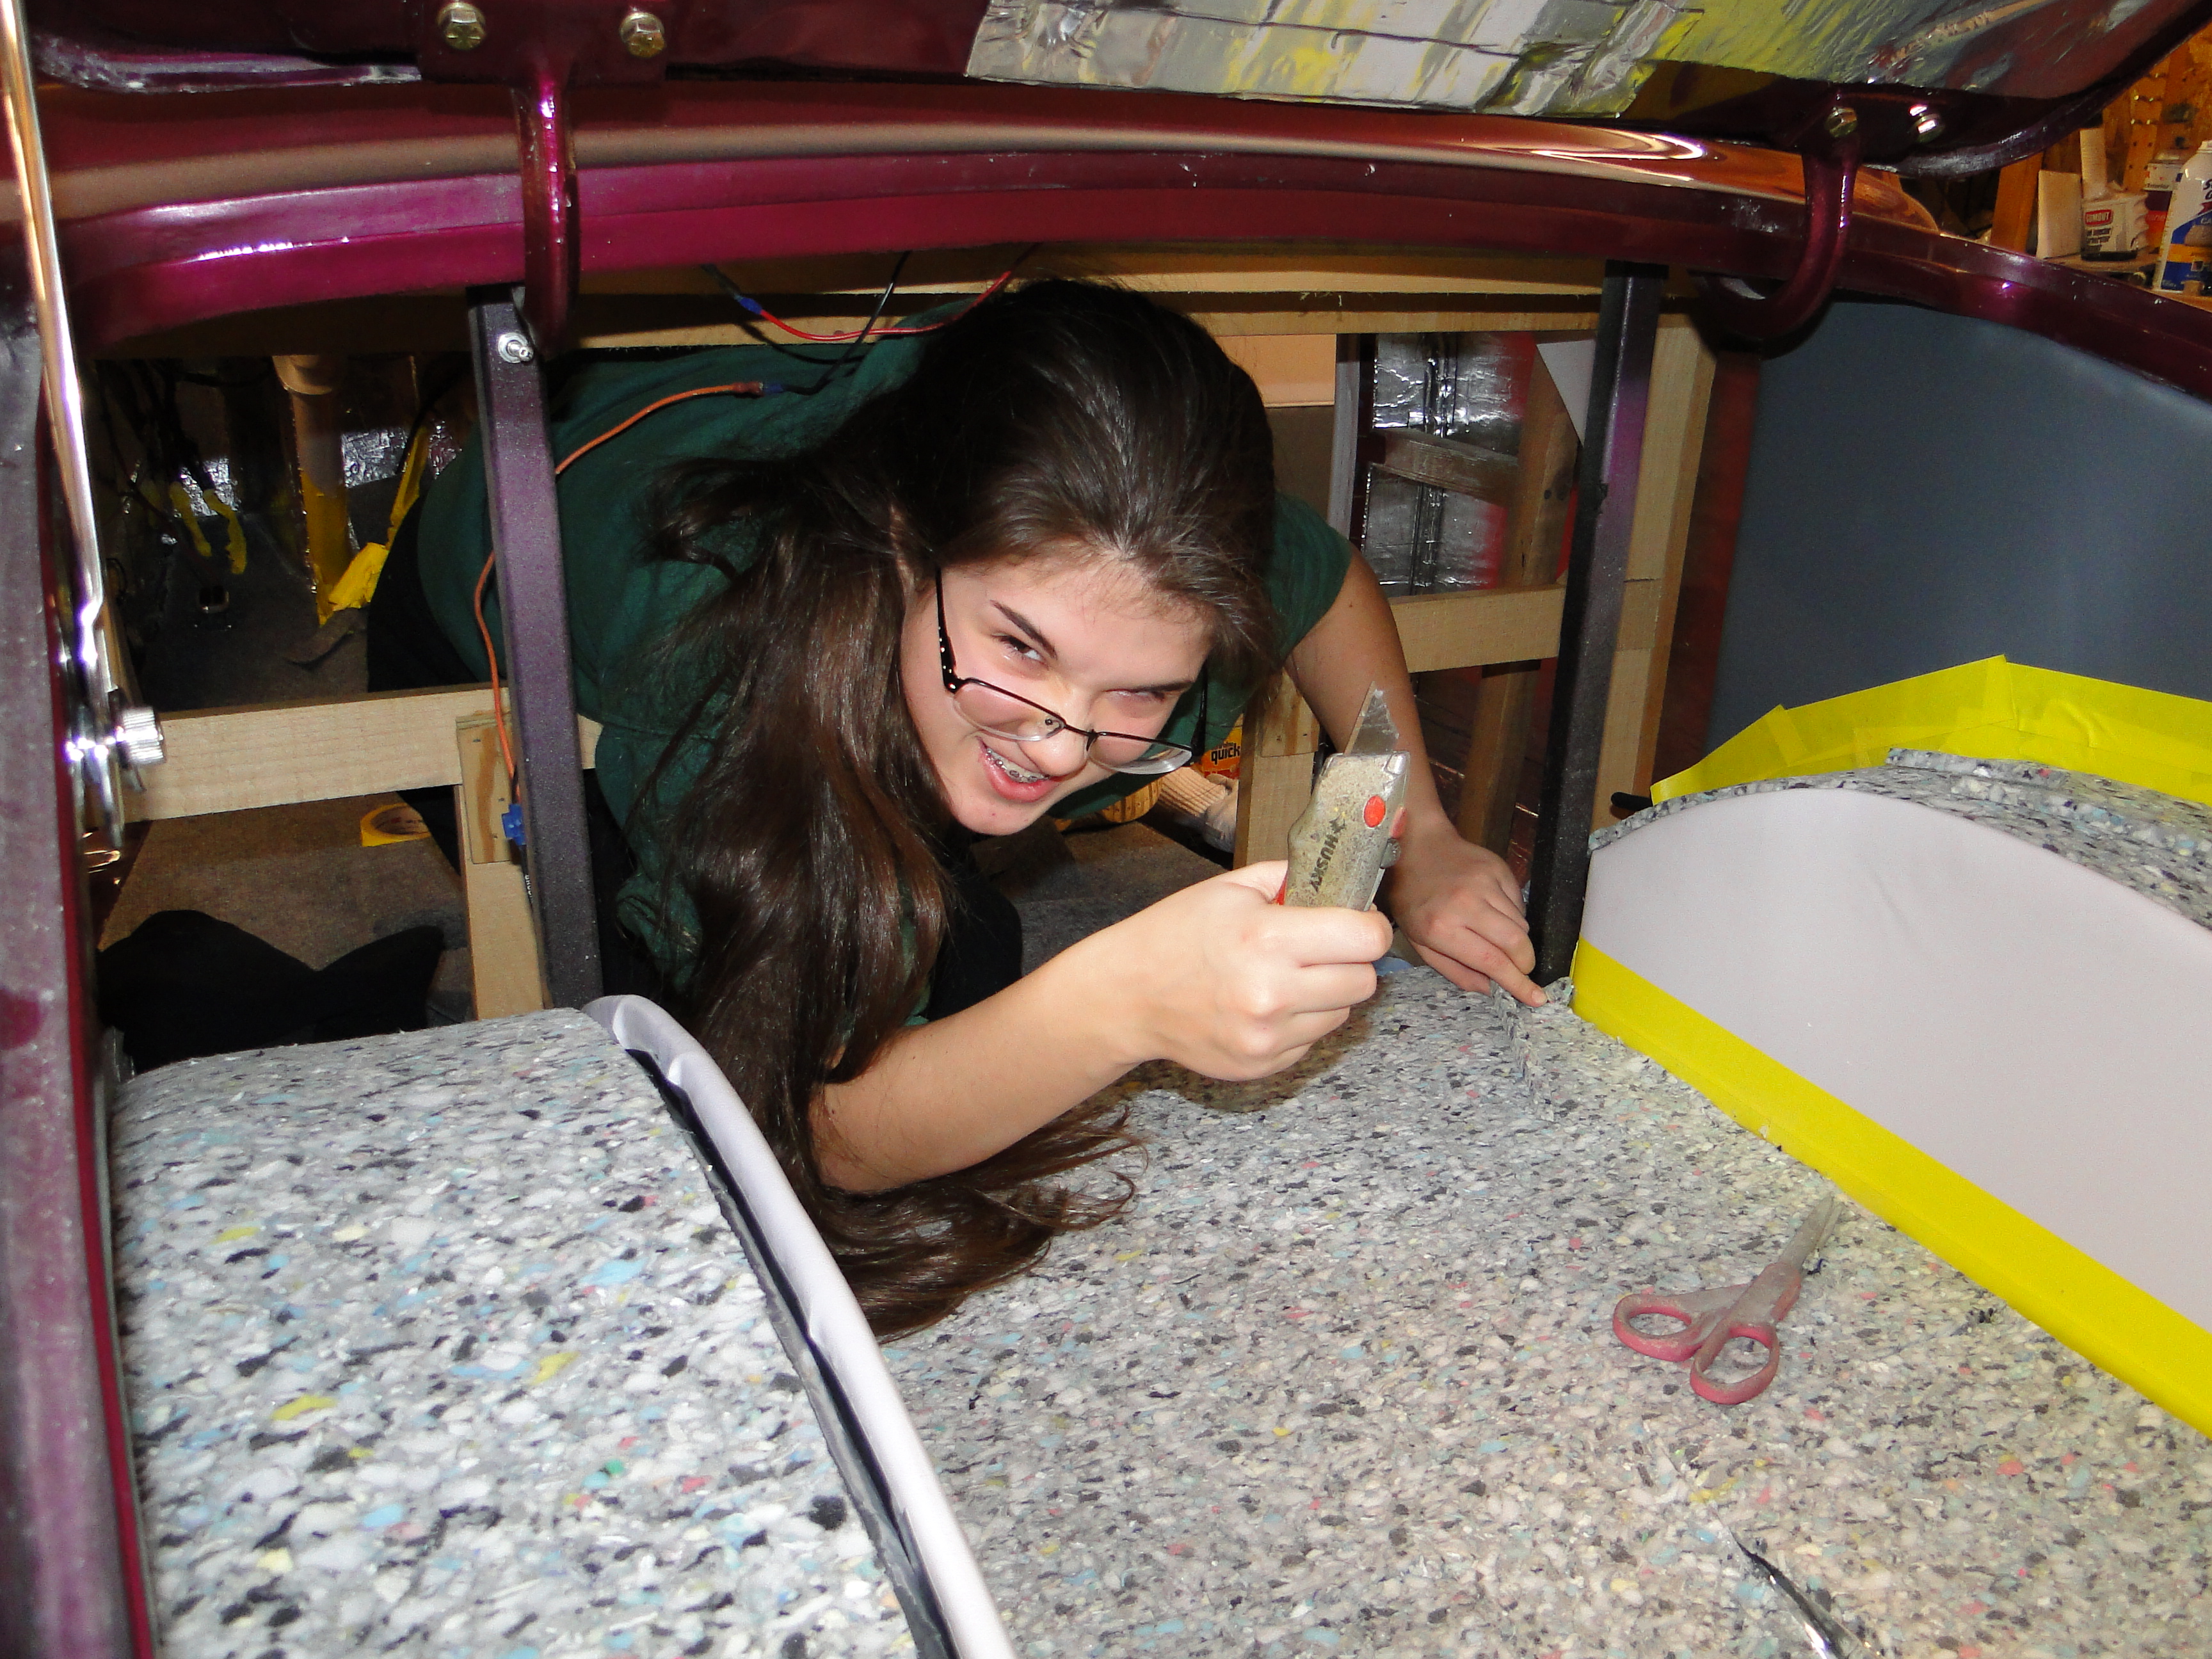
Custom Trunk Interior Installation
Using my cardboard templates, I cut panels from thin plywood, except for the panel that goes on the trunk lid. I use regular fiber board for that because the lid is concaved, and the fiber board is much more flexible. Then I glued 3/8" foam to all of the panels, and covered the panels with my interior material. At last I was able install the carpet, and mount the panels. My youngest daughter was in charge of getting in the tight spots. LOL! The fuel cell sending unit had to be replaced, and I noticed some scratches in the aluminum, so I broke out the buffer and went to work. Well that was a mistake after I made a clean bright spot on the fuel cell, I had to buff the whole thing, OMG, what a job! Two days later I was done polishing the fuel cell. Wow! The fuel cell looks like a mirror, that's great, right? Wait, not so much. If you look closely at the first fuel cell photo, you can see the reflection of the uncovered Hushmat installed on the under side of the car body. Talk about unintended consequences, now I will have to panel the whole under side of the body. Yay! The last part of the trunk restoration was to add lights, and now were all done.
Click any picture to enlarge.
|
|
|
|
|
|
|


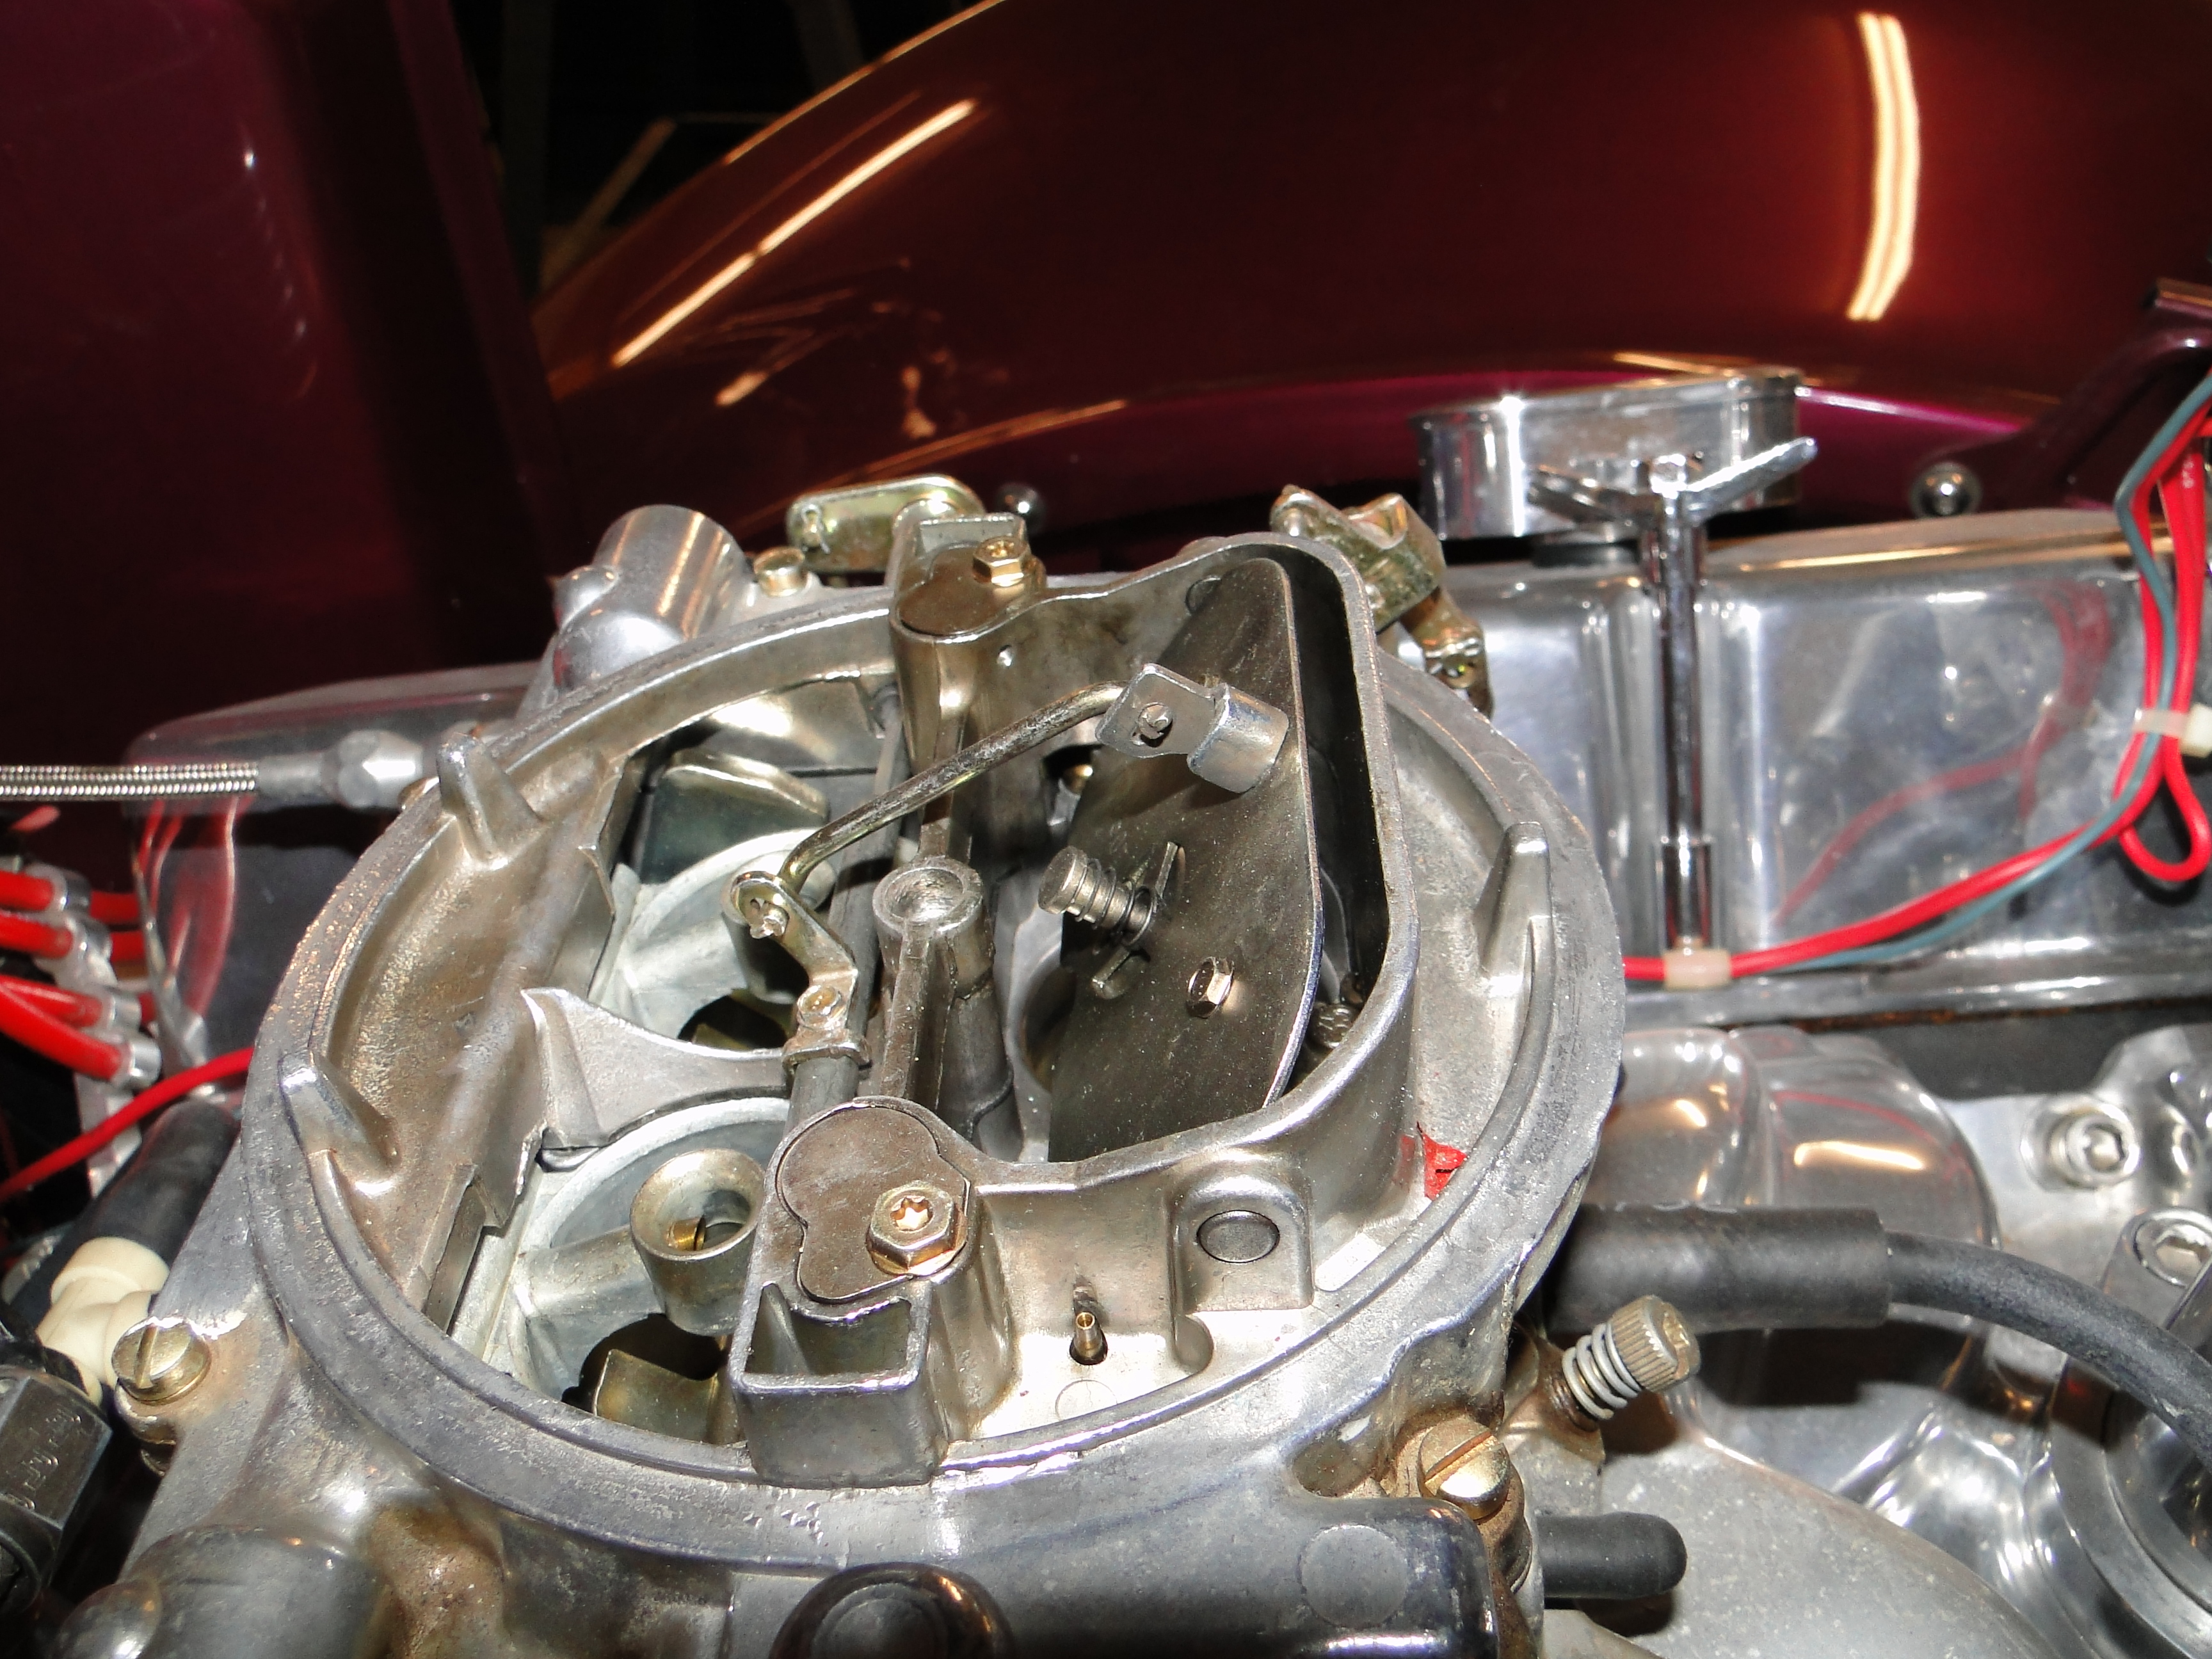
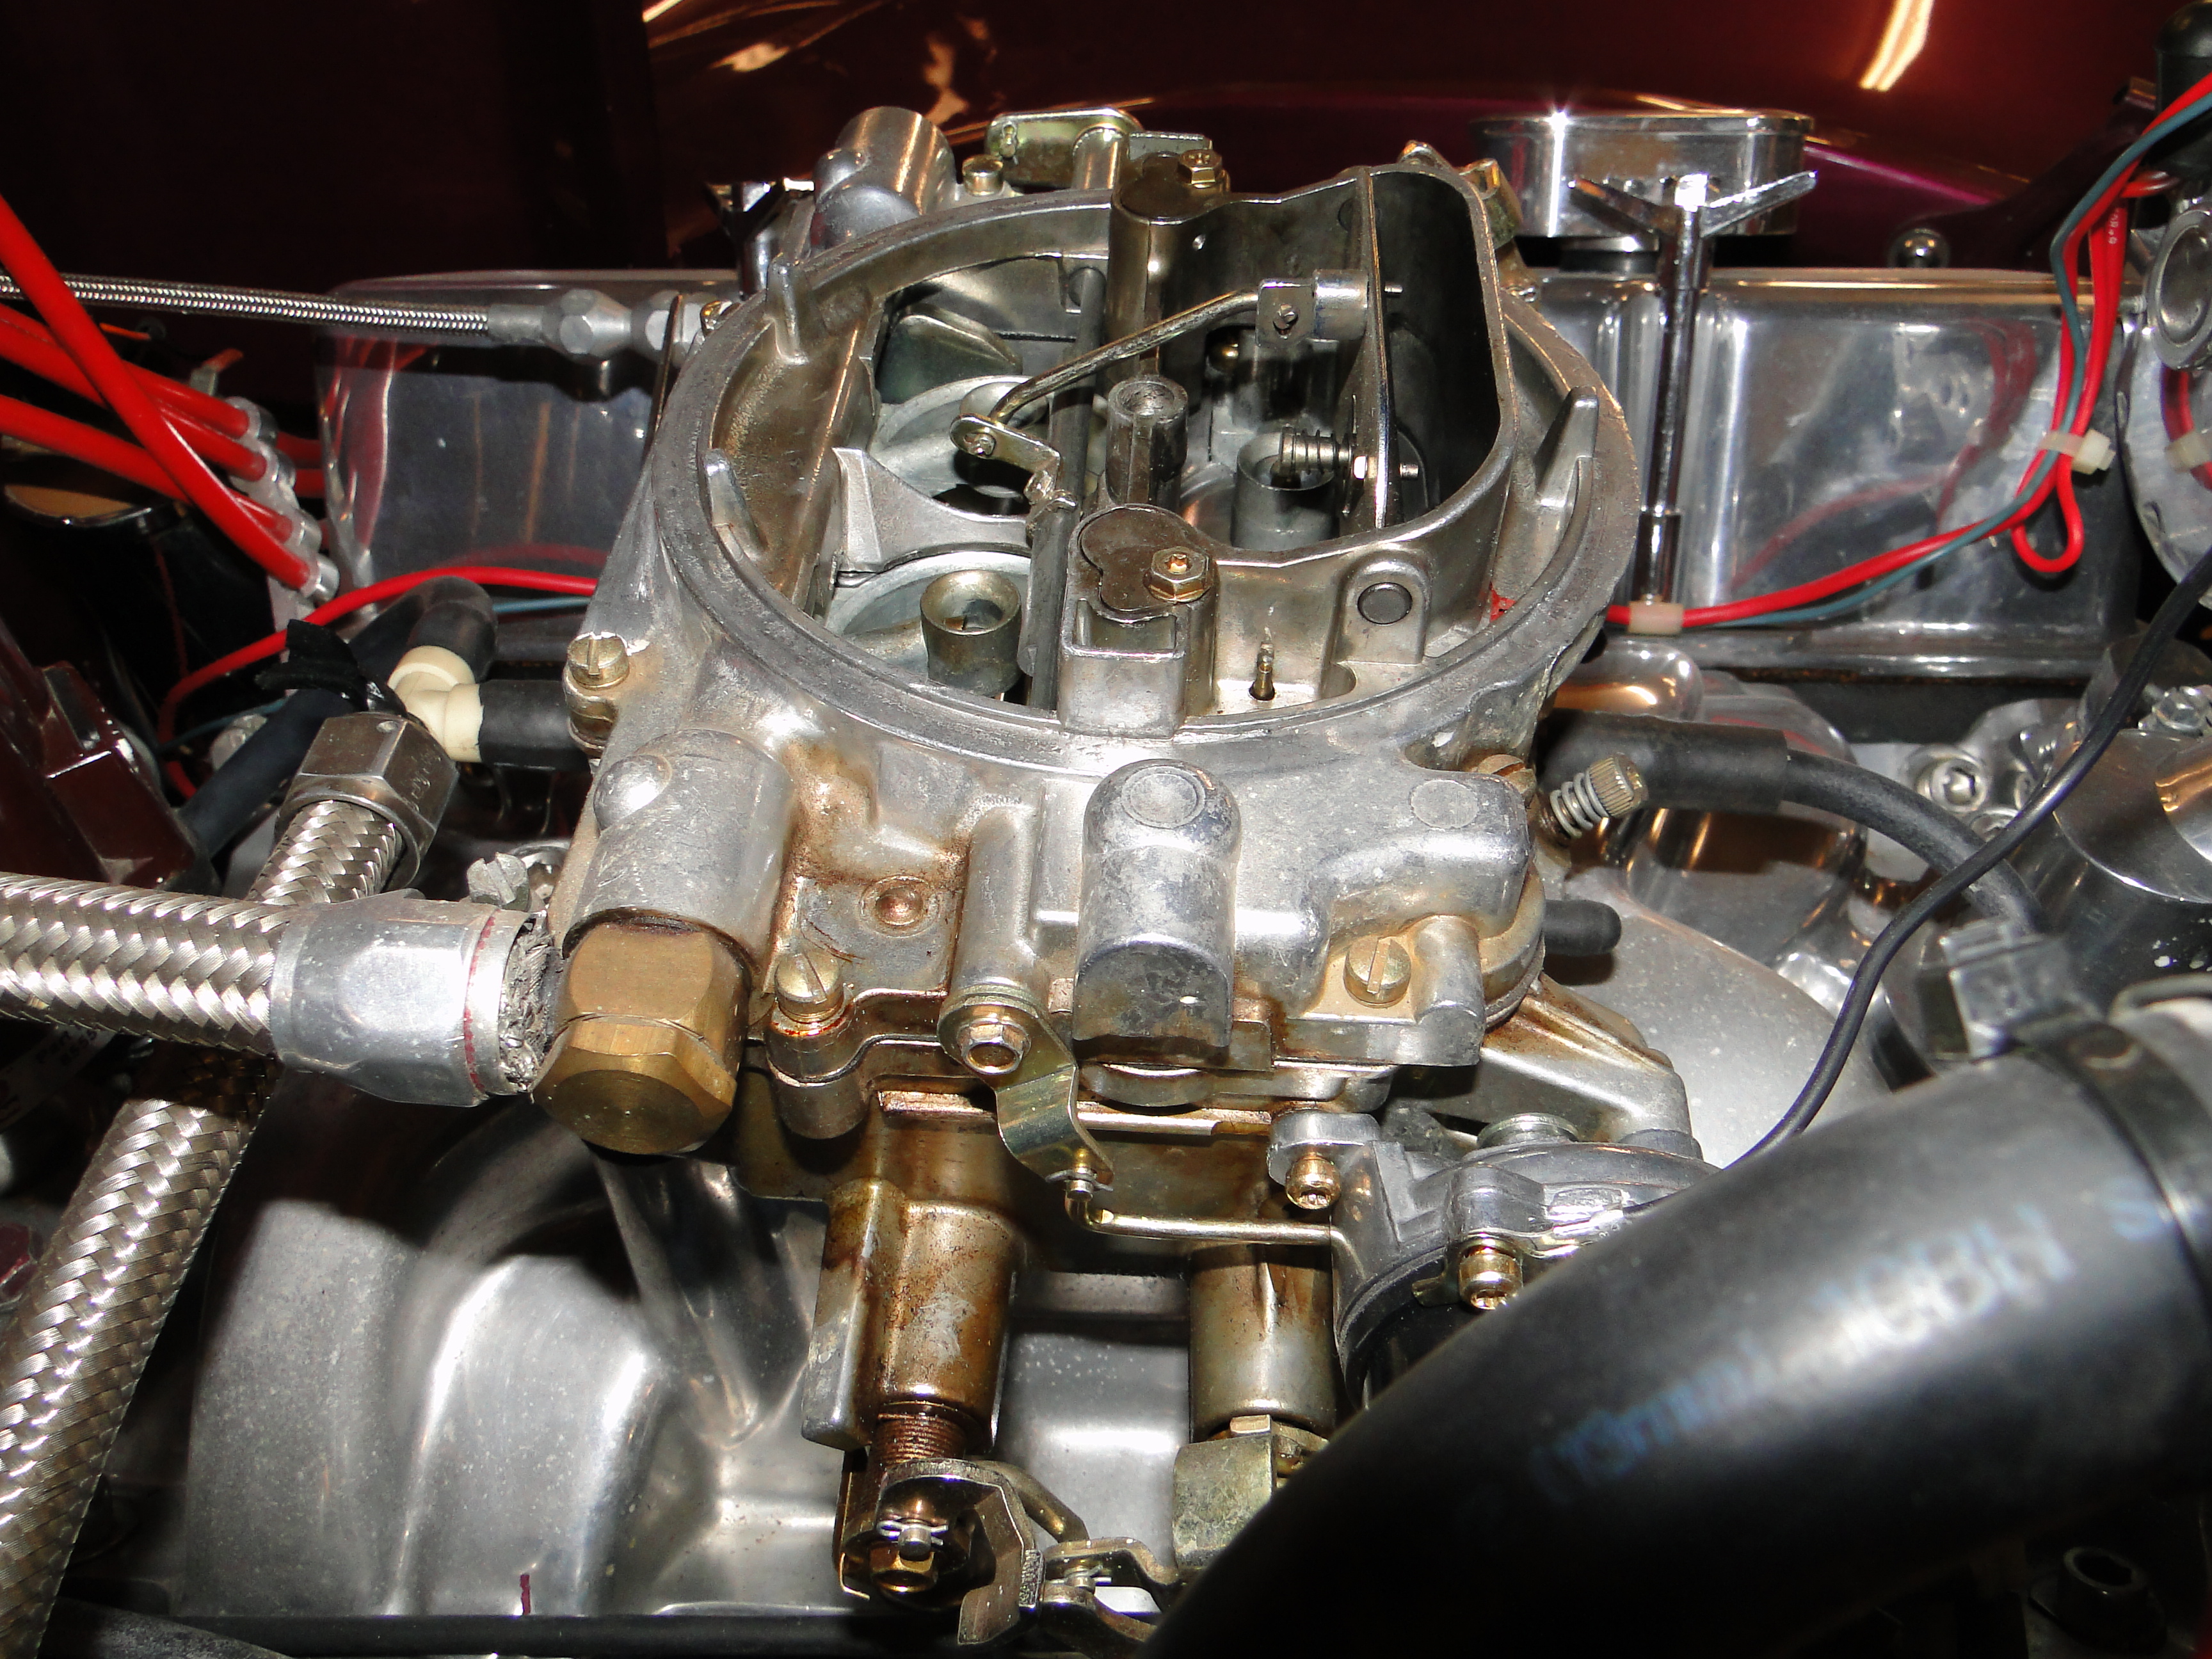
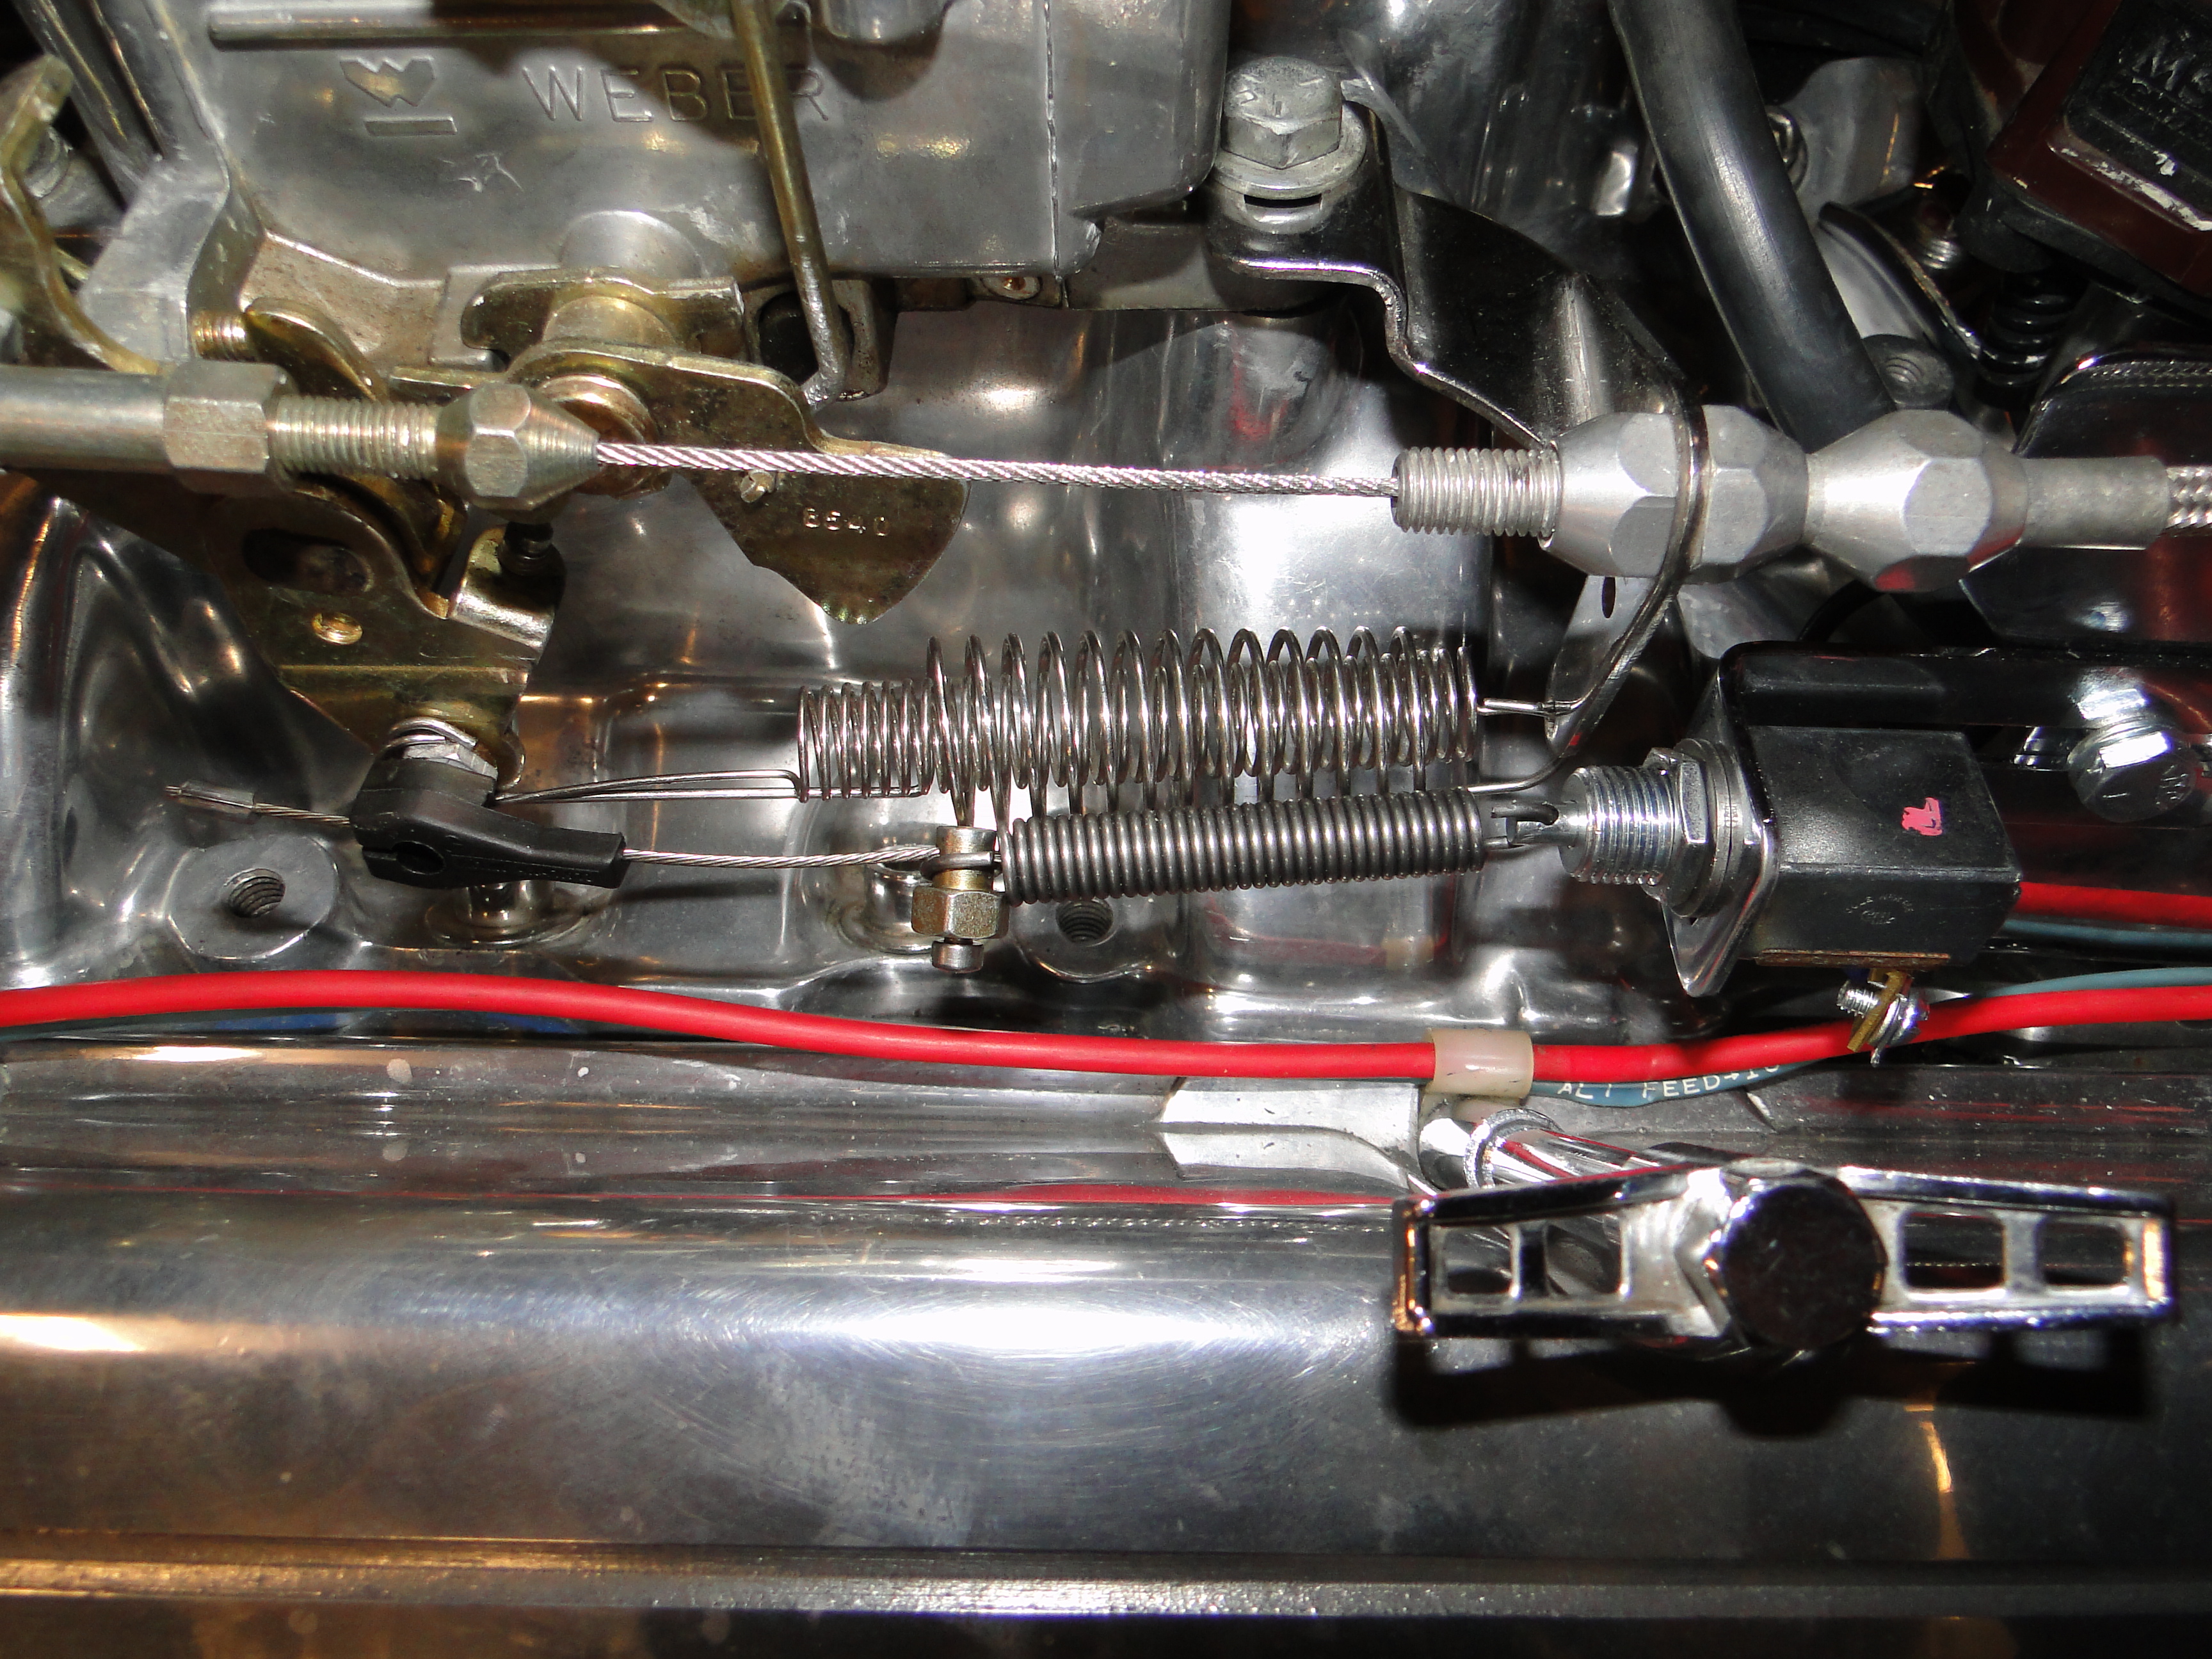
Engine Starting, And Performance Issues Part 1
When I picked up the car, I noticed she was very hard to start when cold, and she ran poorly when hot. I did a complete tune-up and still had both problems. At first I thought it was because this car sat in a garage for eight years with almost no run time. Then I had Jim at Boffo Motors look at it, and he discovered the choke on my four barrow Edelbrock carburetor was fixed 80% closed. I don't understand why anyone would do this, if you have any ideas, email me. Jim told me to install a electric choke. After the installation we are now starting, and running better however the engine seems unrulley.
Click any picture to enlarge.
|
|
|
March
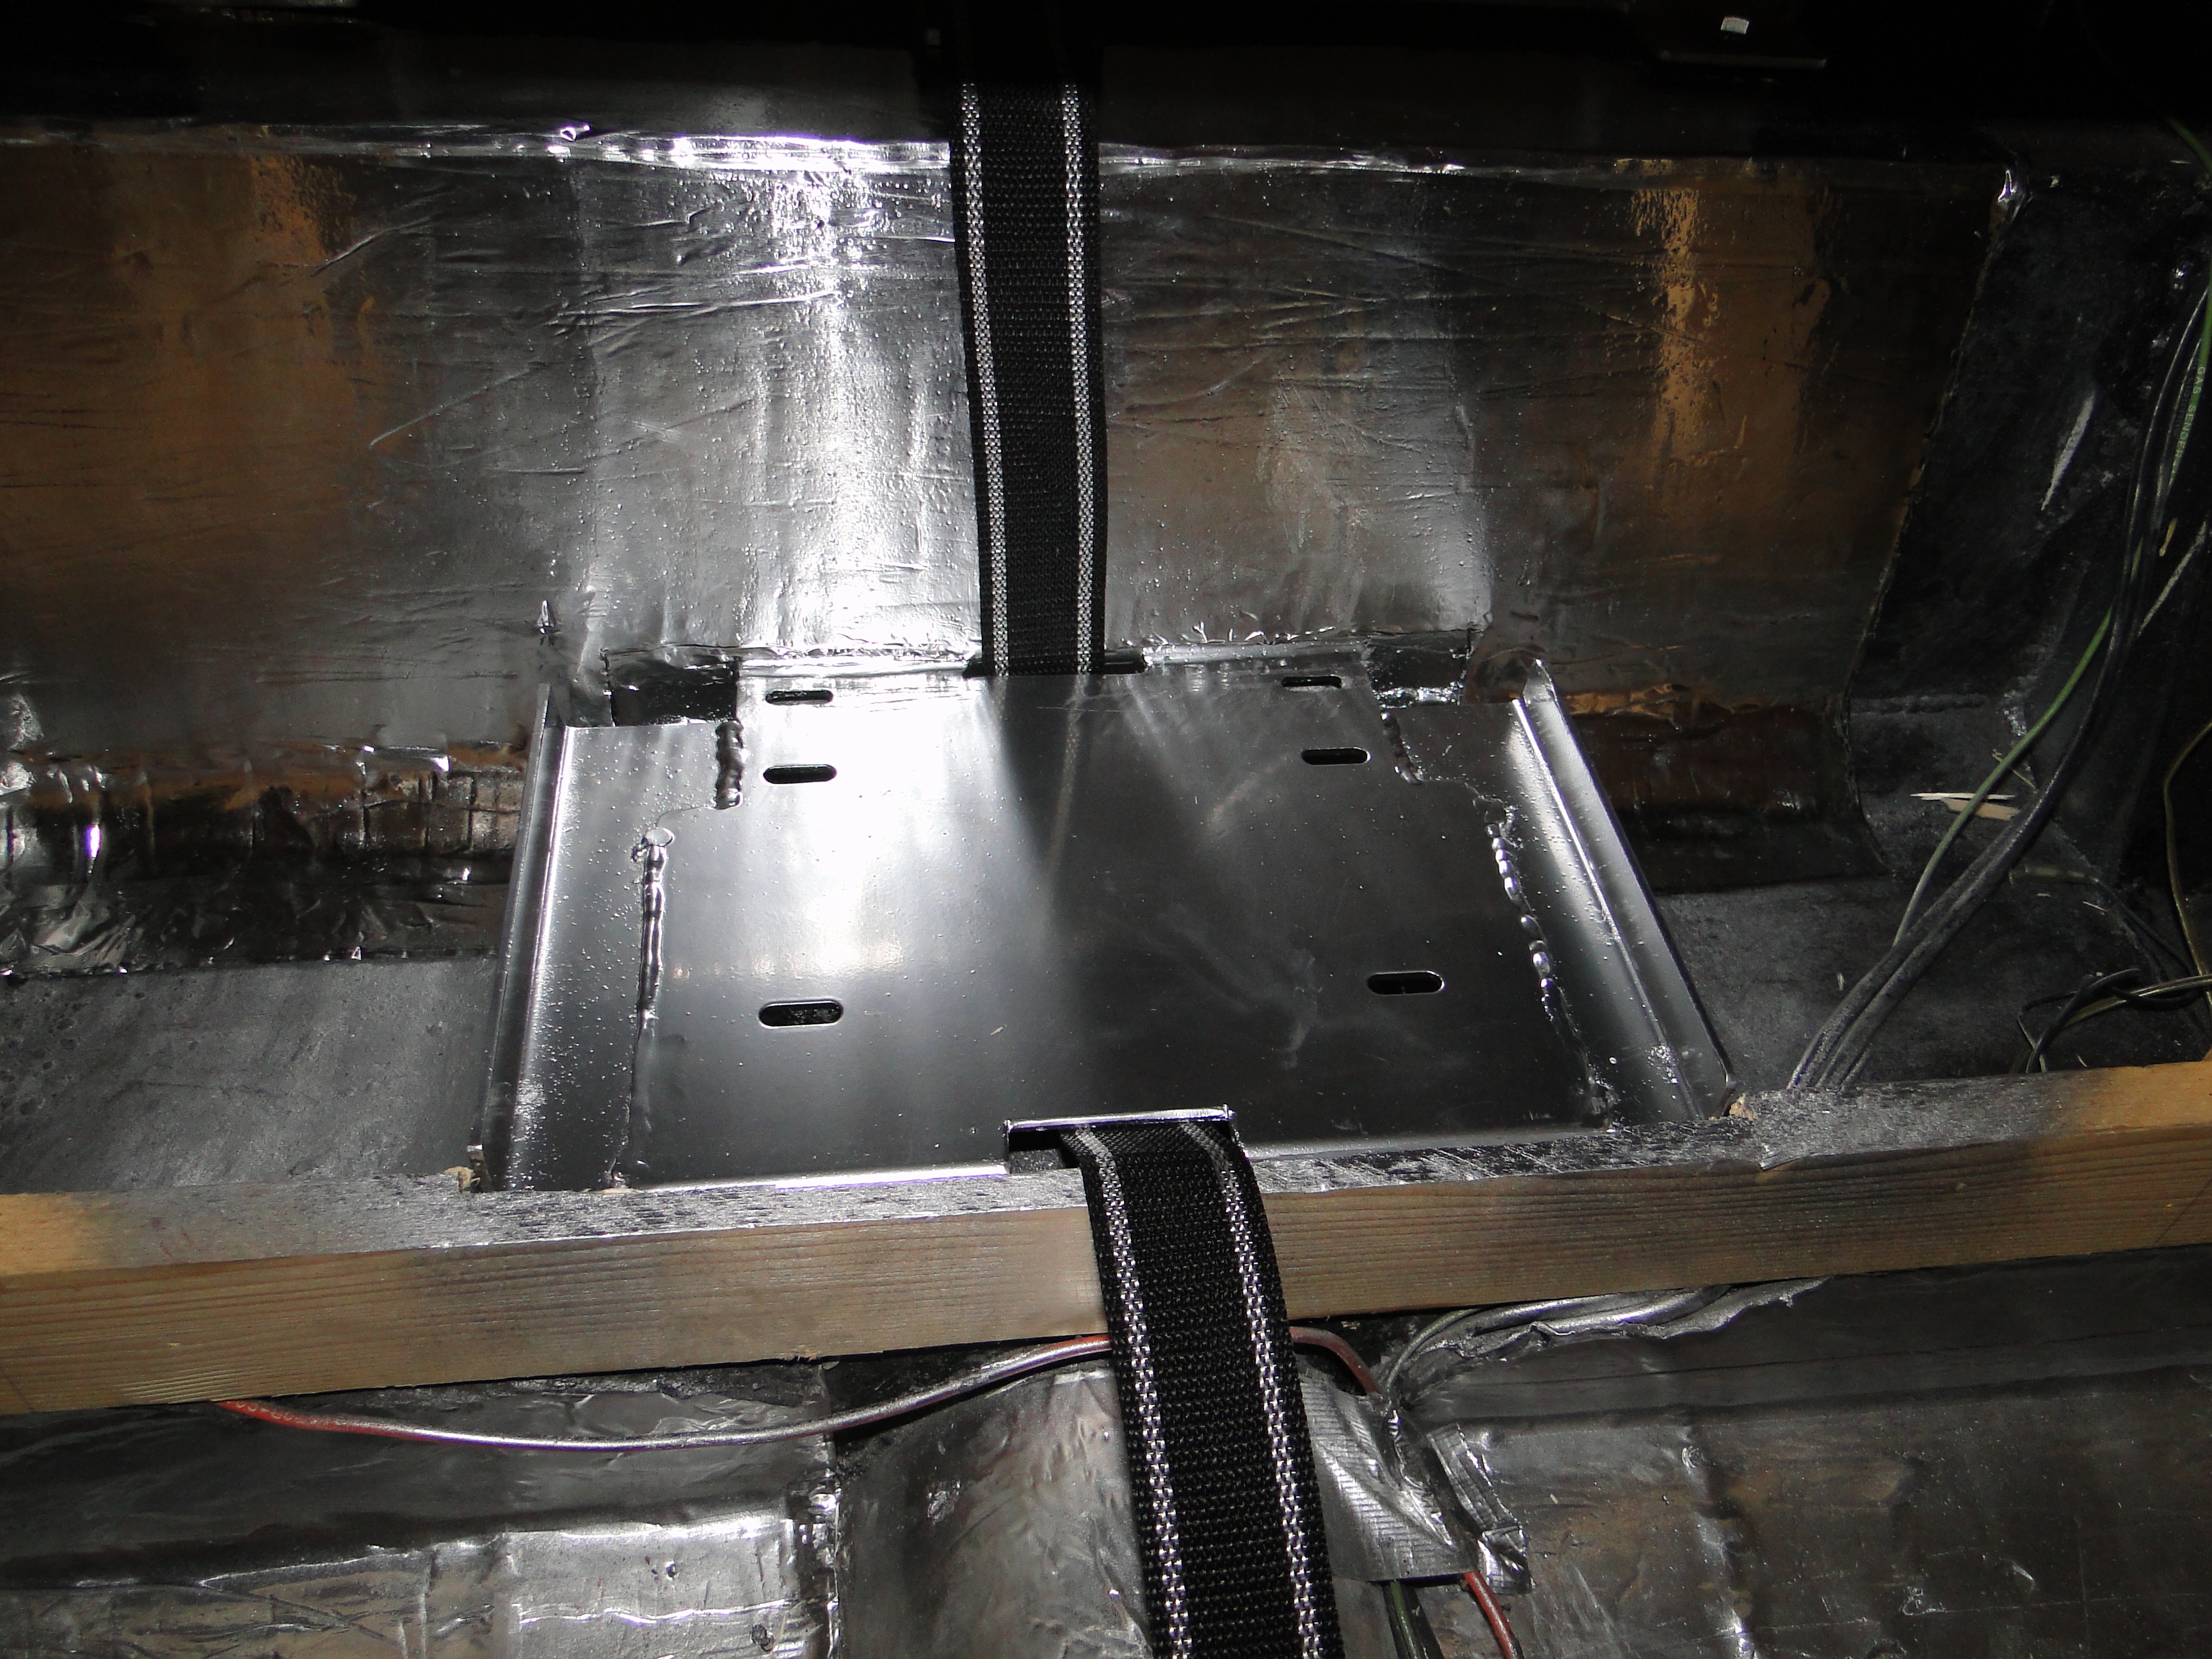
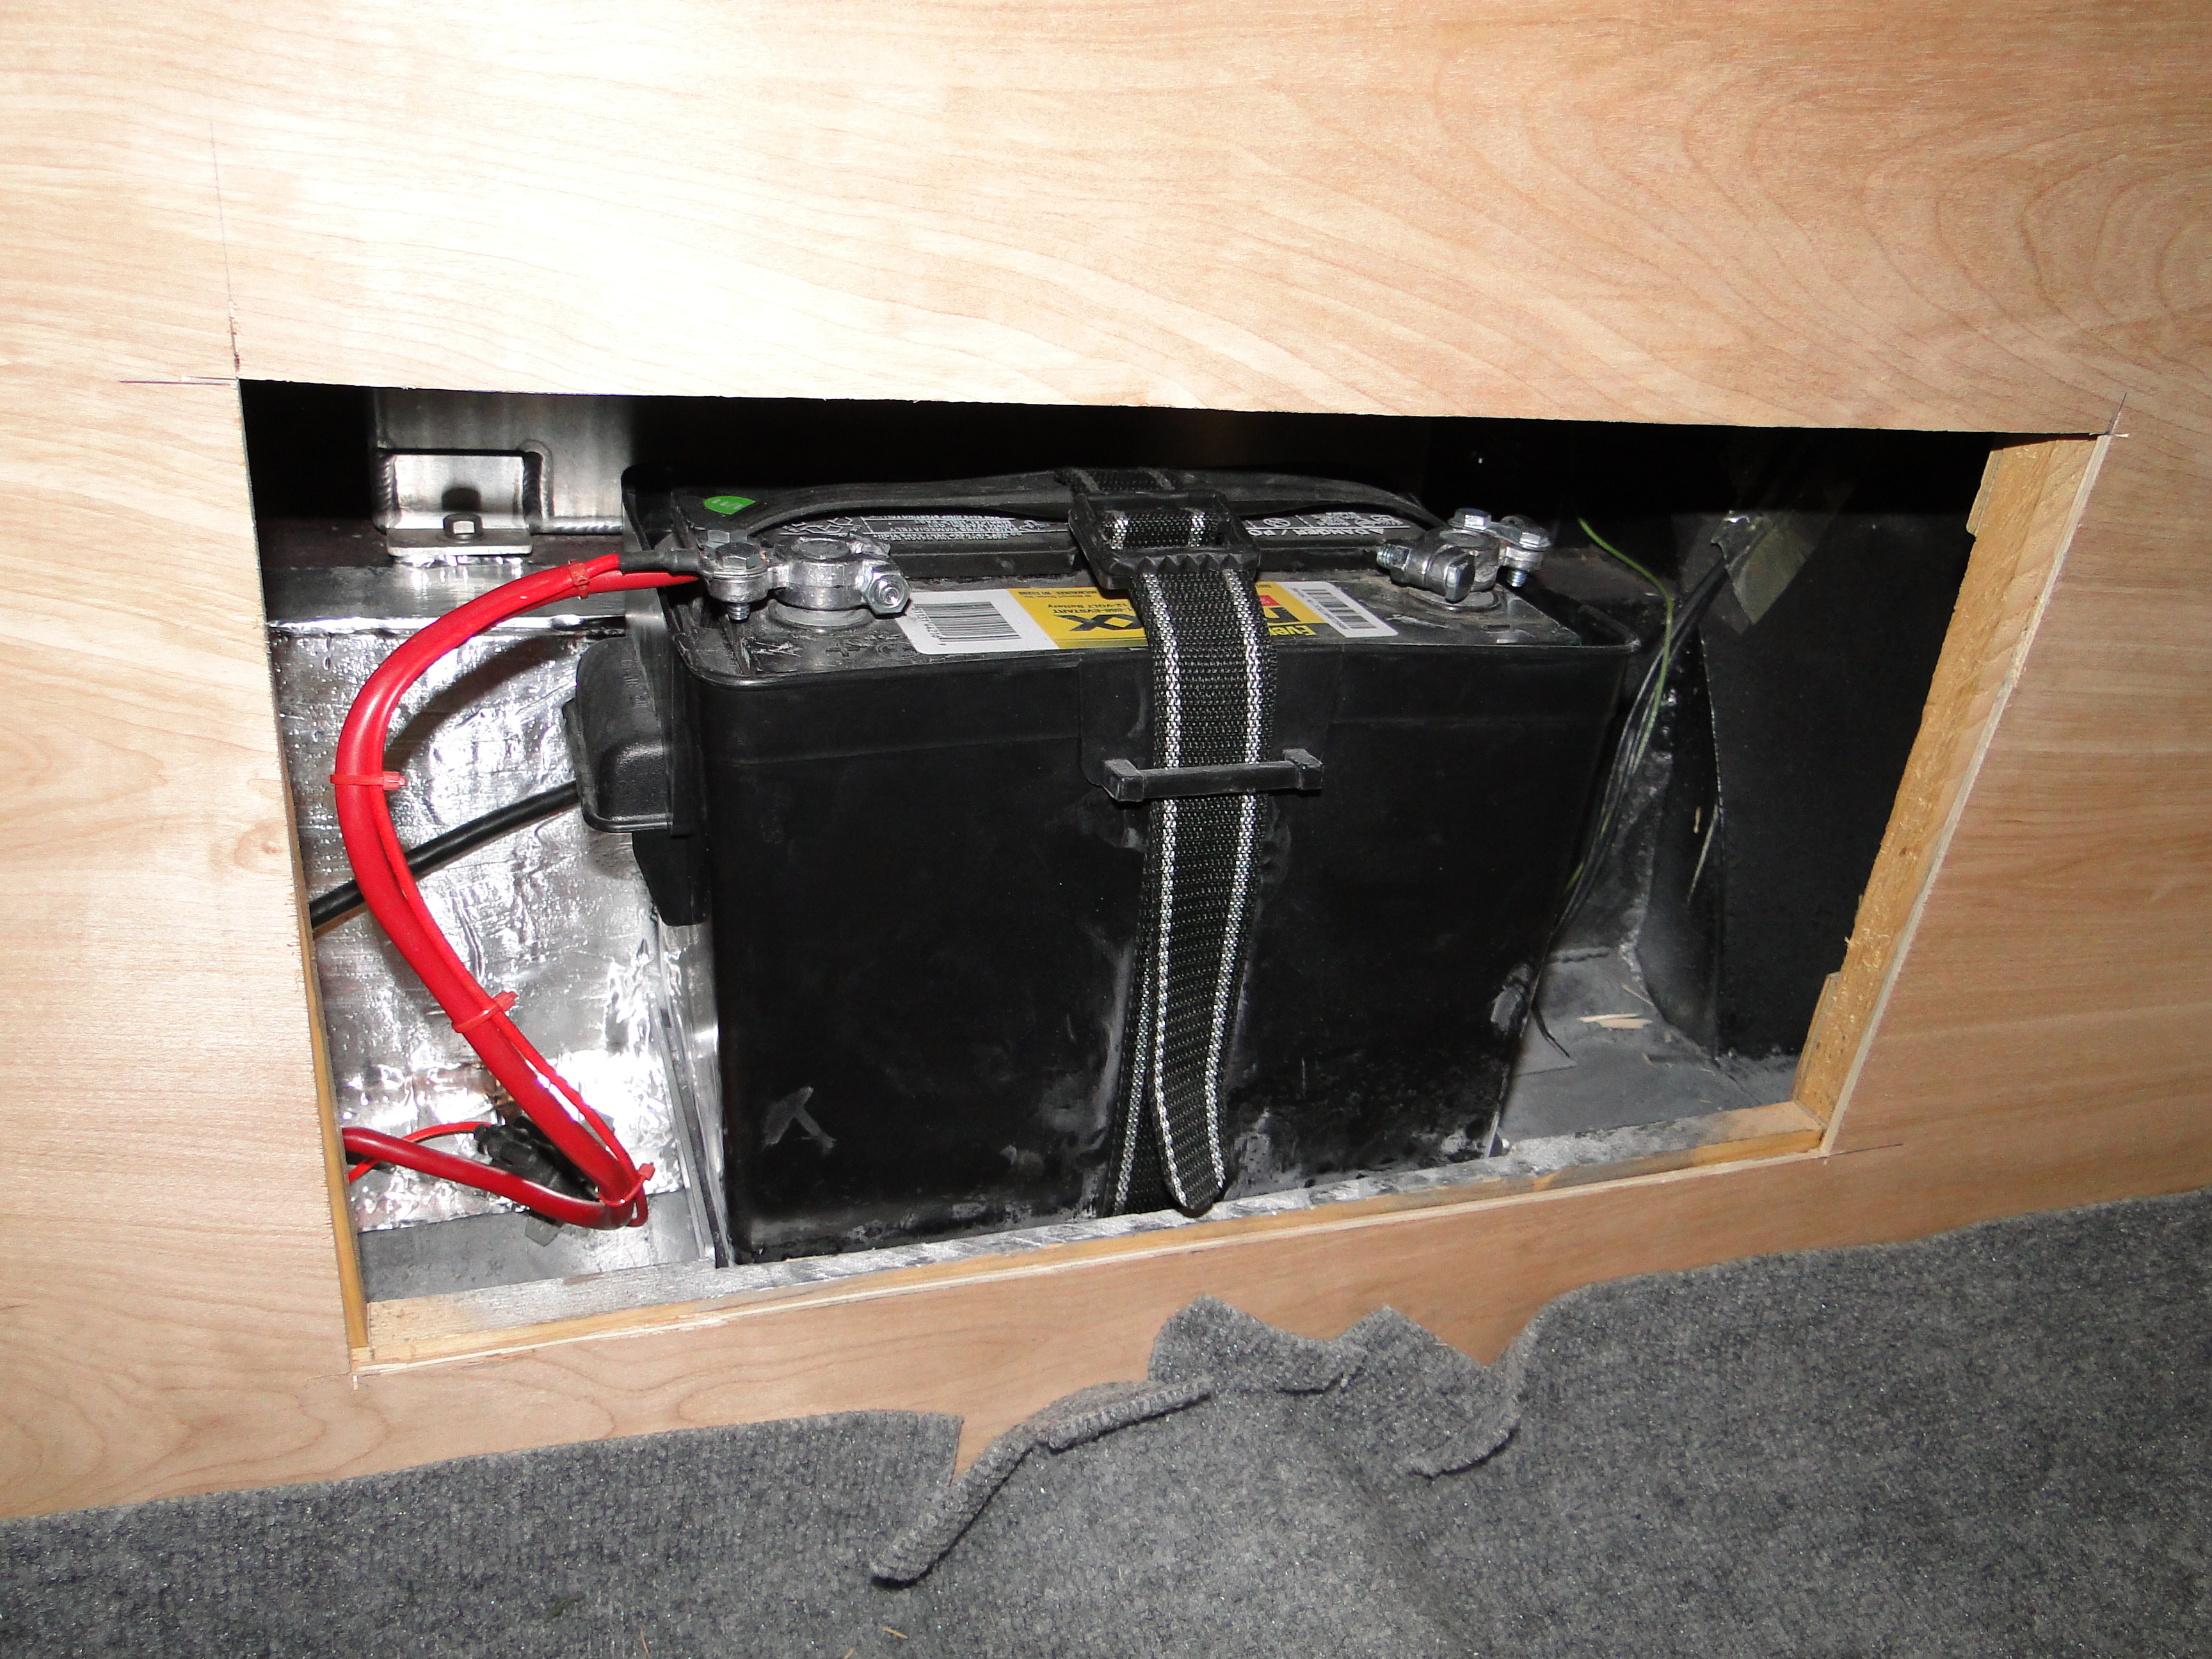
Interior Restoration Cab Rear
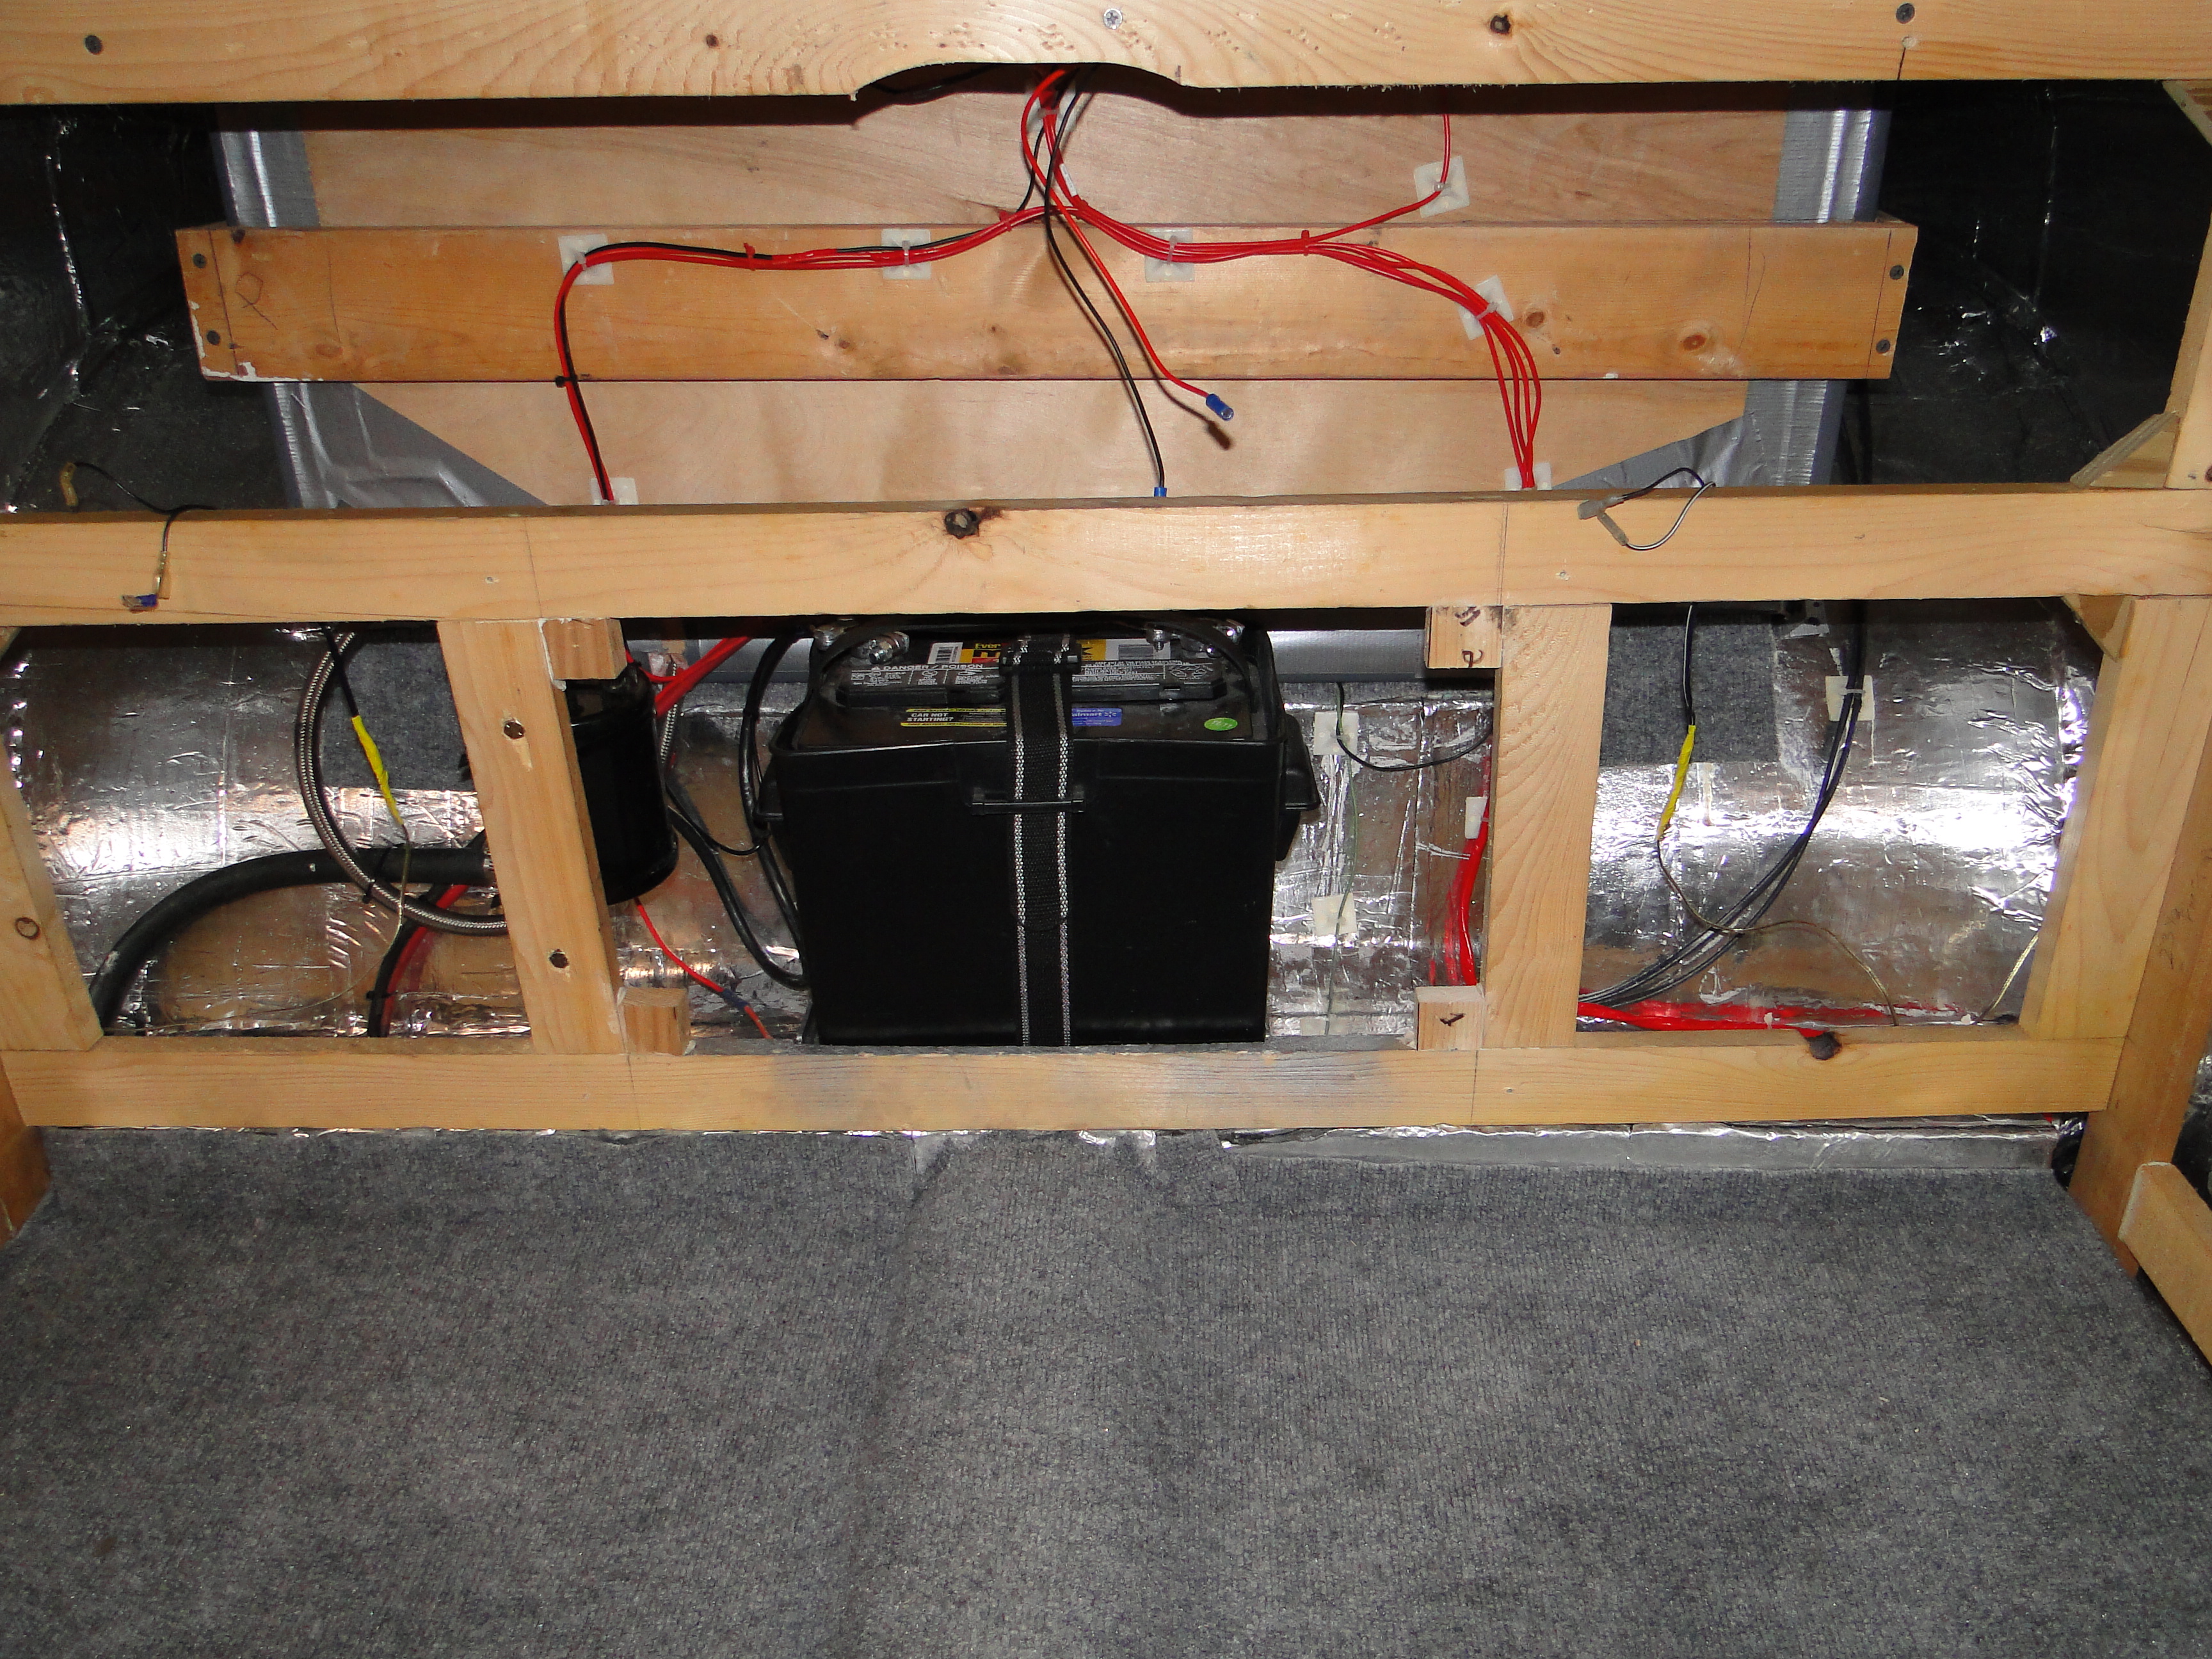
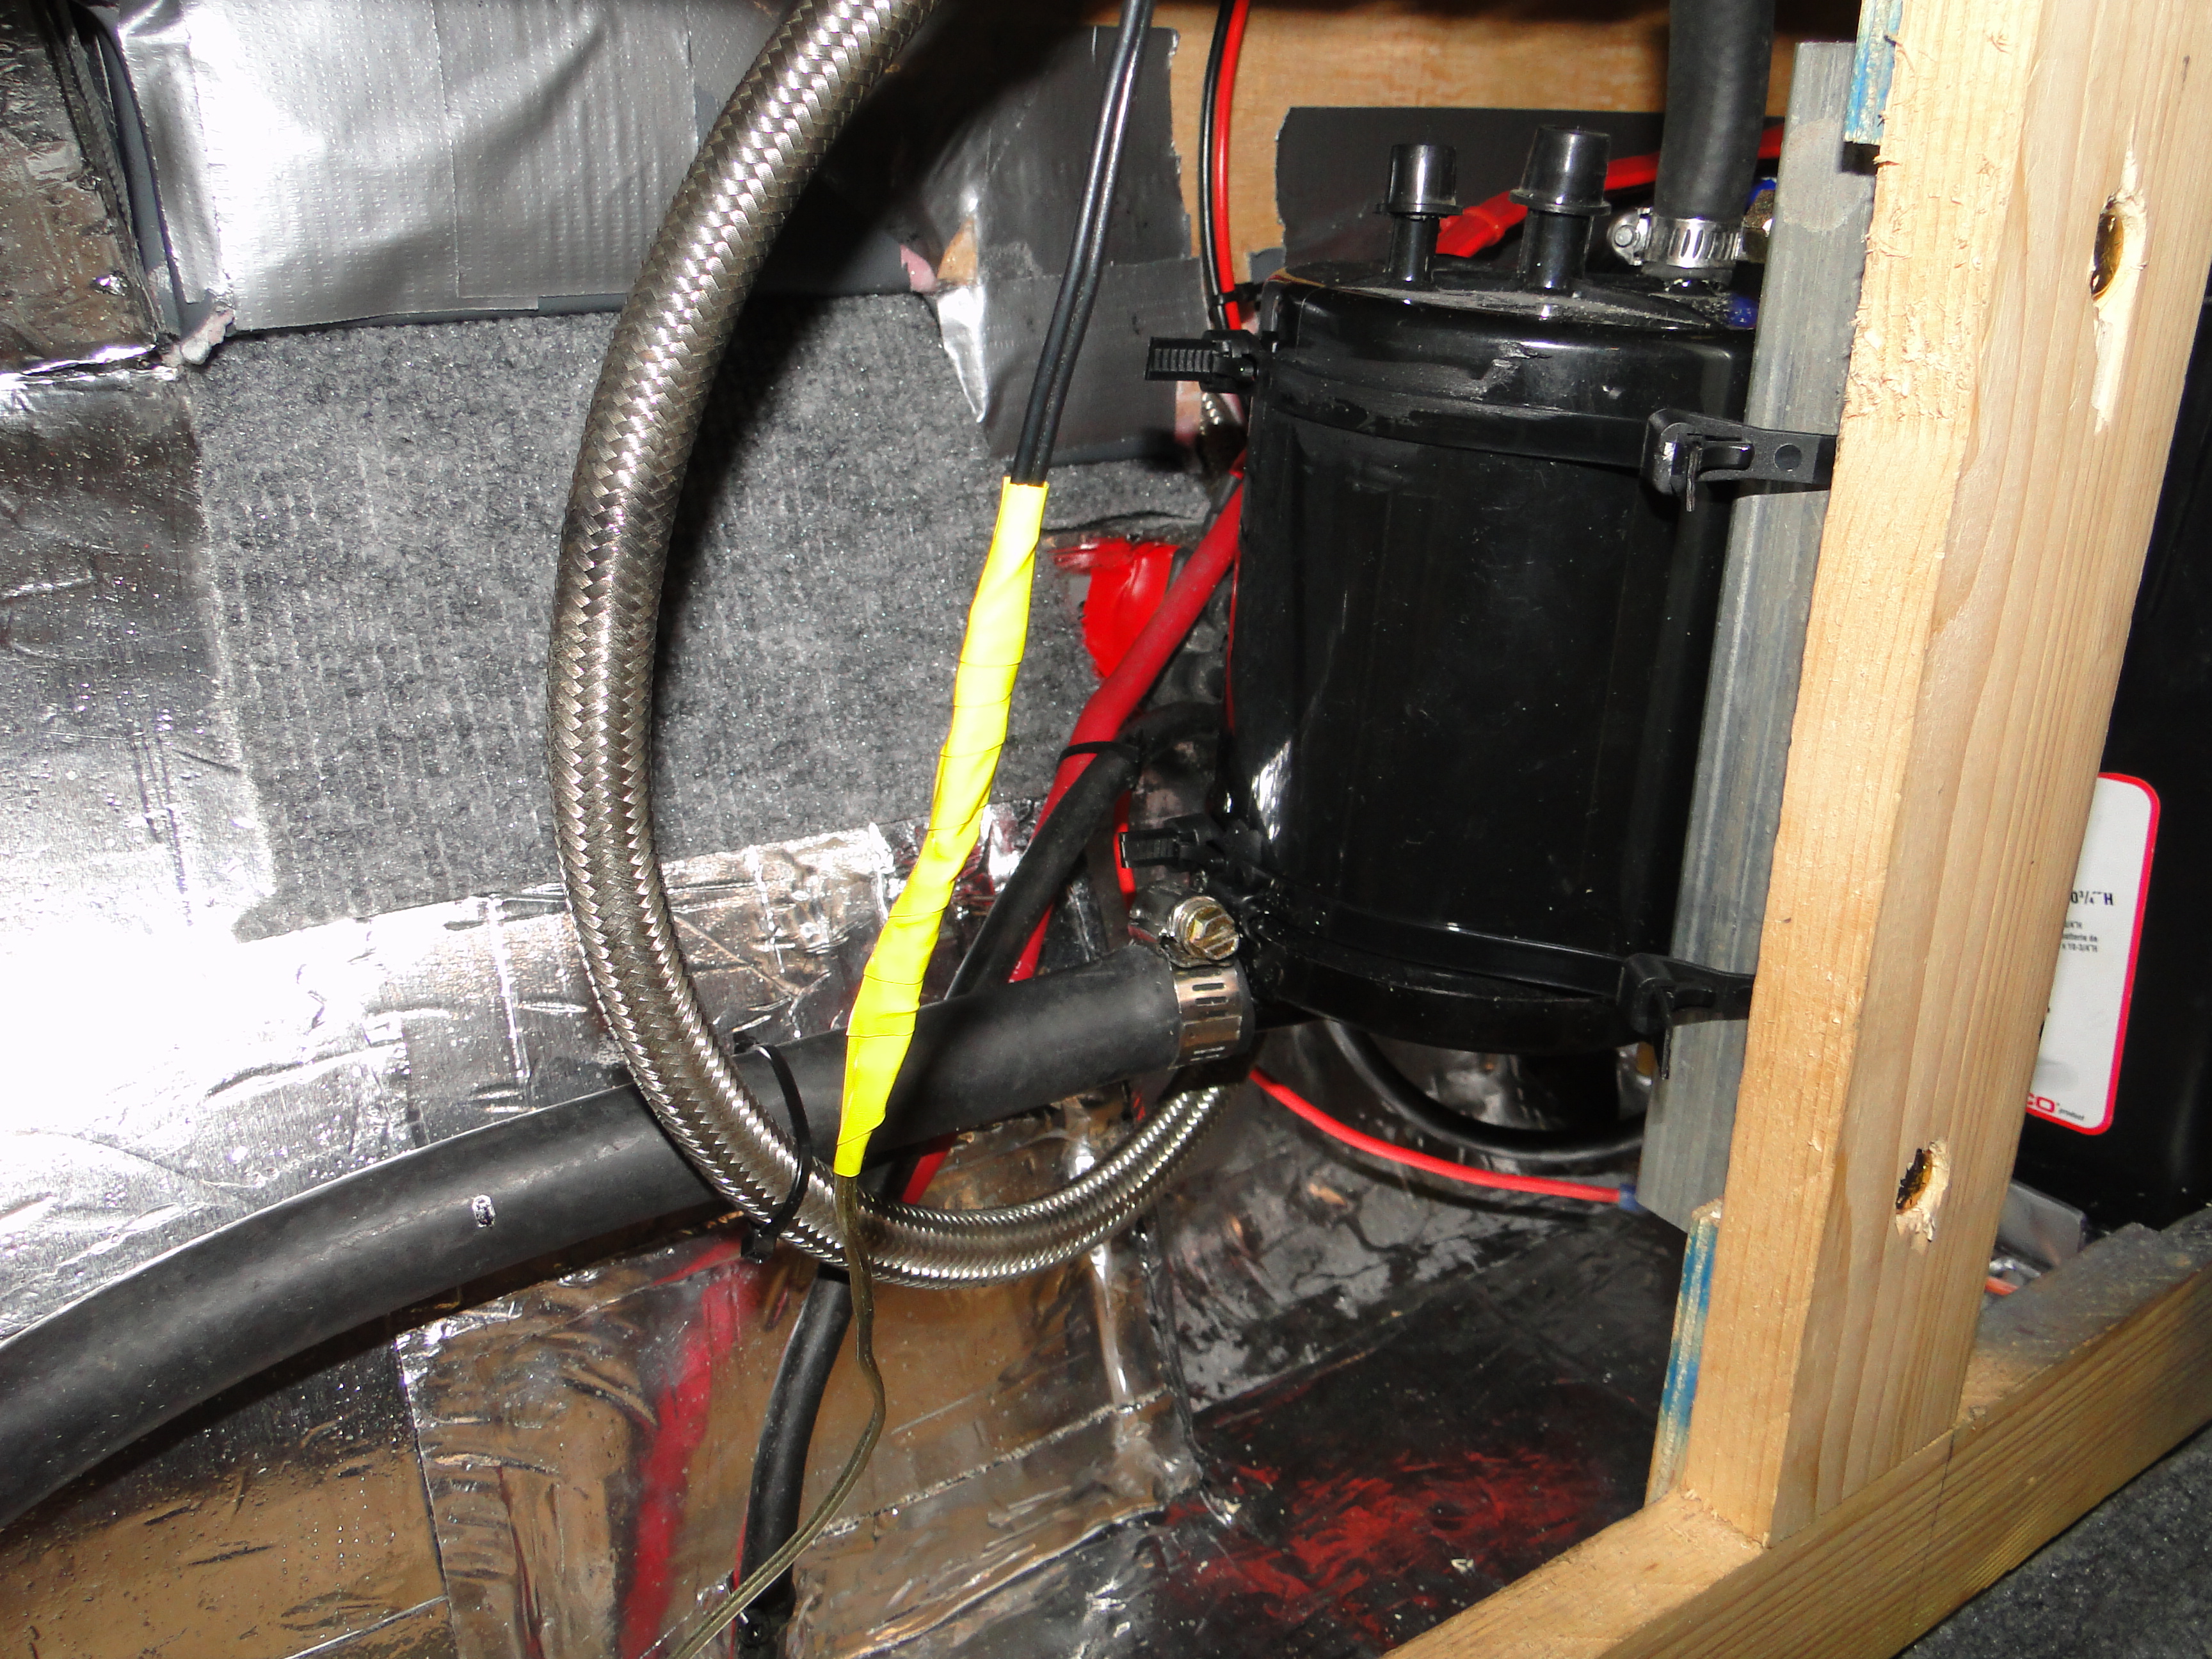
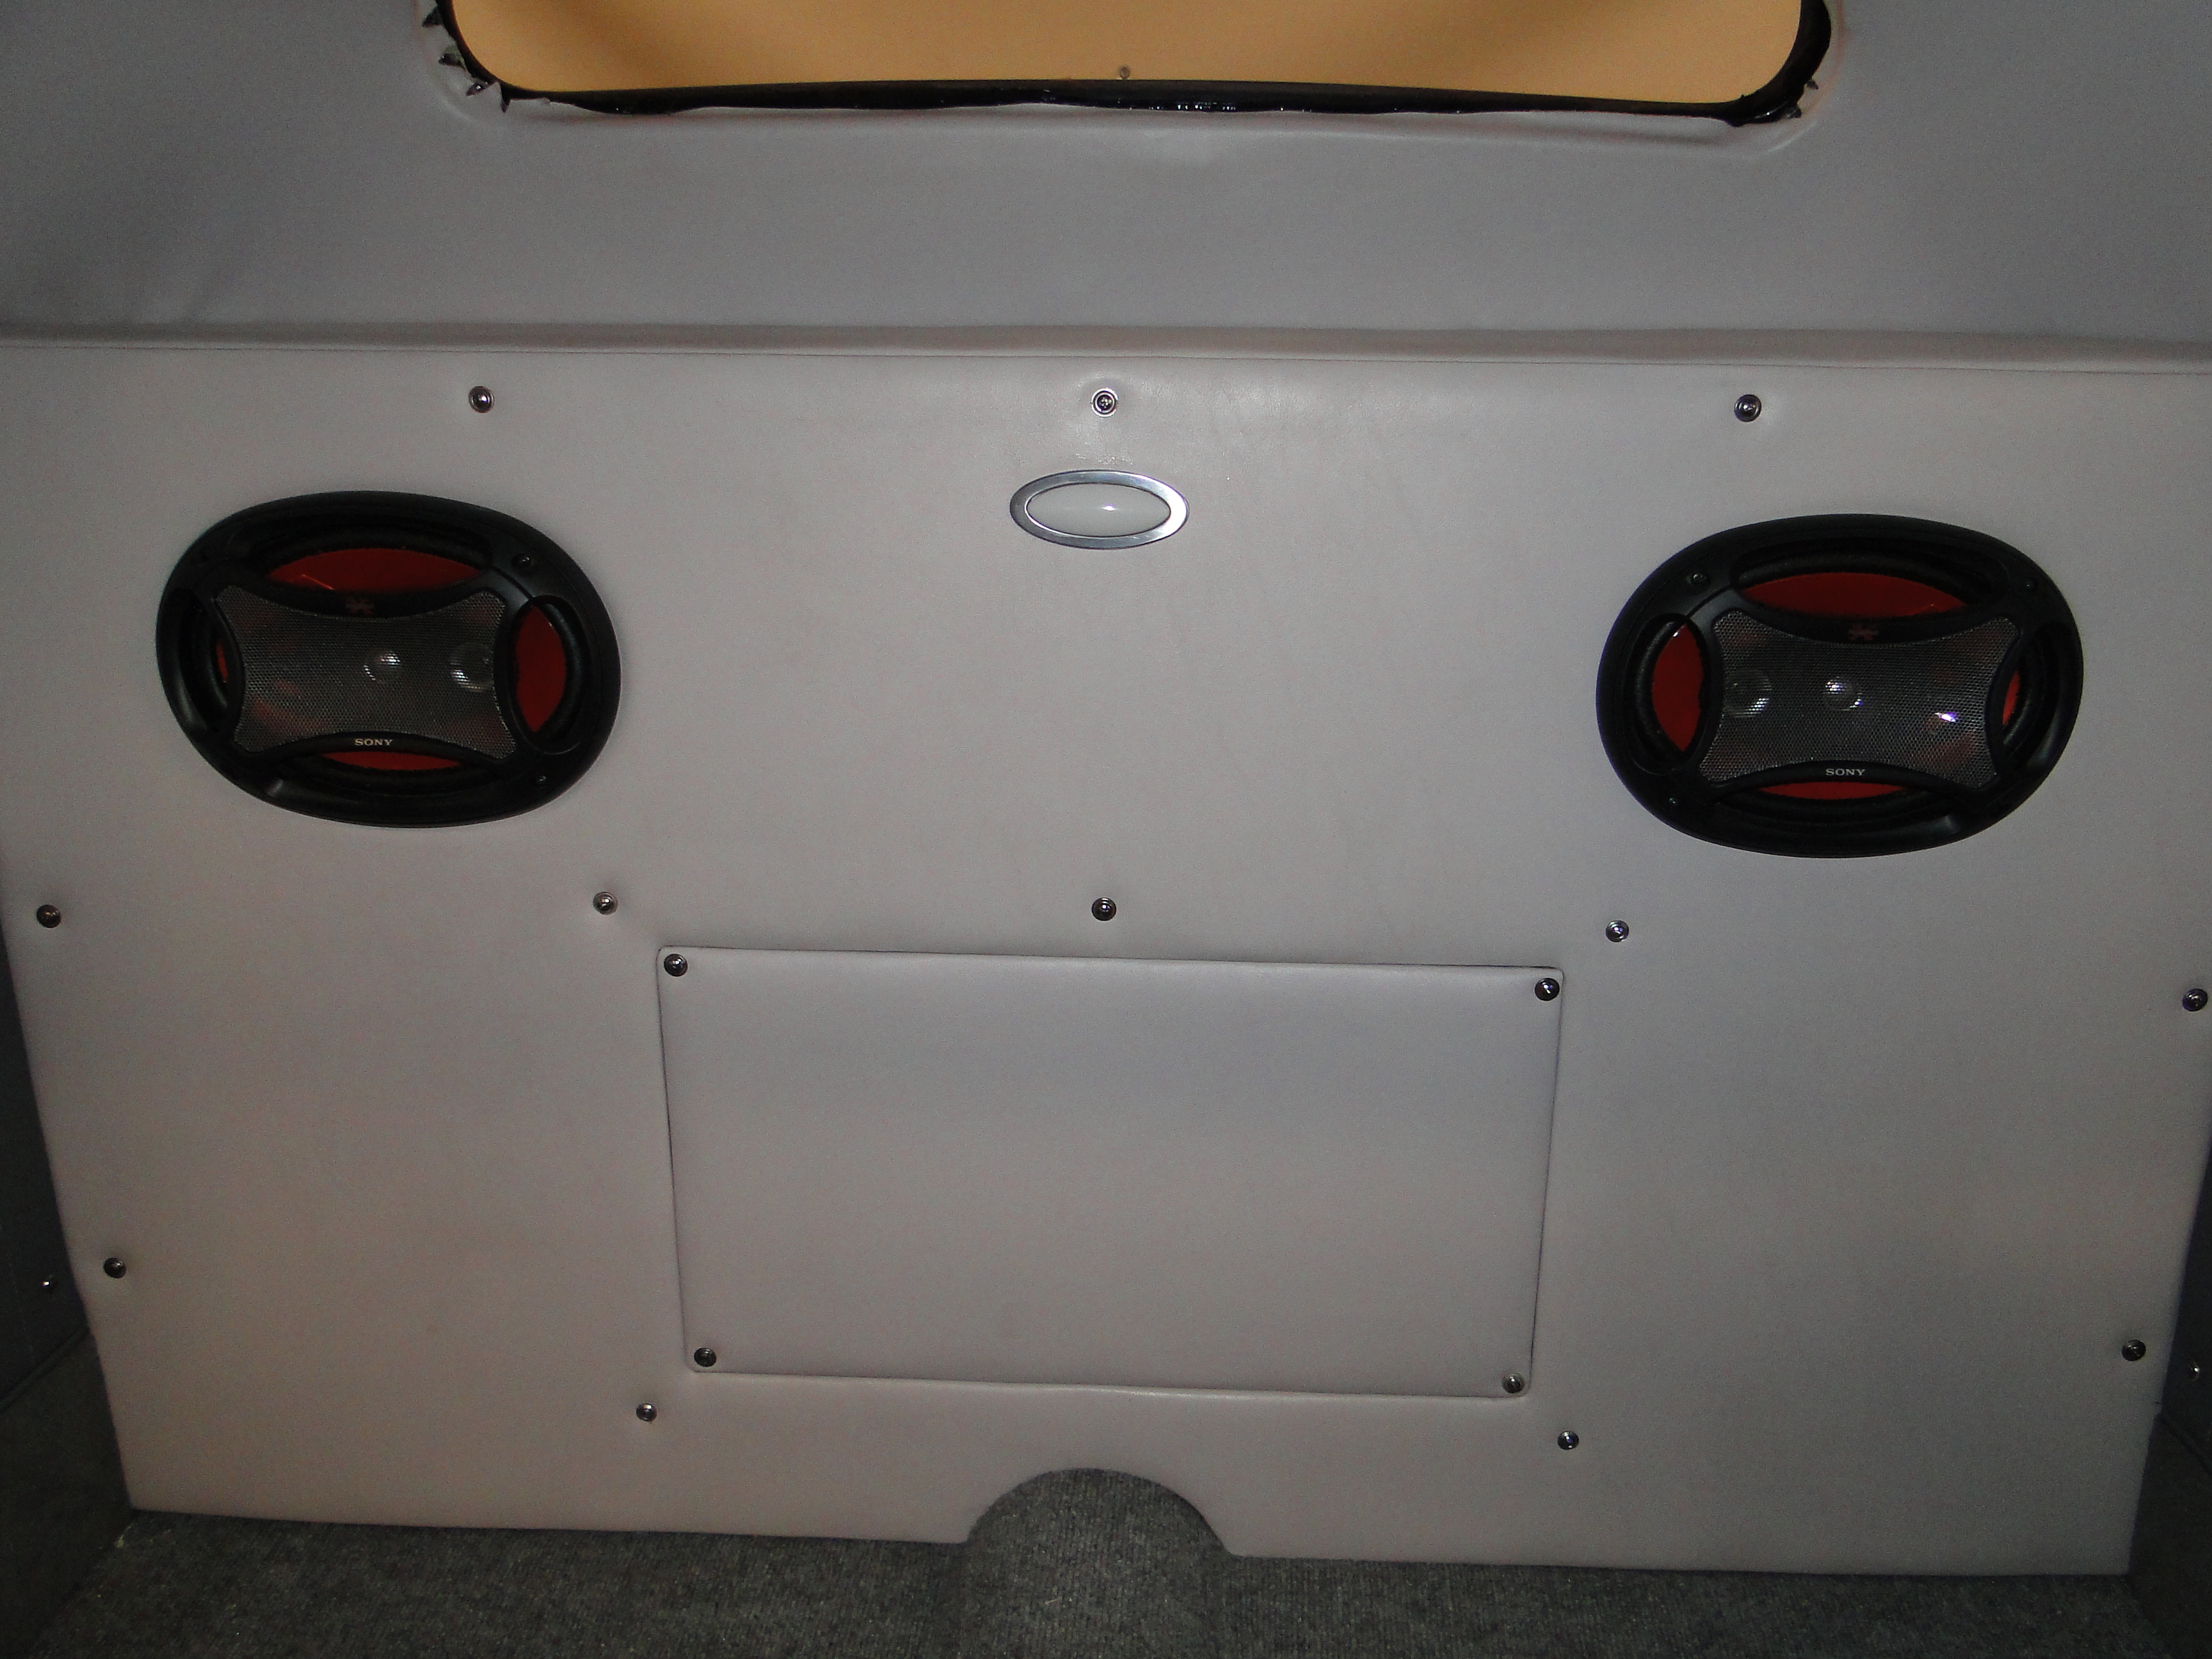
The area between the trunk and cab was next on my list. The battery mount was all ready to go, I needed to mount a charcoal filter for the fuel cell, which helps to remove any gas fumes that would be discharged in my garage from the fuel cell. The wiring for stereo speakers, doors, and trunk lid switches to power the interior lighting was completed. Finally the new rear top, rear back, and rear side panels were installed.
Click any picture to enlarge.
|
|
|
|
|
|
April
Interior Restoration Cab Forward
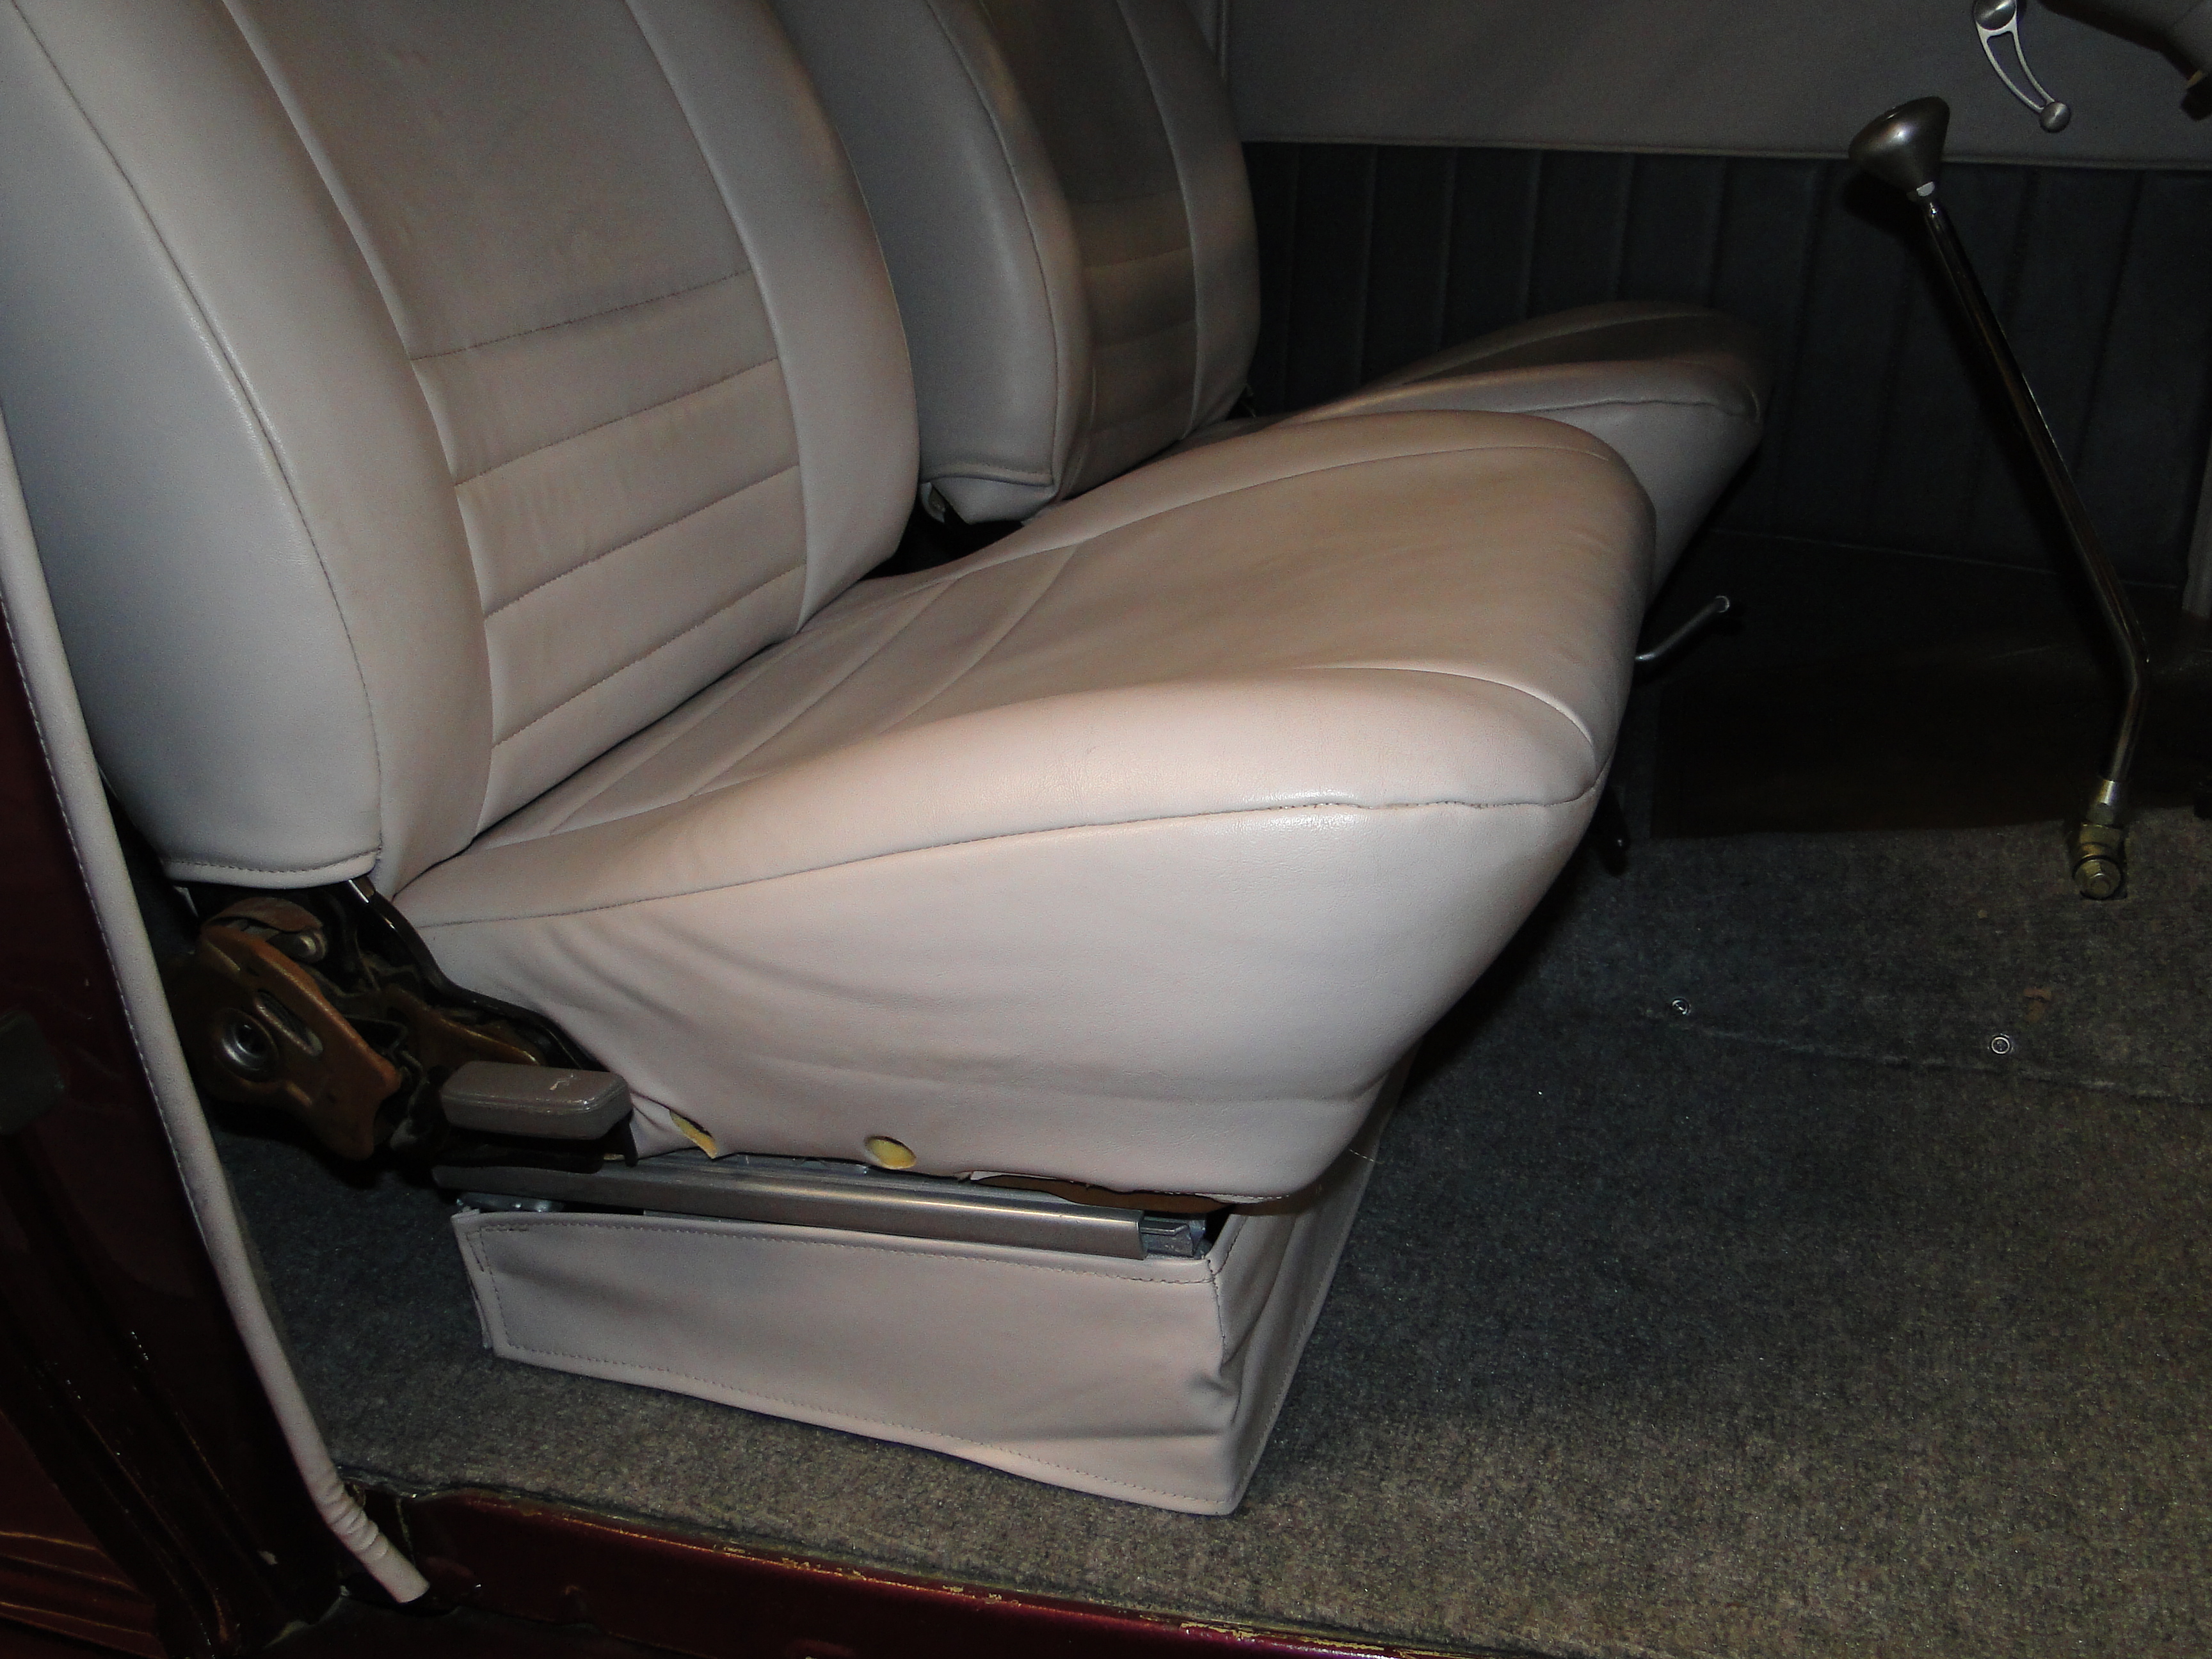
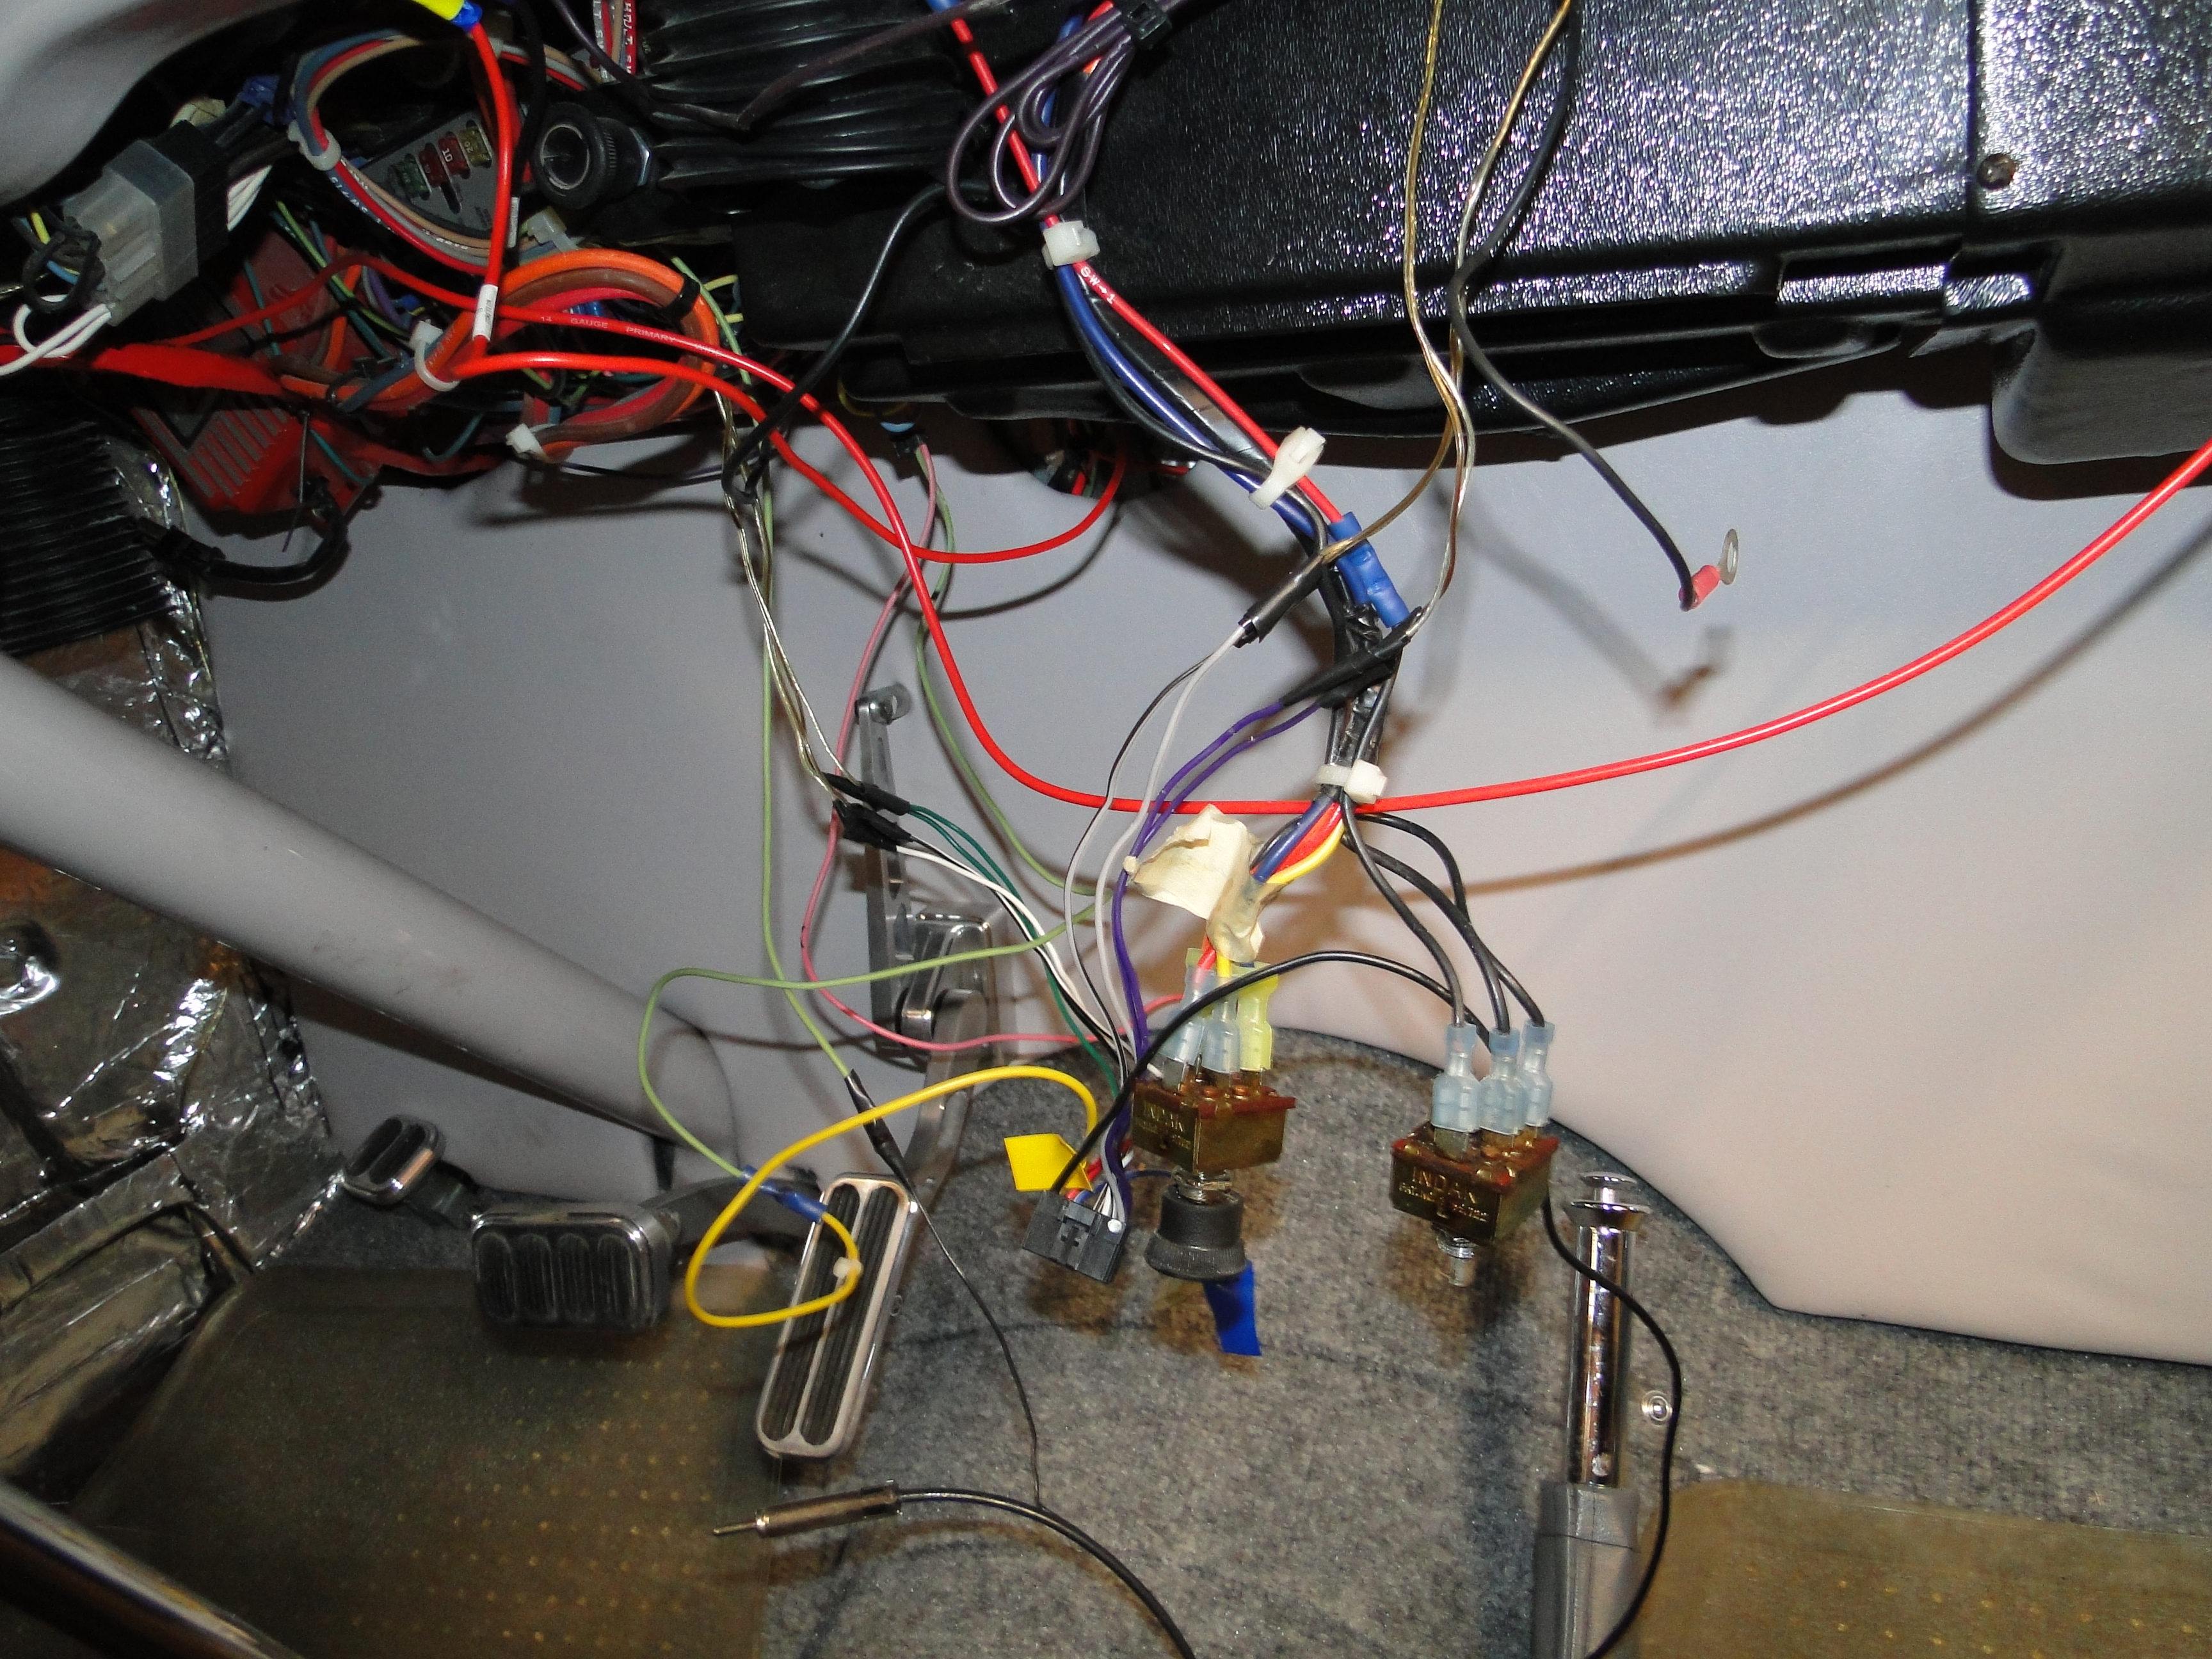
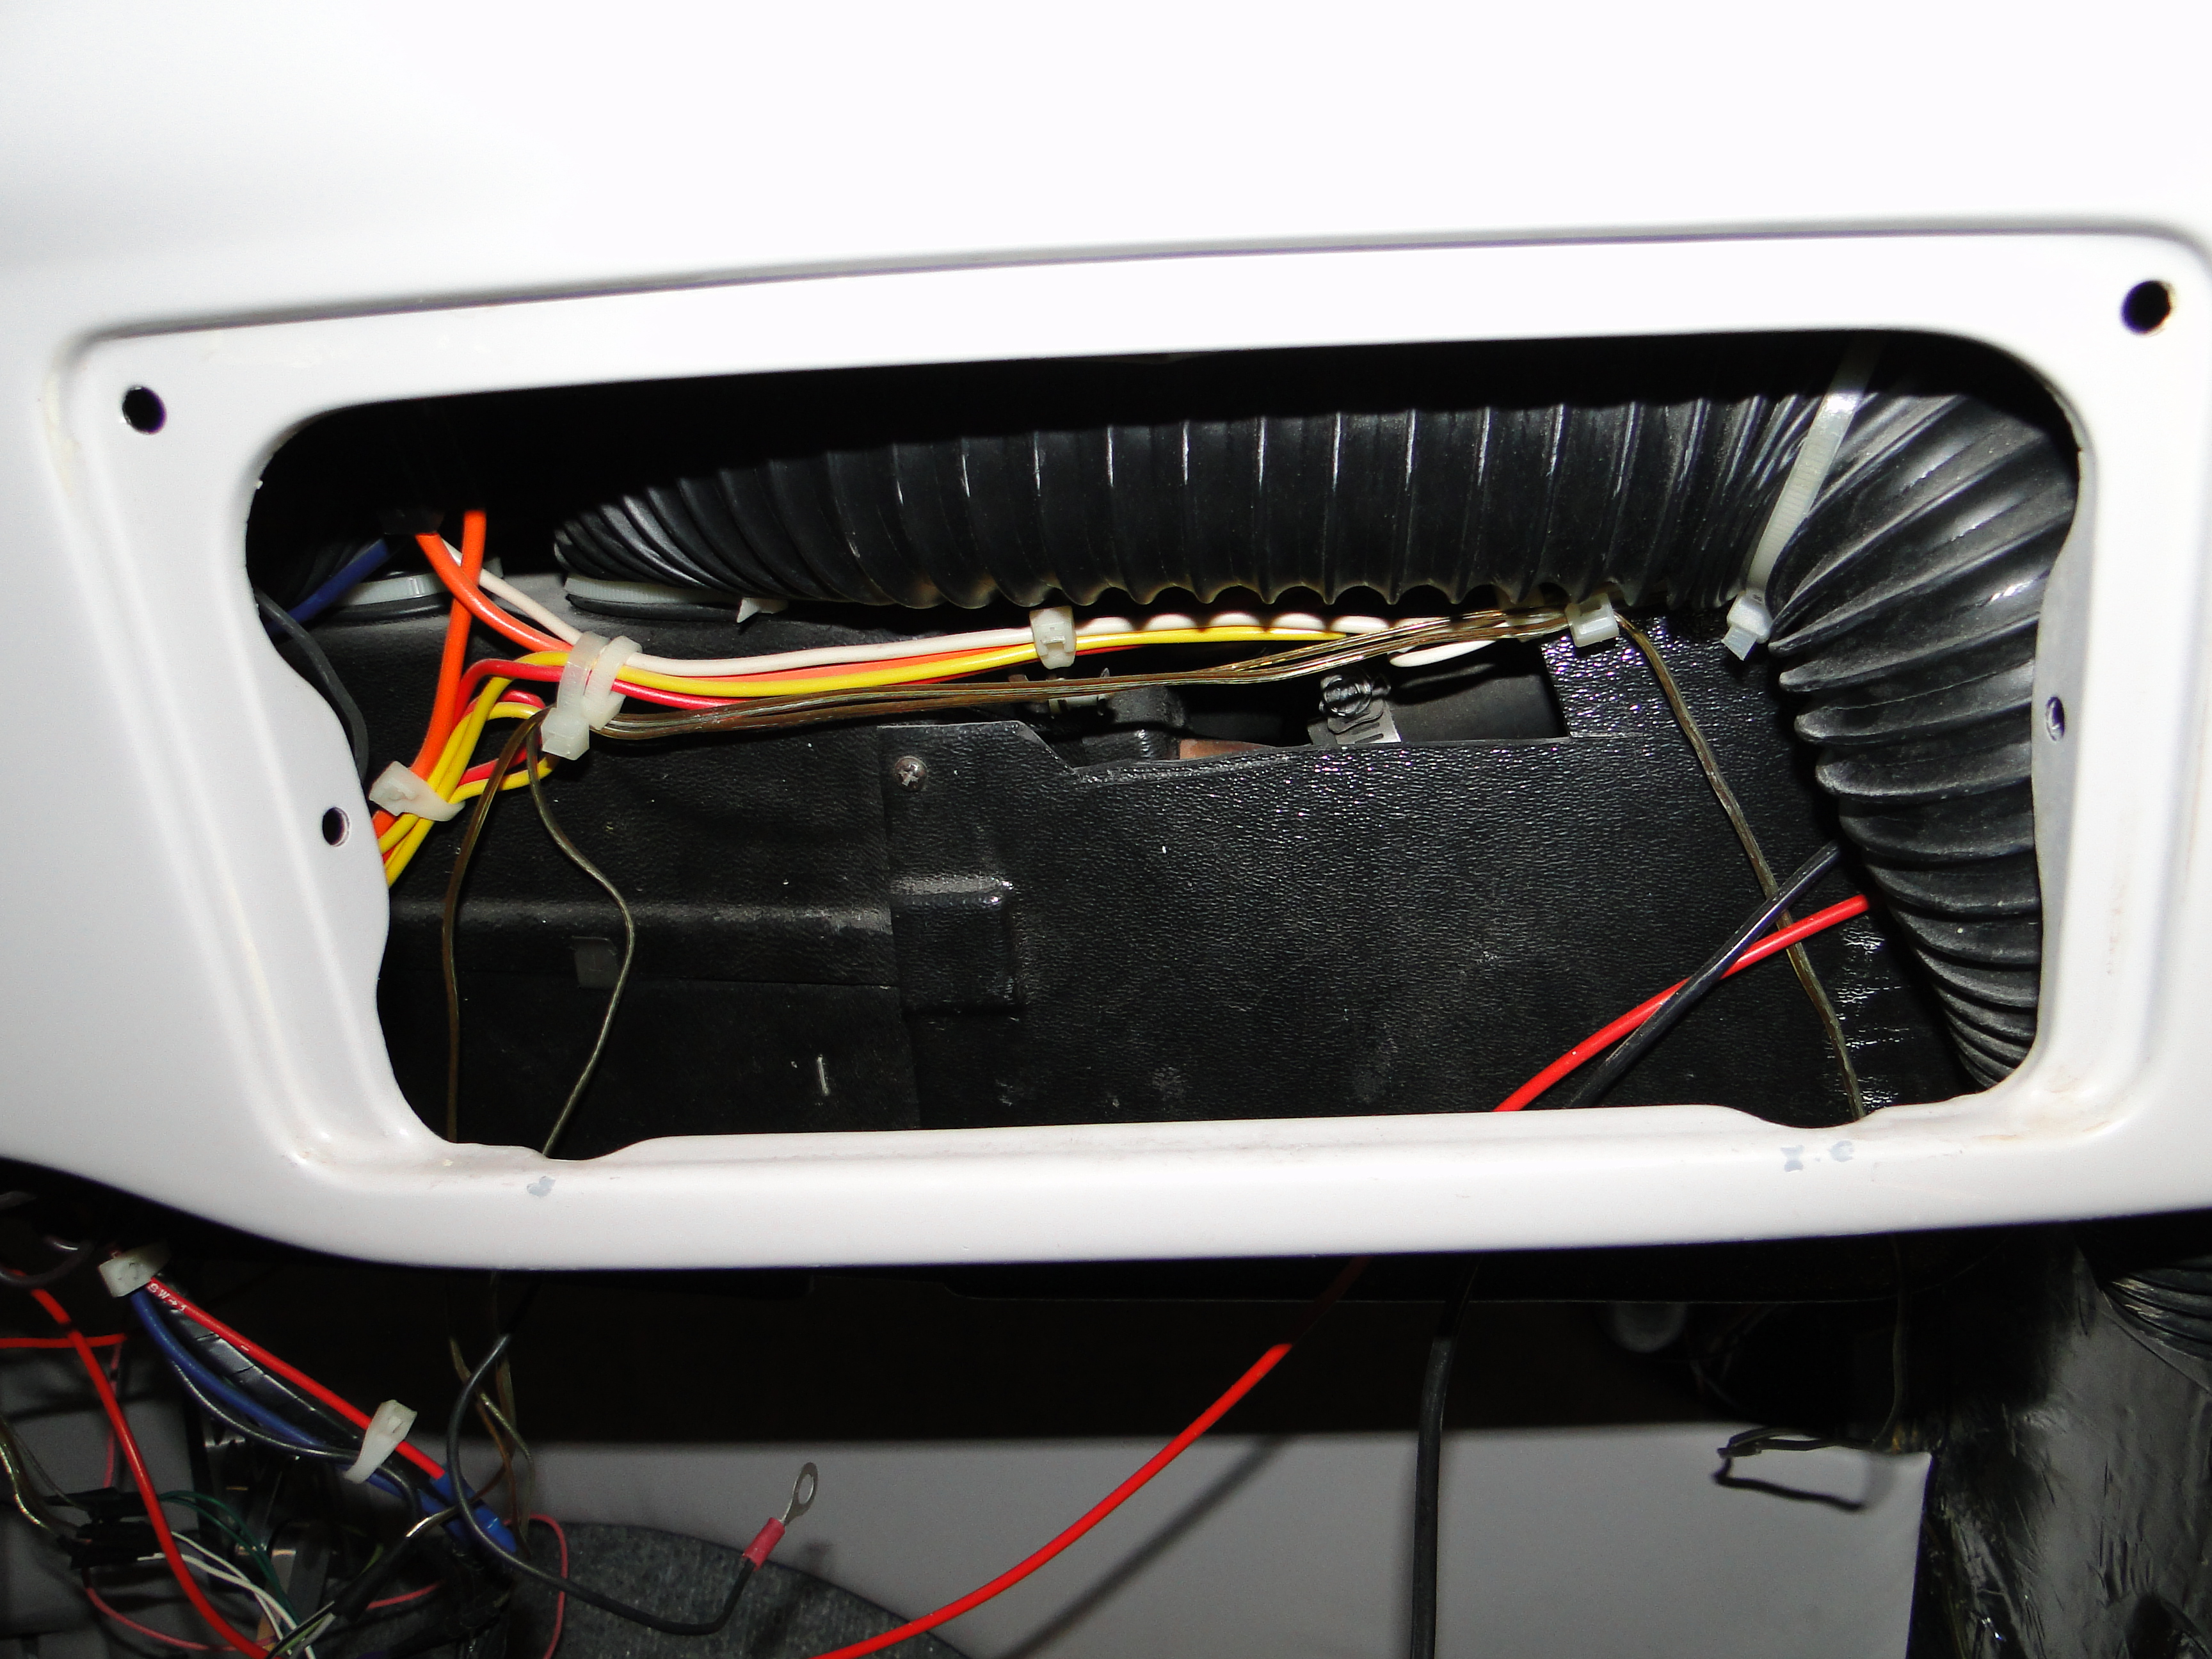
The seats are now back in, I have mounted the lower seat skirt covers, and I still need to find the plastic seat lever covers. I made a new firewall panel for the front, and Lil has made new side panels for the cabin floor. My solution for the air-conditioning switches, that were just hanging down from the dash, is not to mount them on the dash, I will use the inside of the clove box to mount the control switches. I made a recessed box to fit inside the glove box for the three switches, and predrilled an smaller pilot hole for future uses. Then I painted the box to match the interior. I also installed the cab and trunk dome lights, and ran wires for the front speakers to fit in the new floor panels.
Click any picture to enlarge.
|
|
|
|
|
|
|
Engine Starting, And Performance Issues Part 2
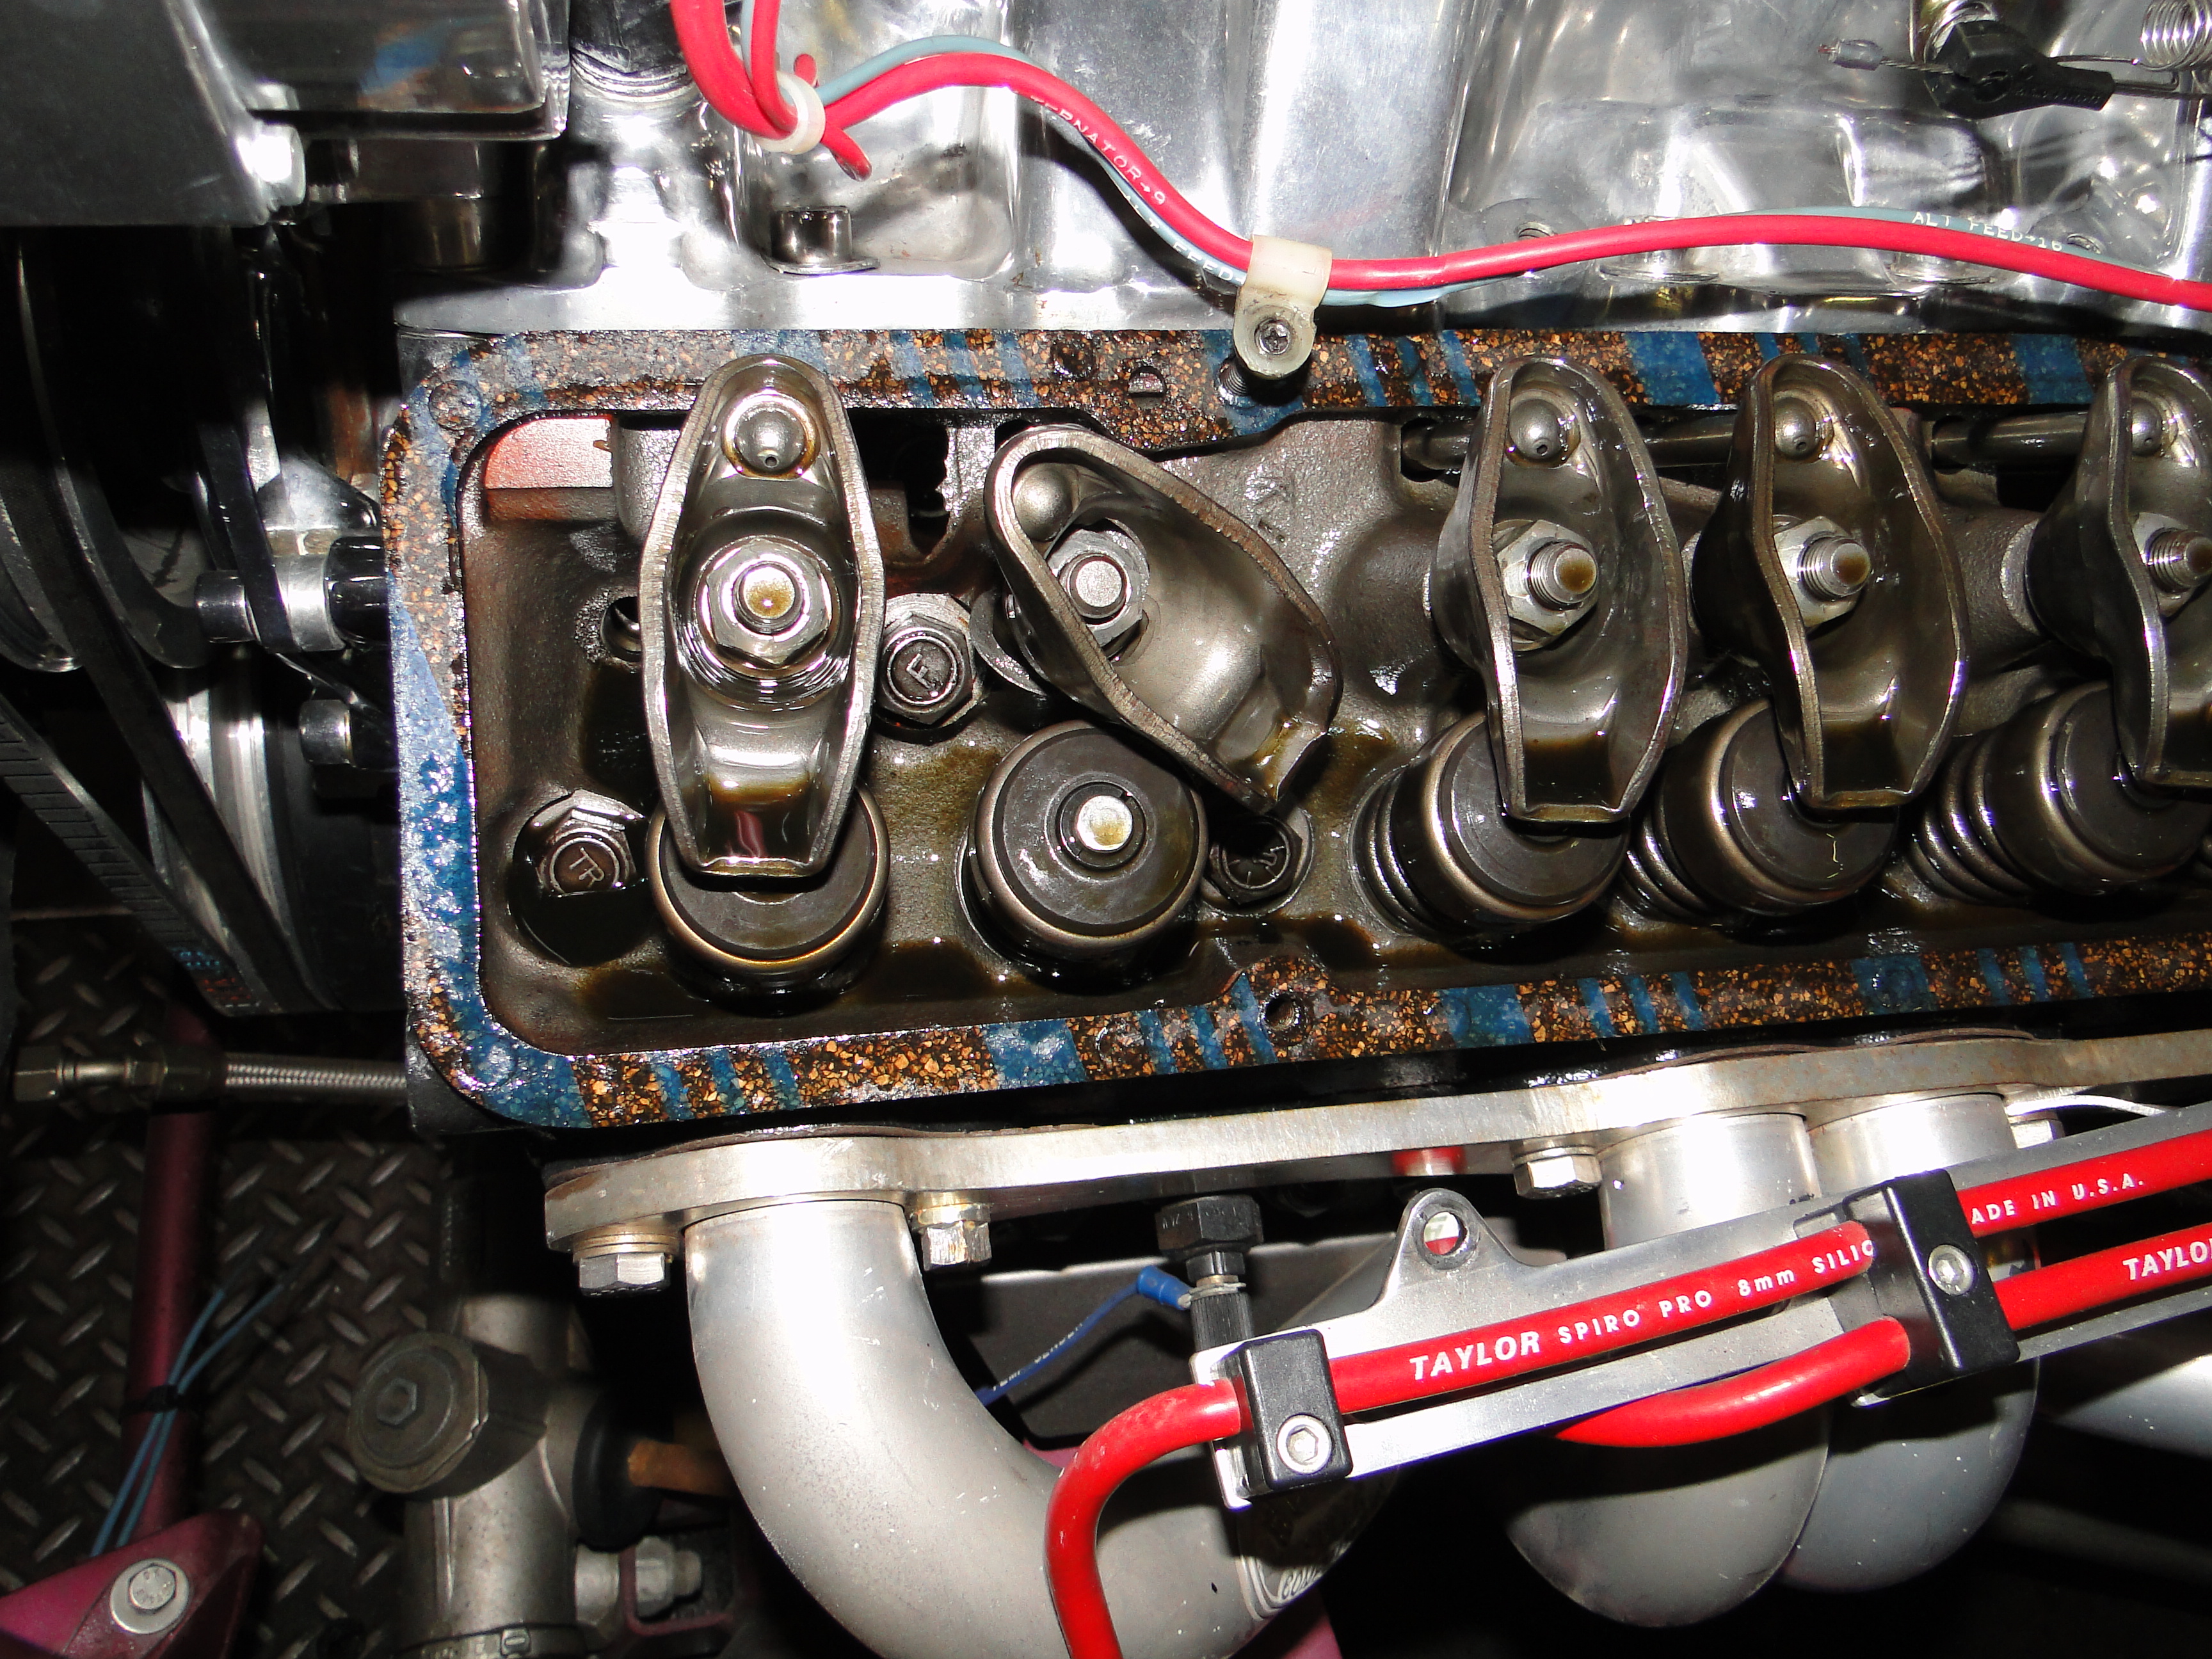
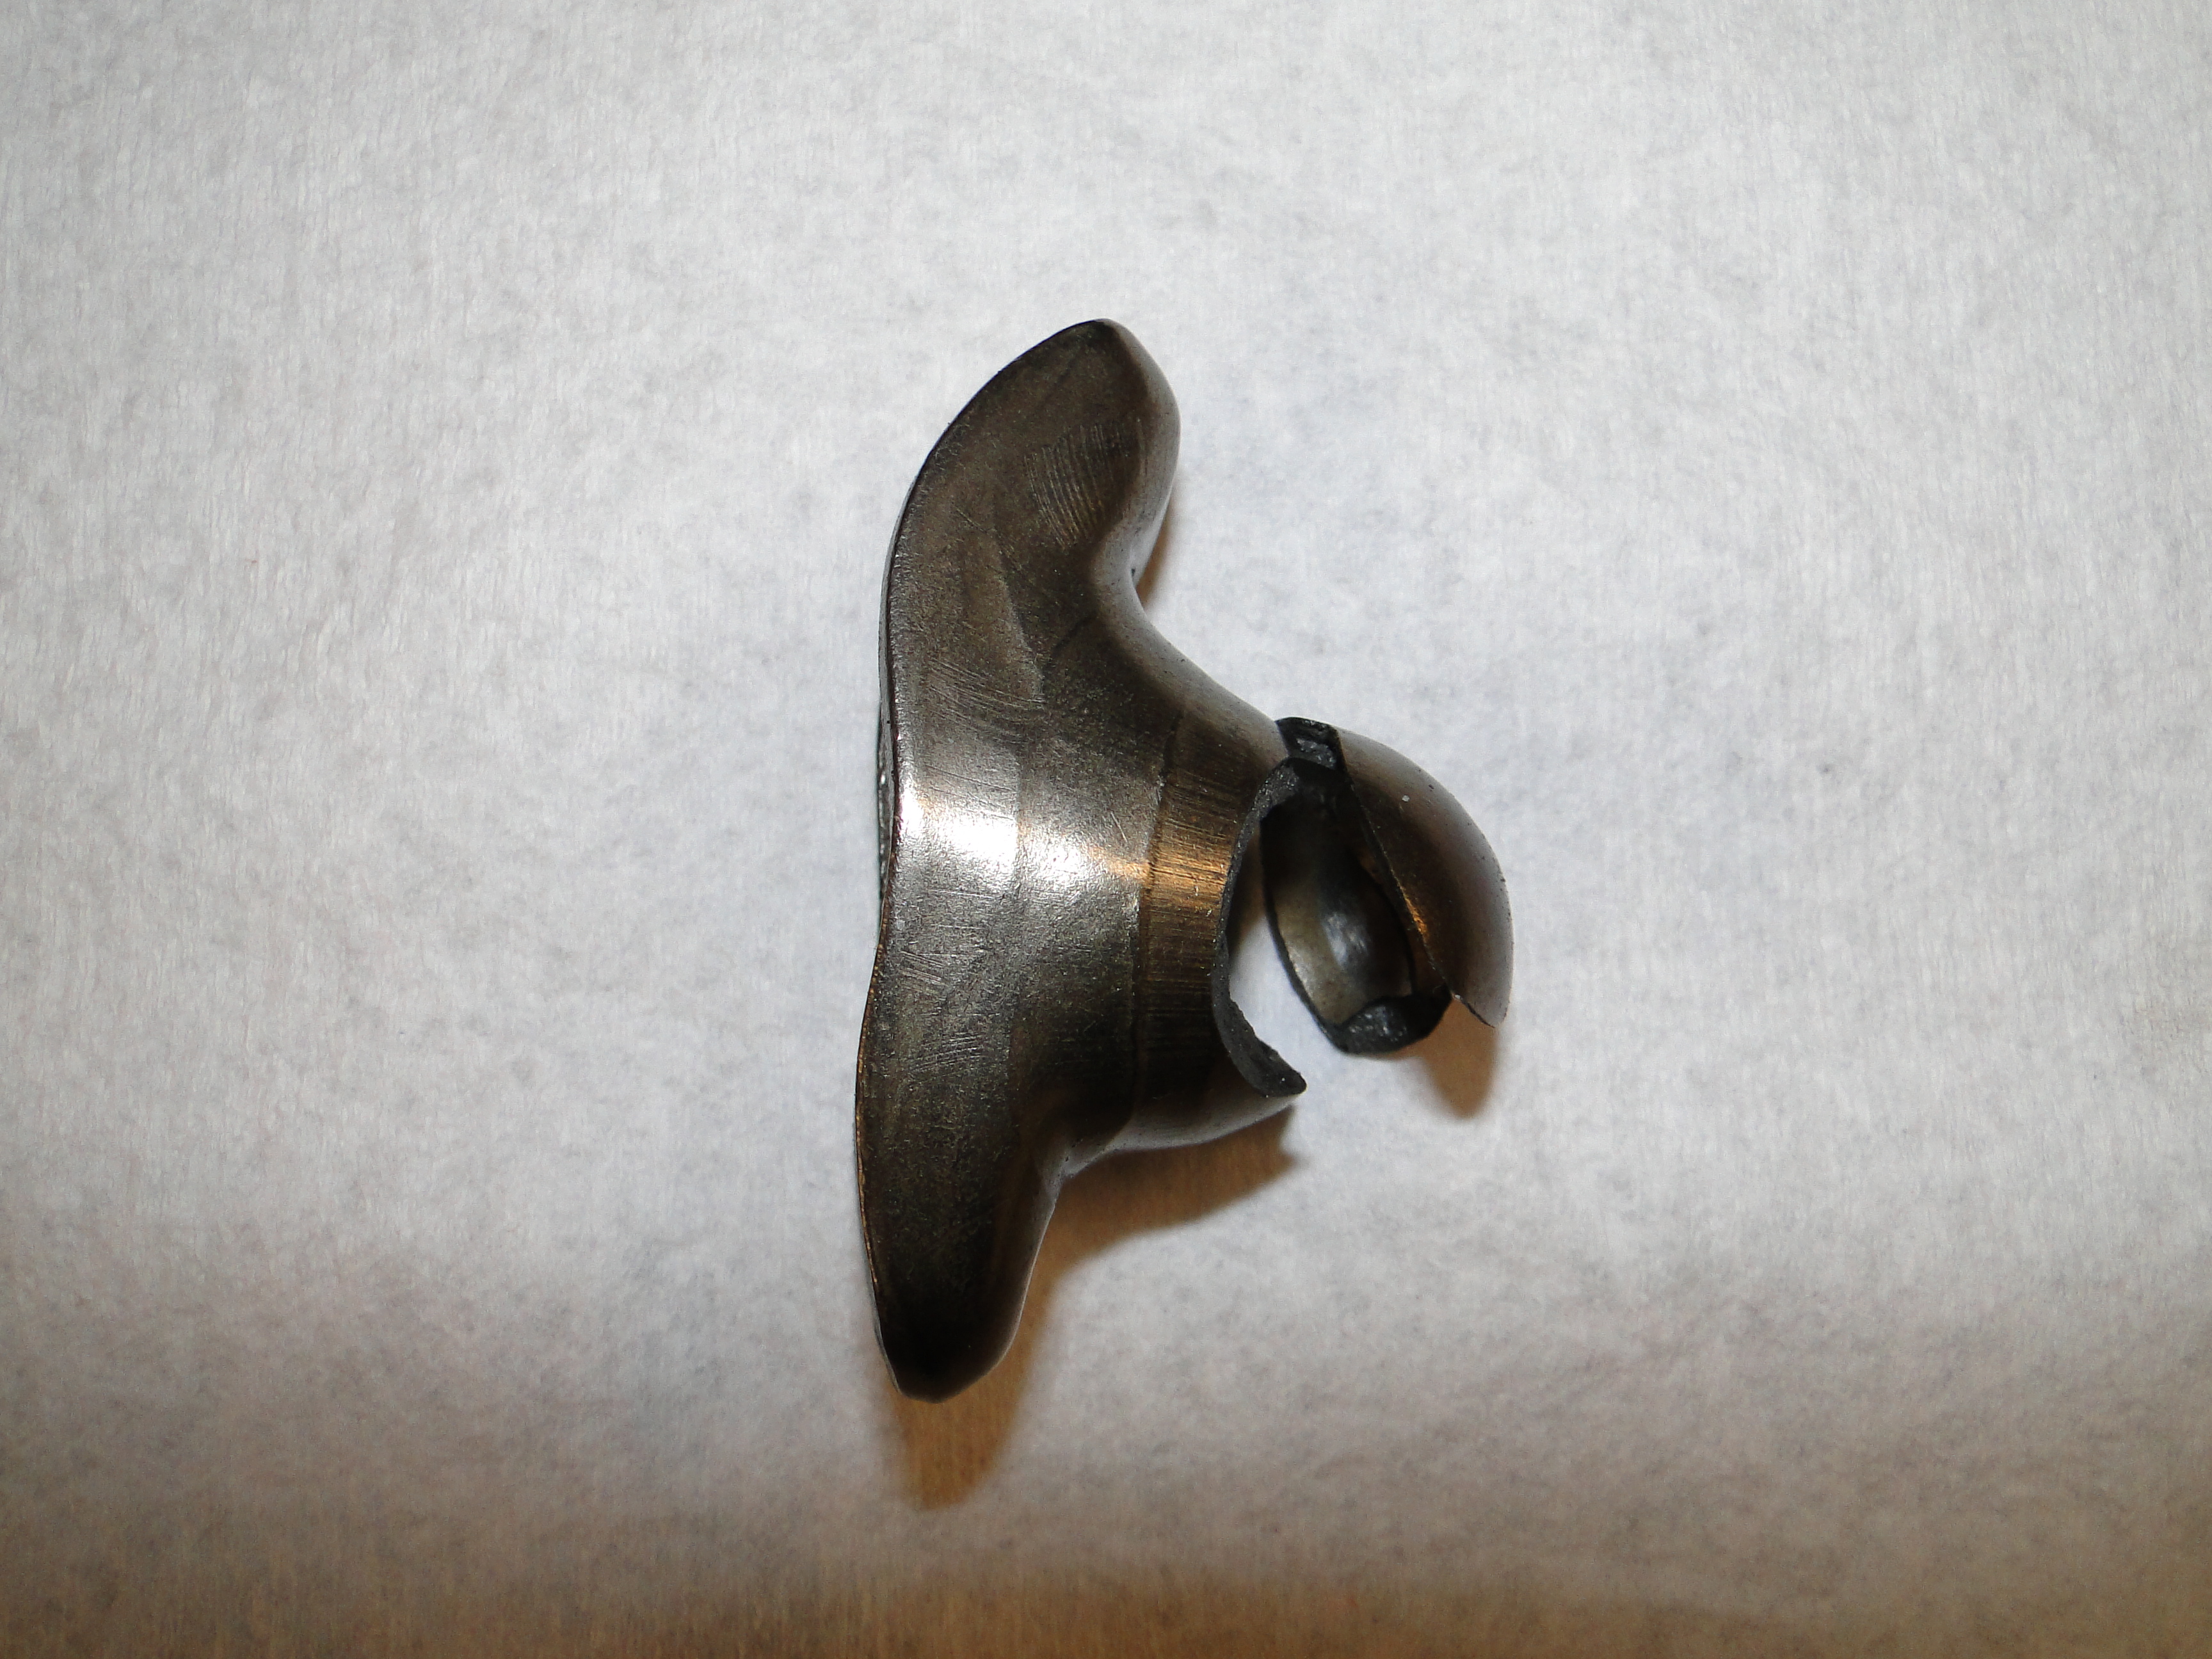
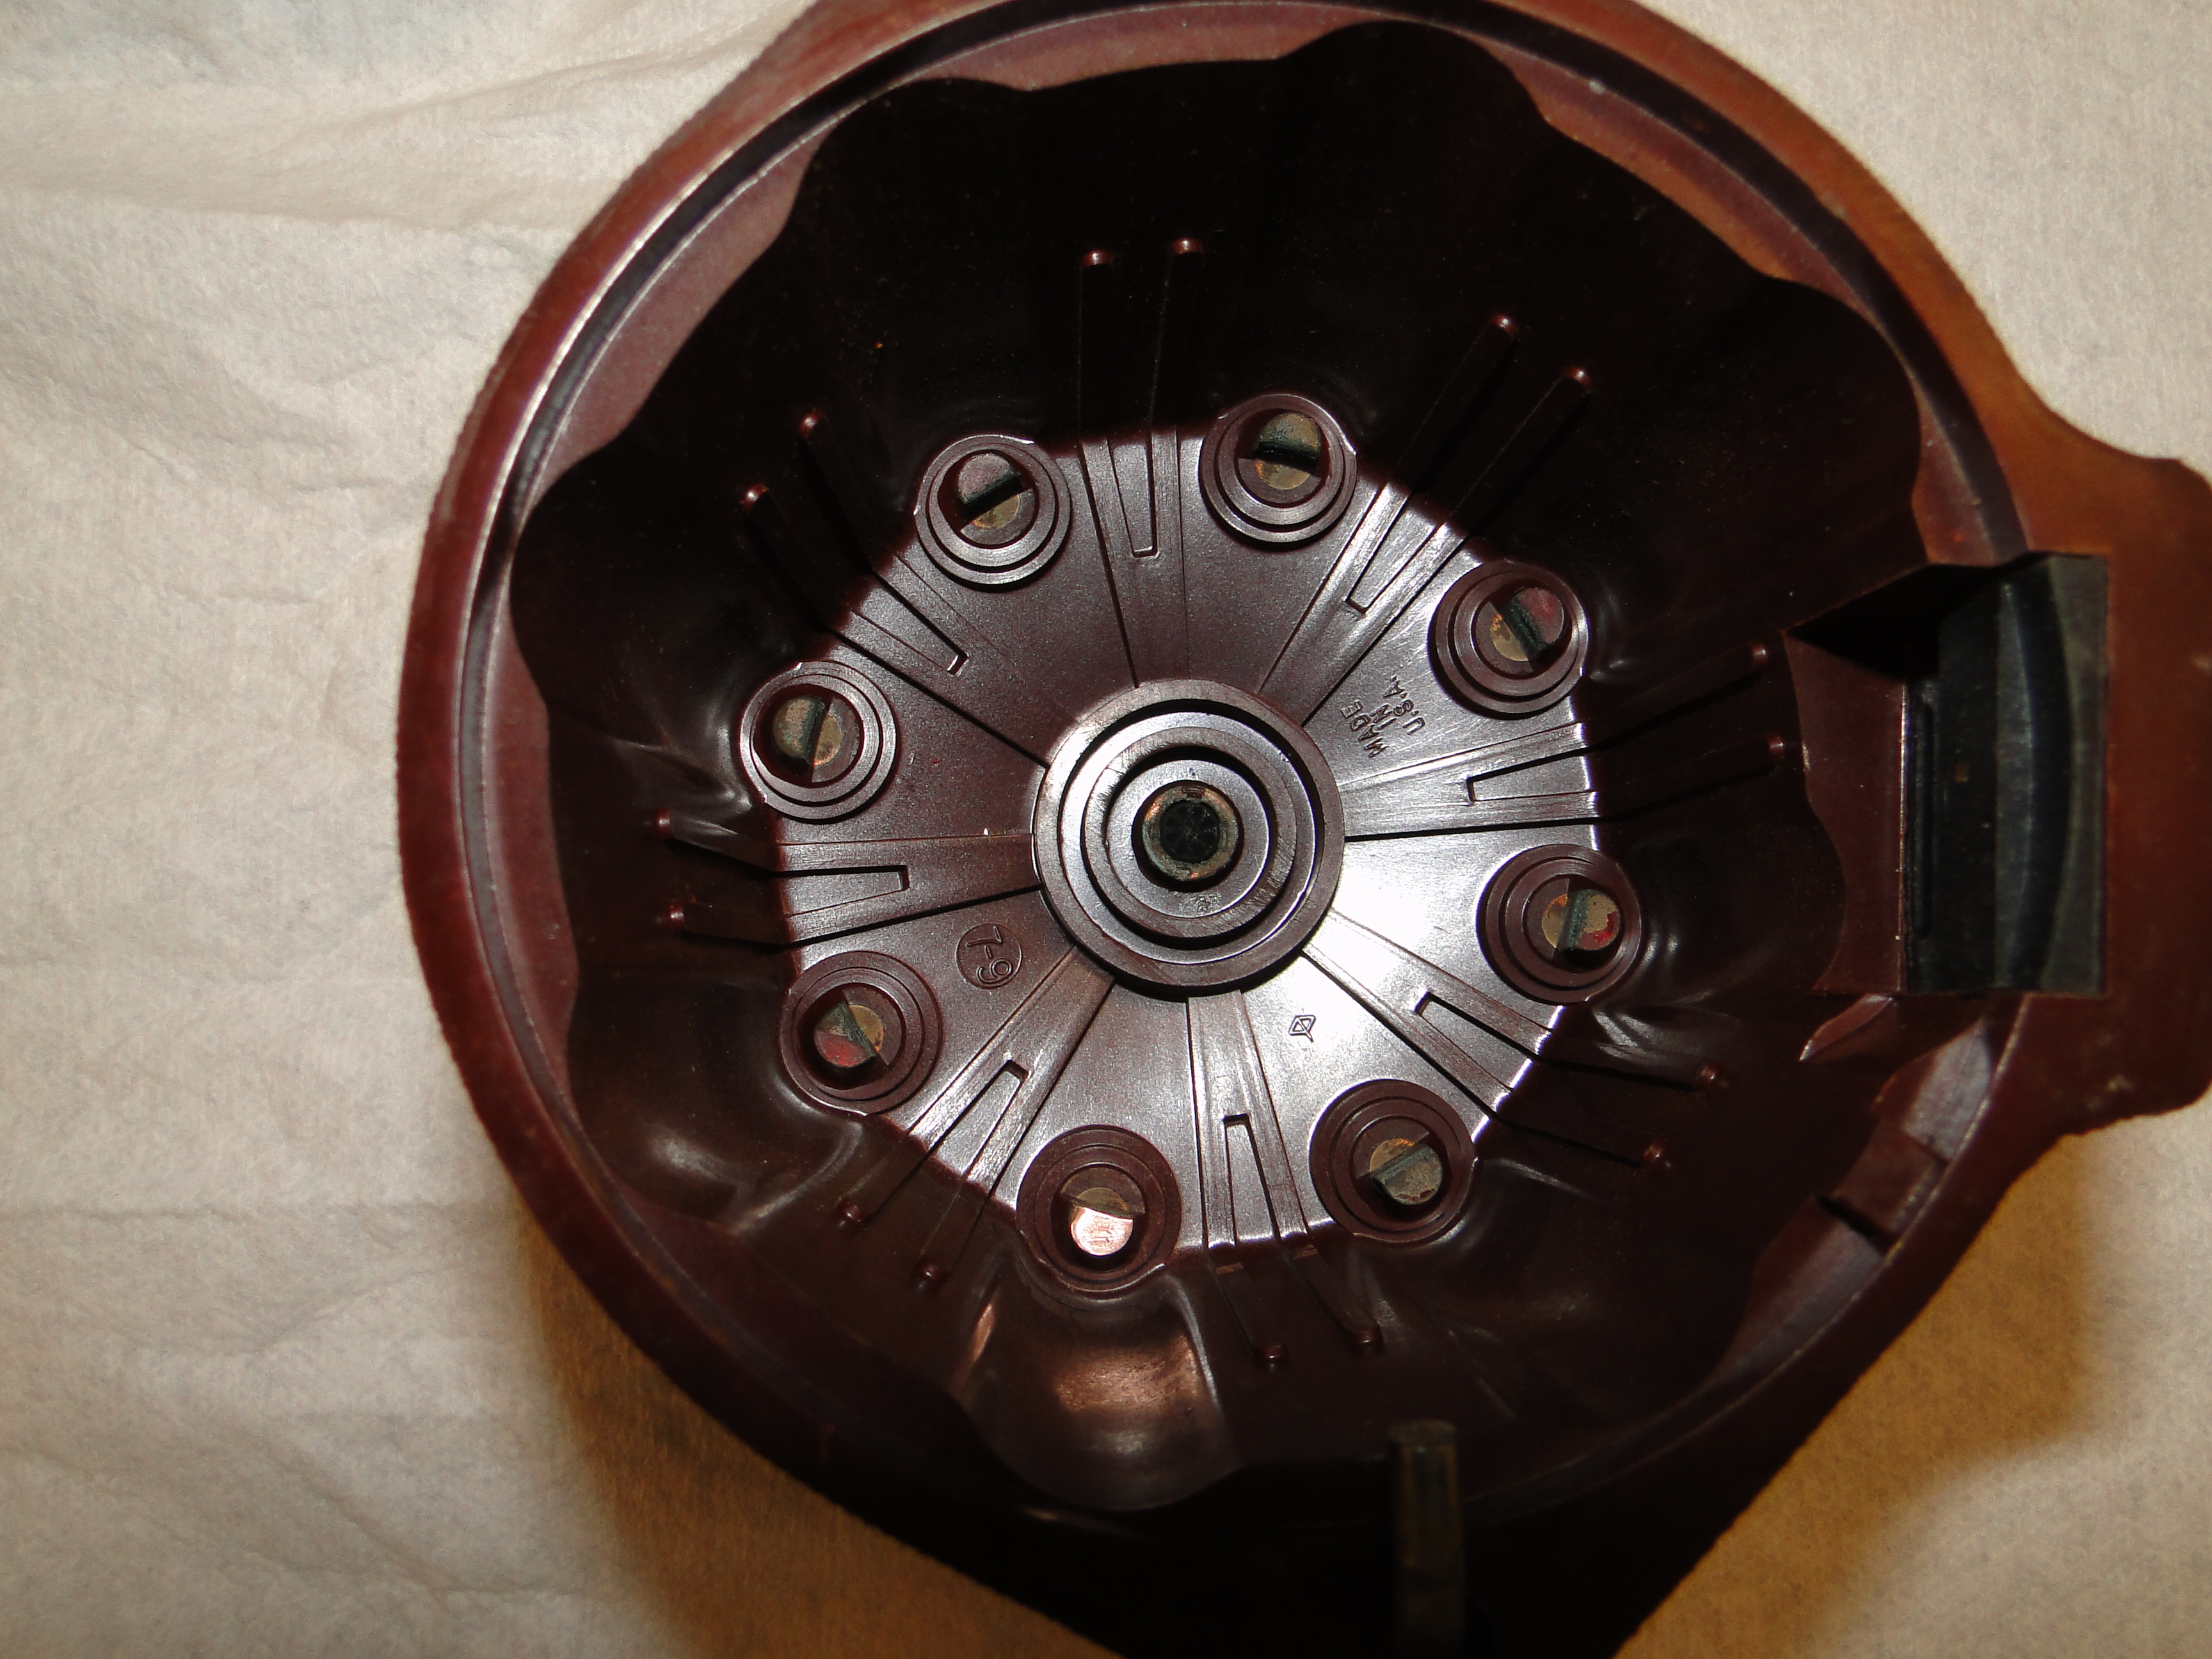
When I purchased this car Last November, at my request Boffo Motors made the car safe, and road worthy. This way I could quickly get her home before the first snow, due to the nature of my driveway there is no way this car could make it up my hill after the snow started to fall. Jim and I agreed that we could finish the rest of the necessary work in the spring. Well all winter the transmission leaked fluid, and the engine did not seem to run properly. I had already done a basic tune-up. I could not put my finger on it but something seem off, To make it harder to diagnose, I did not have any paper work on the engine rebuild specifications. Did the engine have power? You bet! Did it accelerate? Like a bat out of **** absolutely . But at times the engine seemed to struggle. Now its spring and I took her to the Master Mr. Jim Boffo of Boffo Motors. We replaced all but the front Transmission seals, and installed a kick down switch" this allows me to have a passing gear in an automatic transmission". Then I asked Jim to take it for a test drive to see what he thought about the engine performance. Upon his return he said "Something is wrong with this engine, and its going to be really easy or very bad. I thought to my self oh that's just great! It did not take Jim long to find a broken rocker arm, which means this engine was running on seven cylinders not eight. Once this was resolved, the performance issues from a none firing cylinder disappeared. Jim was now able to lower the idle way down, and make a few adjustments, and she ran smooth and strong. In my mind the car was reliable and ready for any road trip. Two weeks later it happened we were about two miles from my house, and the engine just quit. You can see from the photos of the rust buildup in the distributor, and corrosion on the distributor cap leads. I don't think I have to tell you witch connector I cleaned in the cap photo. What I don't understand how this engine ran at all, let alone she ran very very well. To my disappointment the corroded parts were not the my engines stalling problem, days later it just quit again, and again. Well its time to take it back to see the master Jim Boffo.
Click any picture to enlarge.
|
|
|
|
|
|
|
|

May
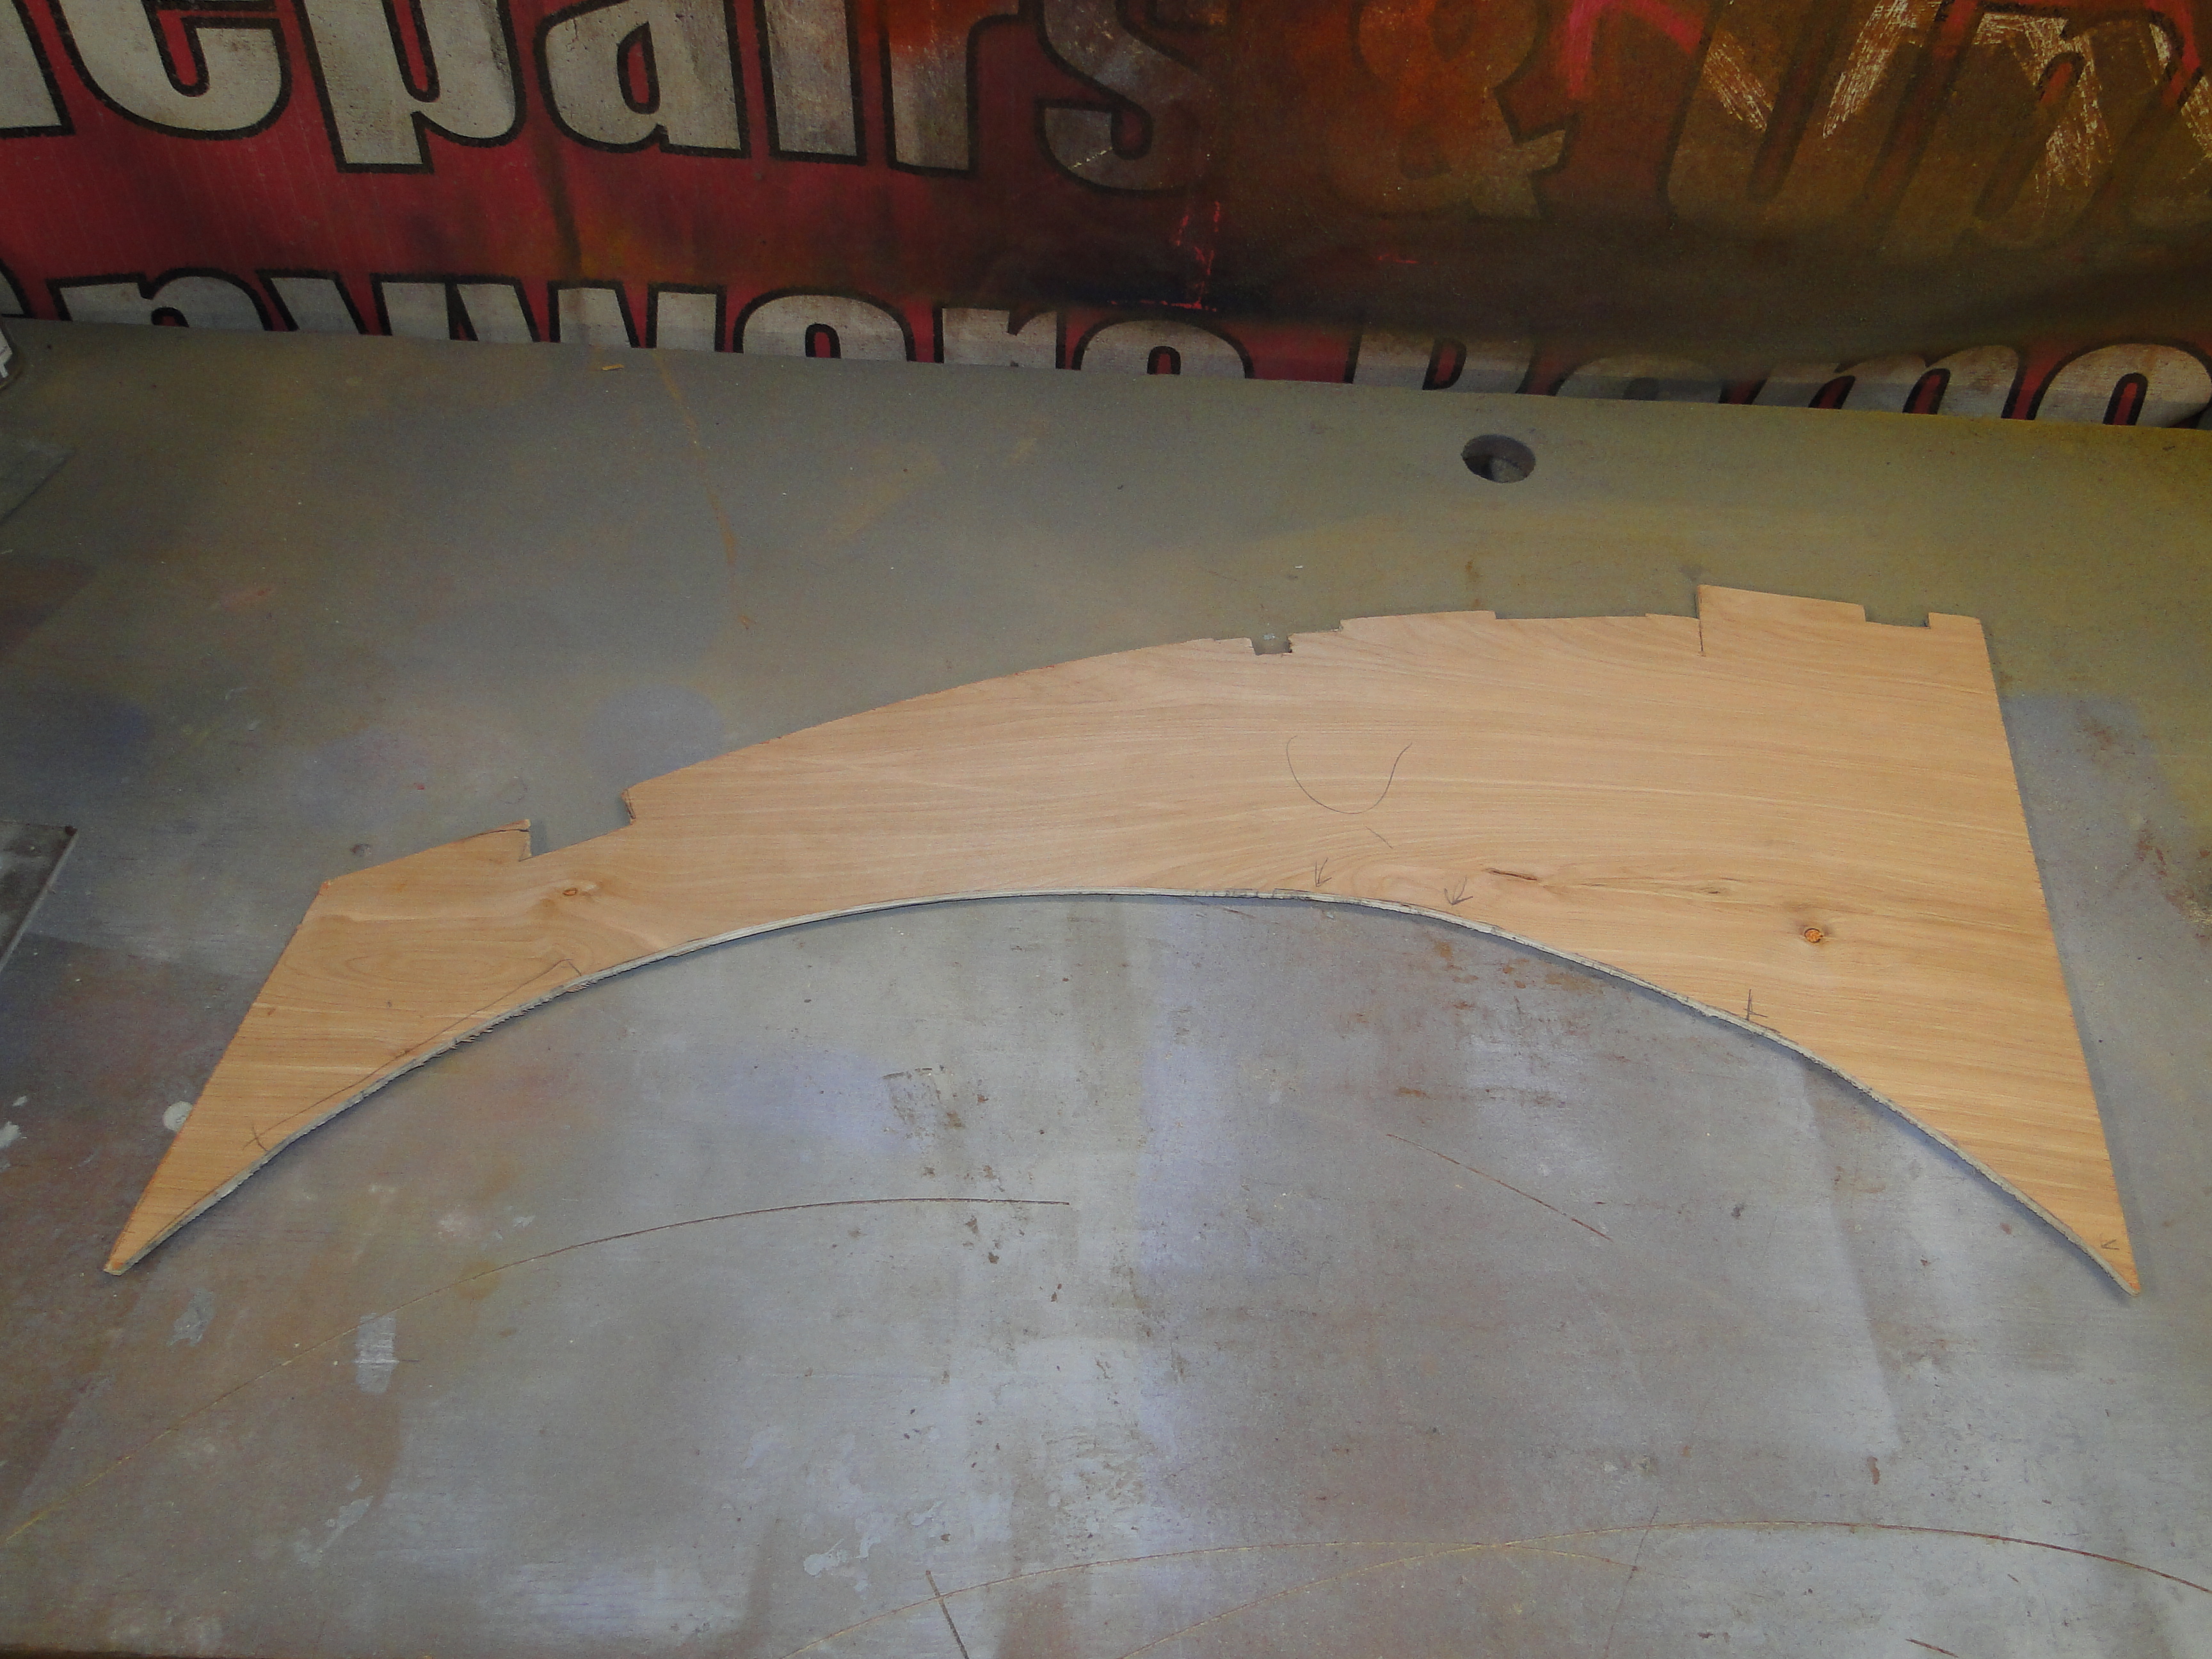
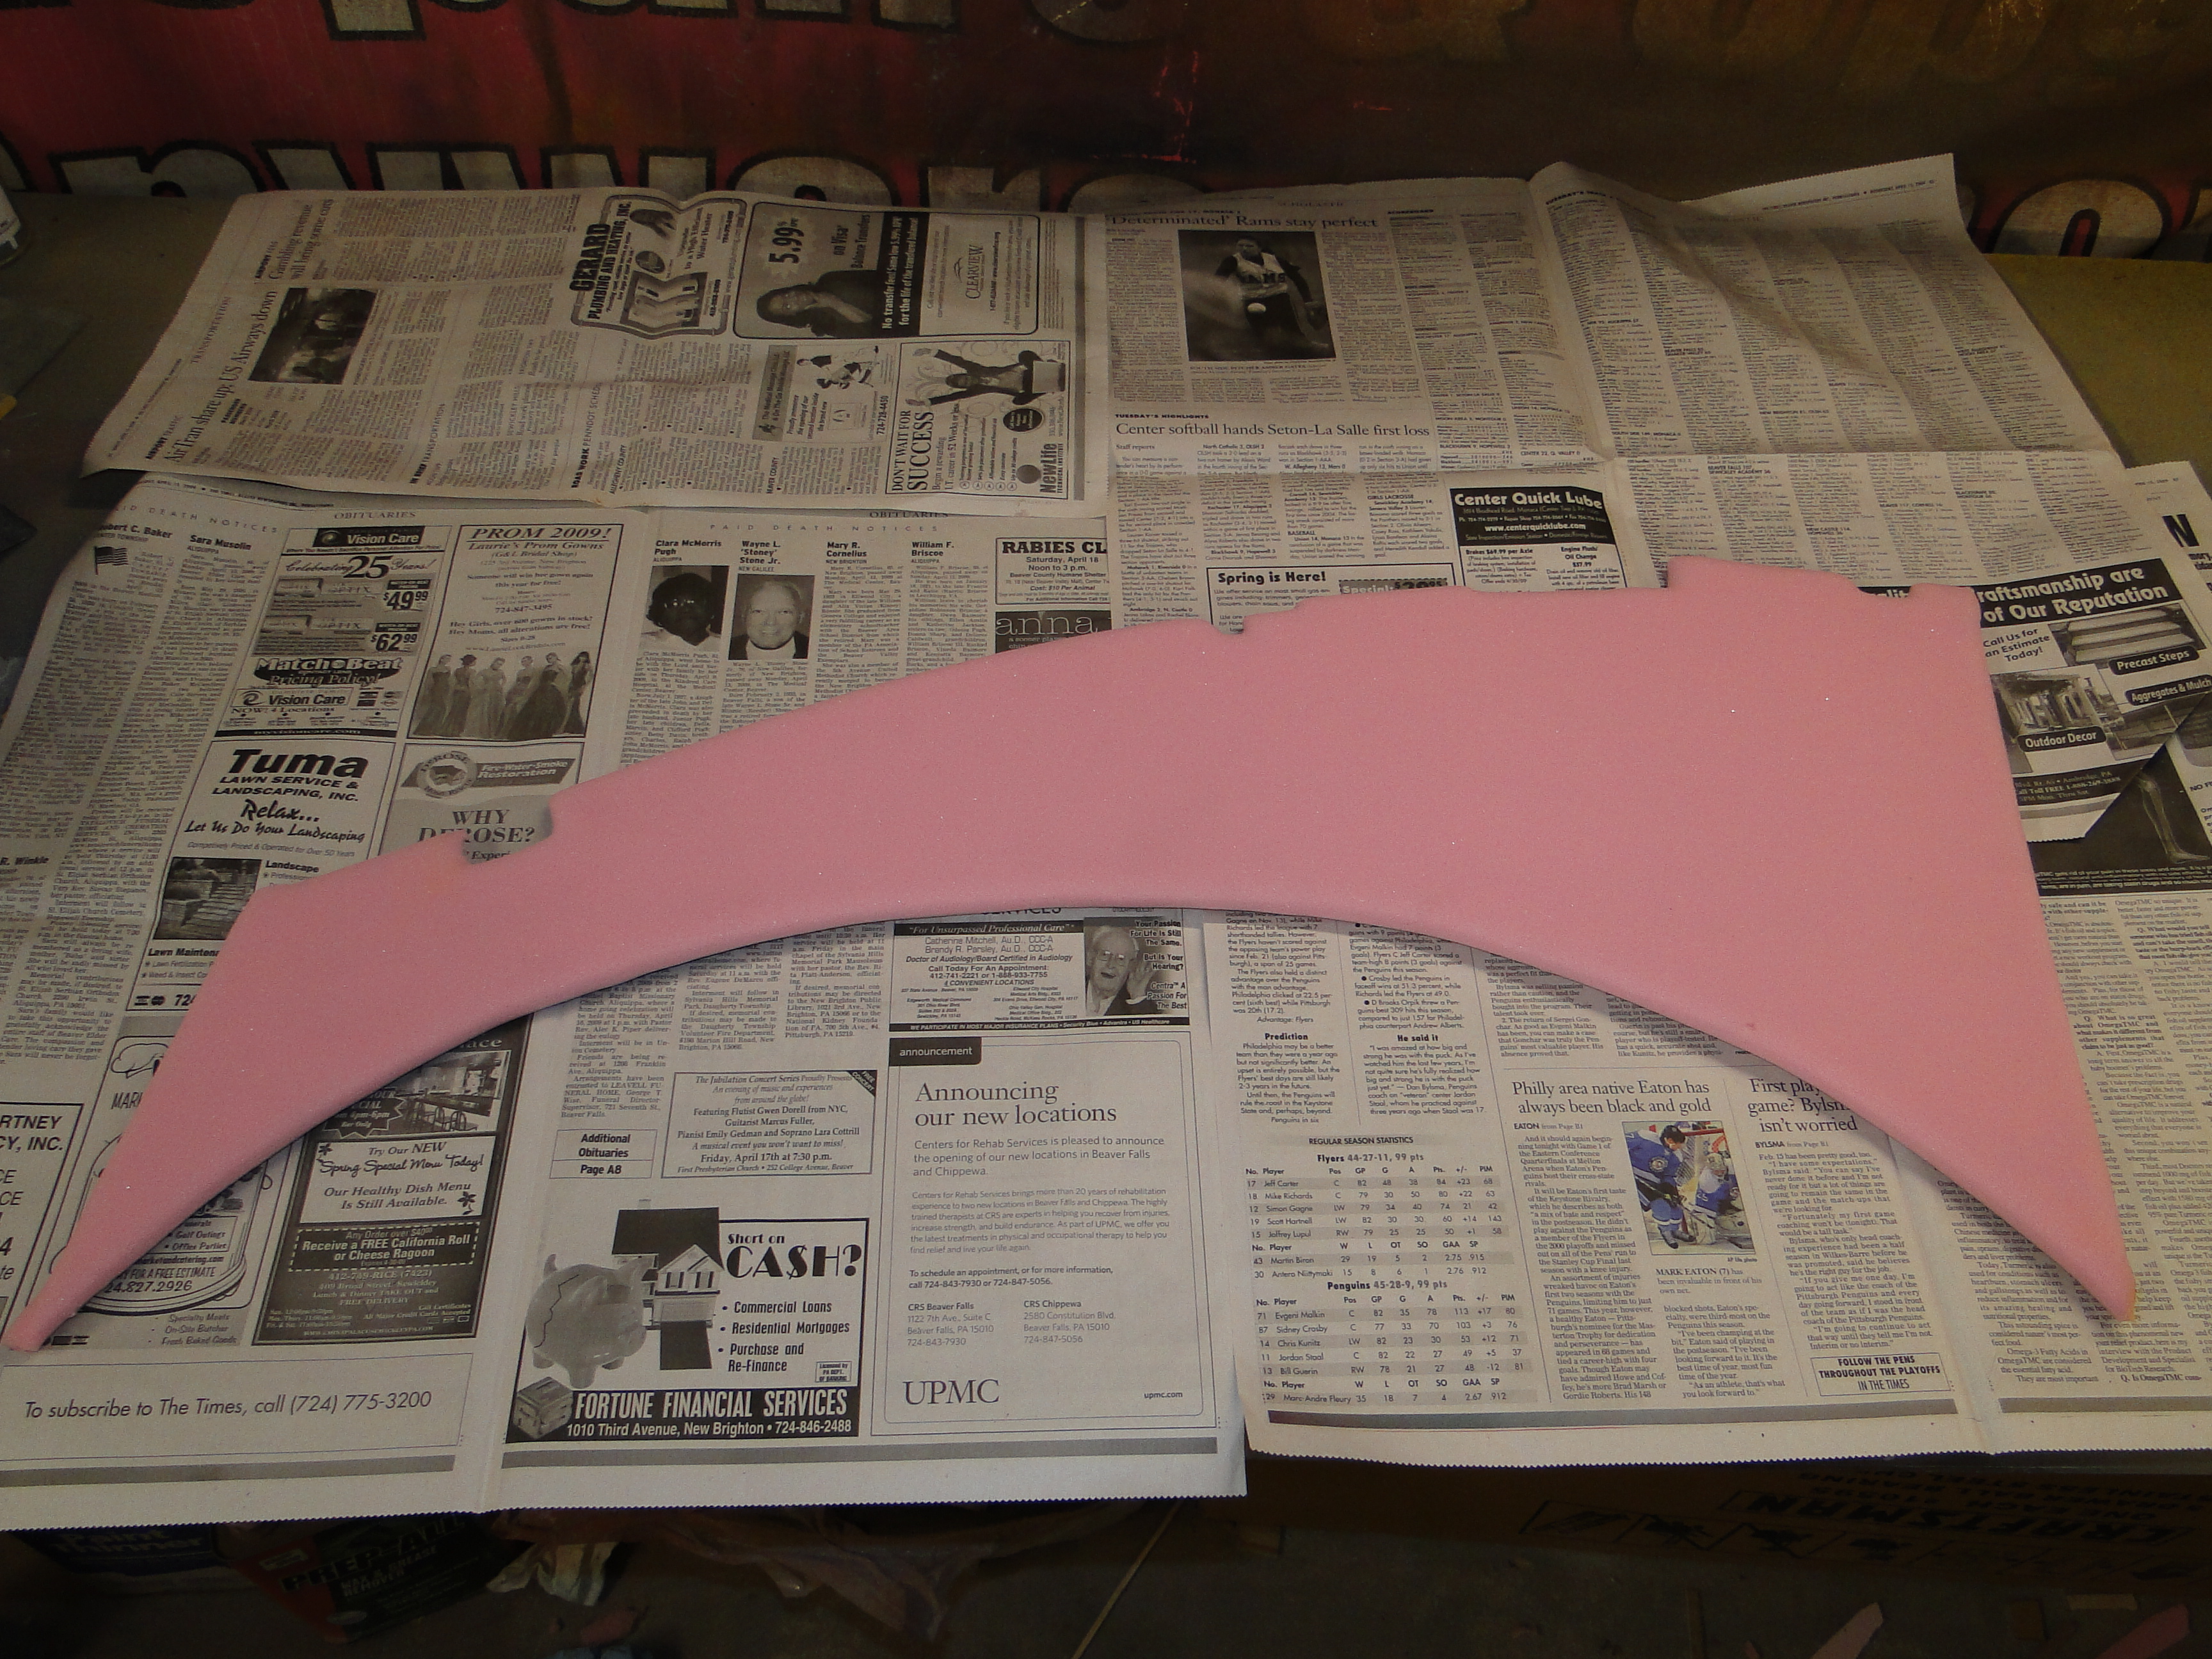
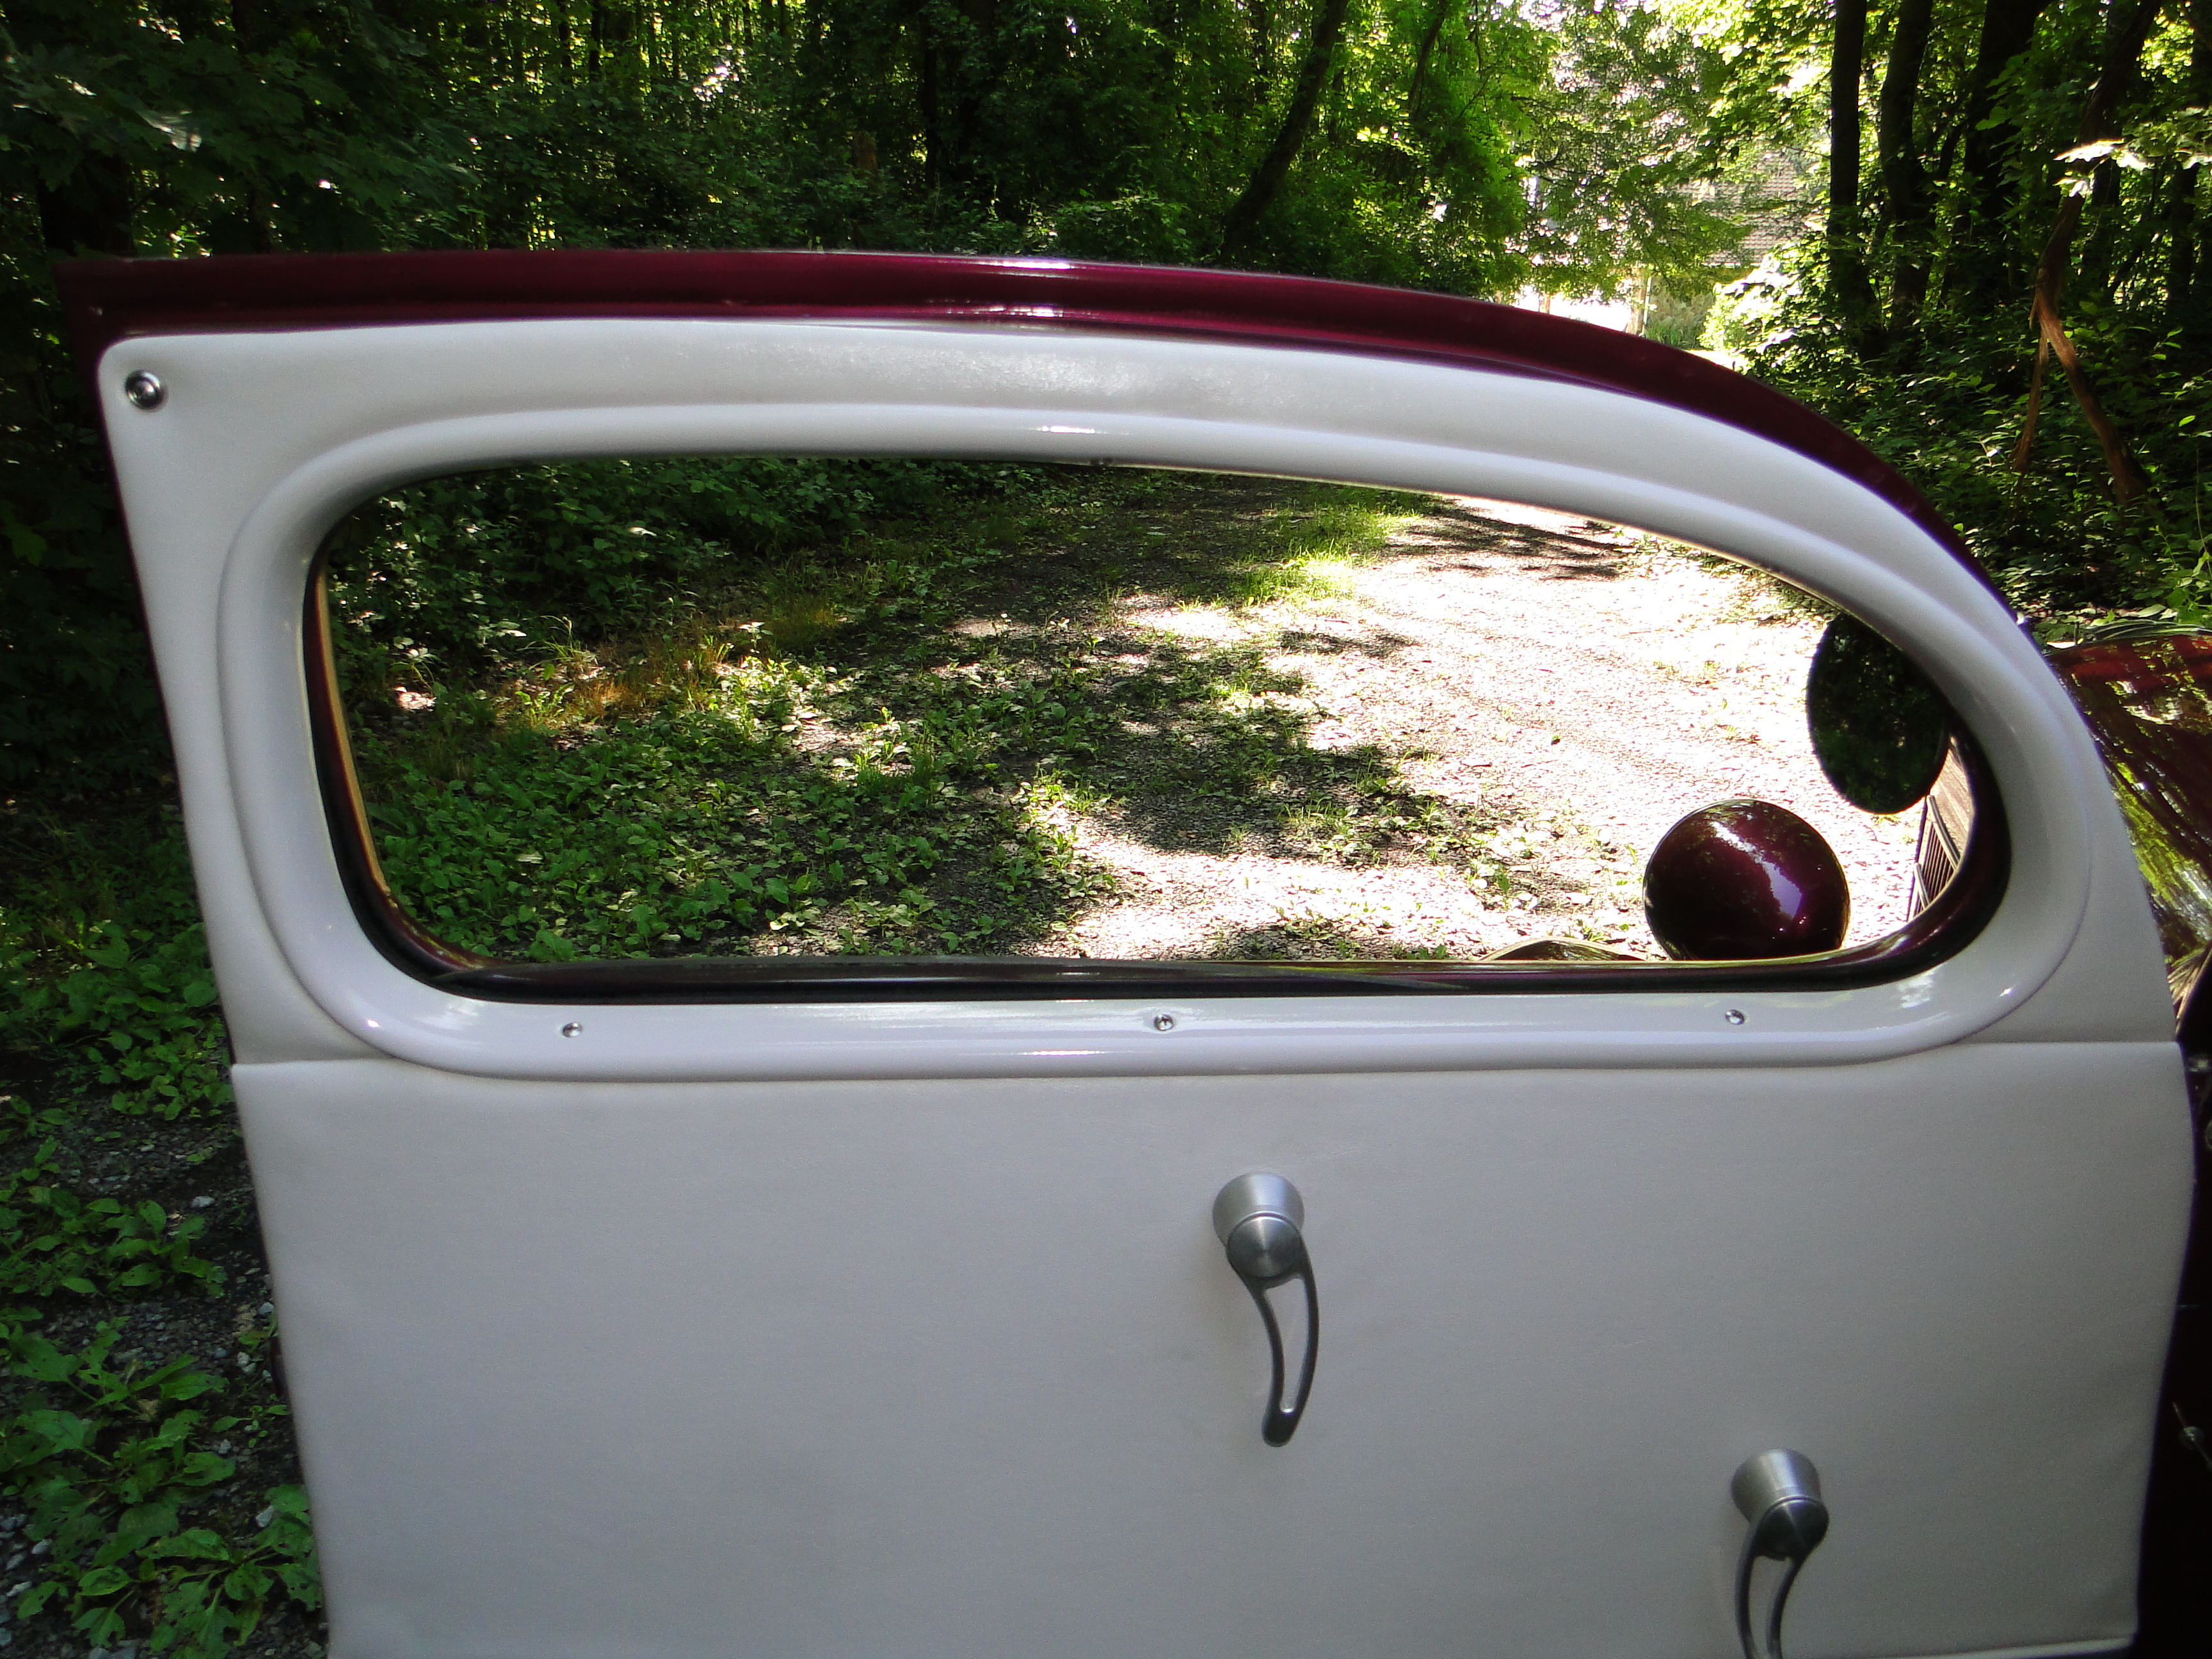
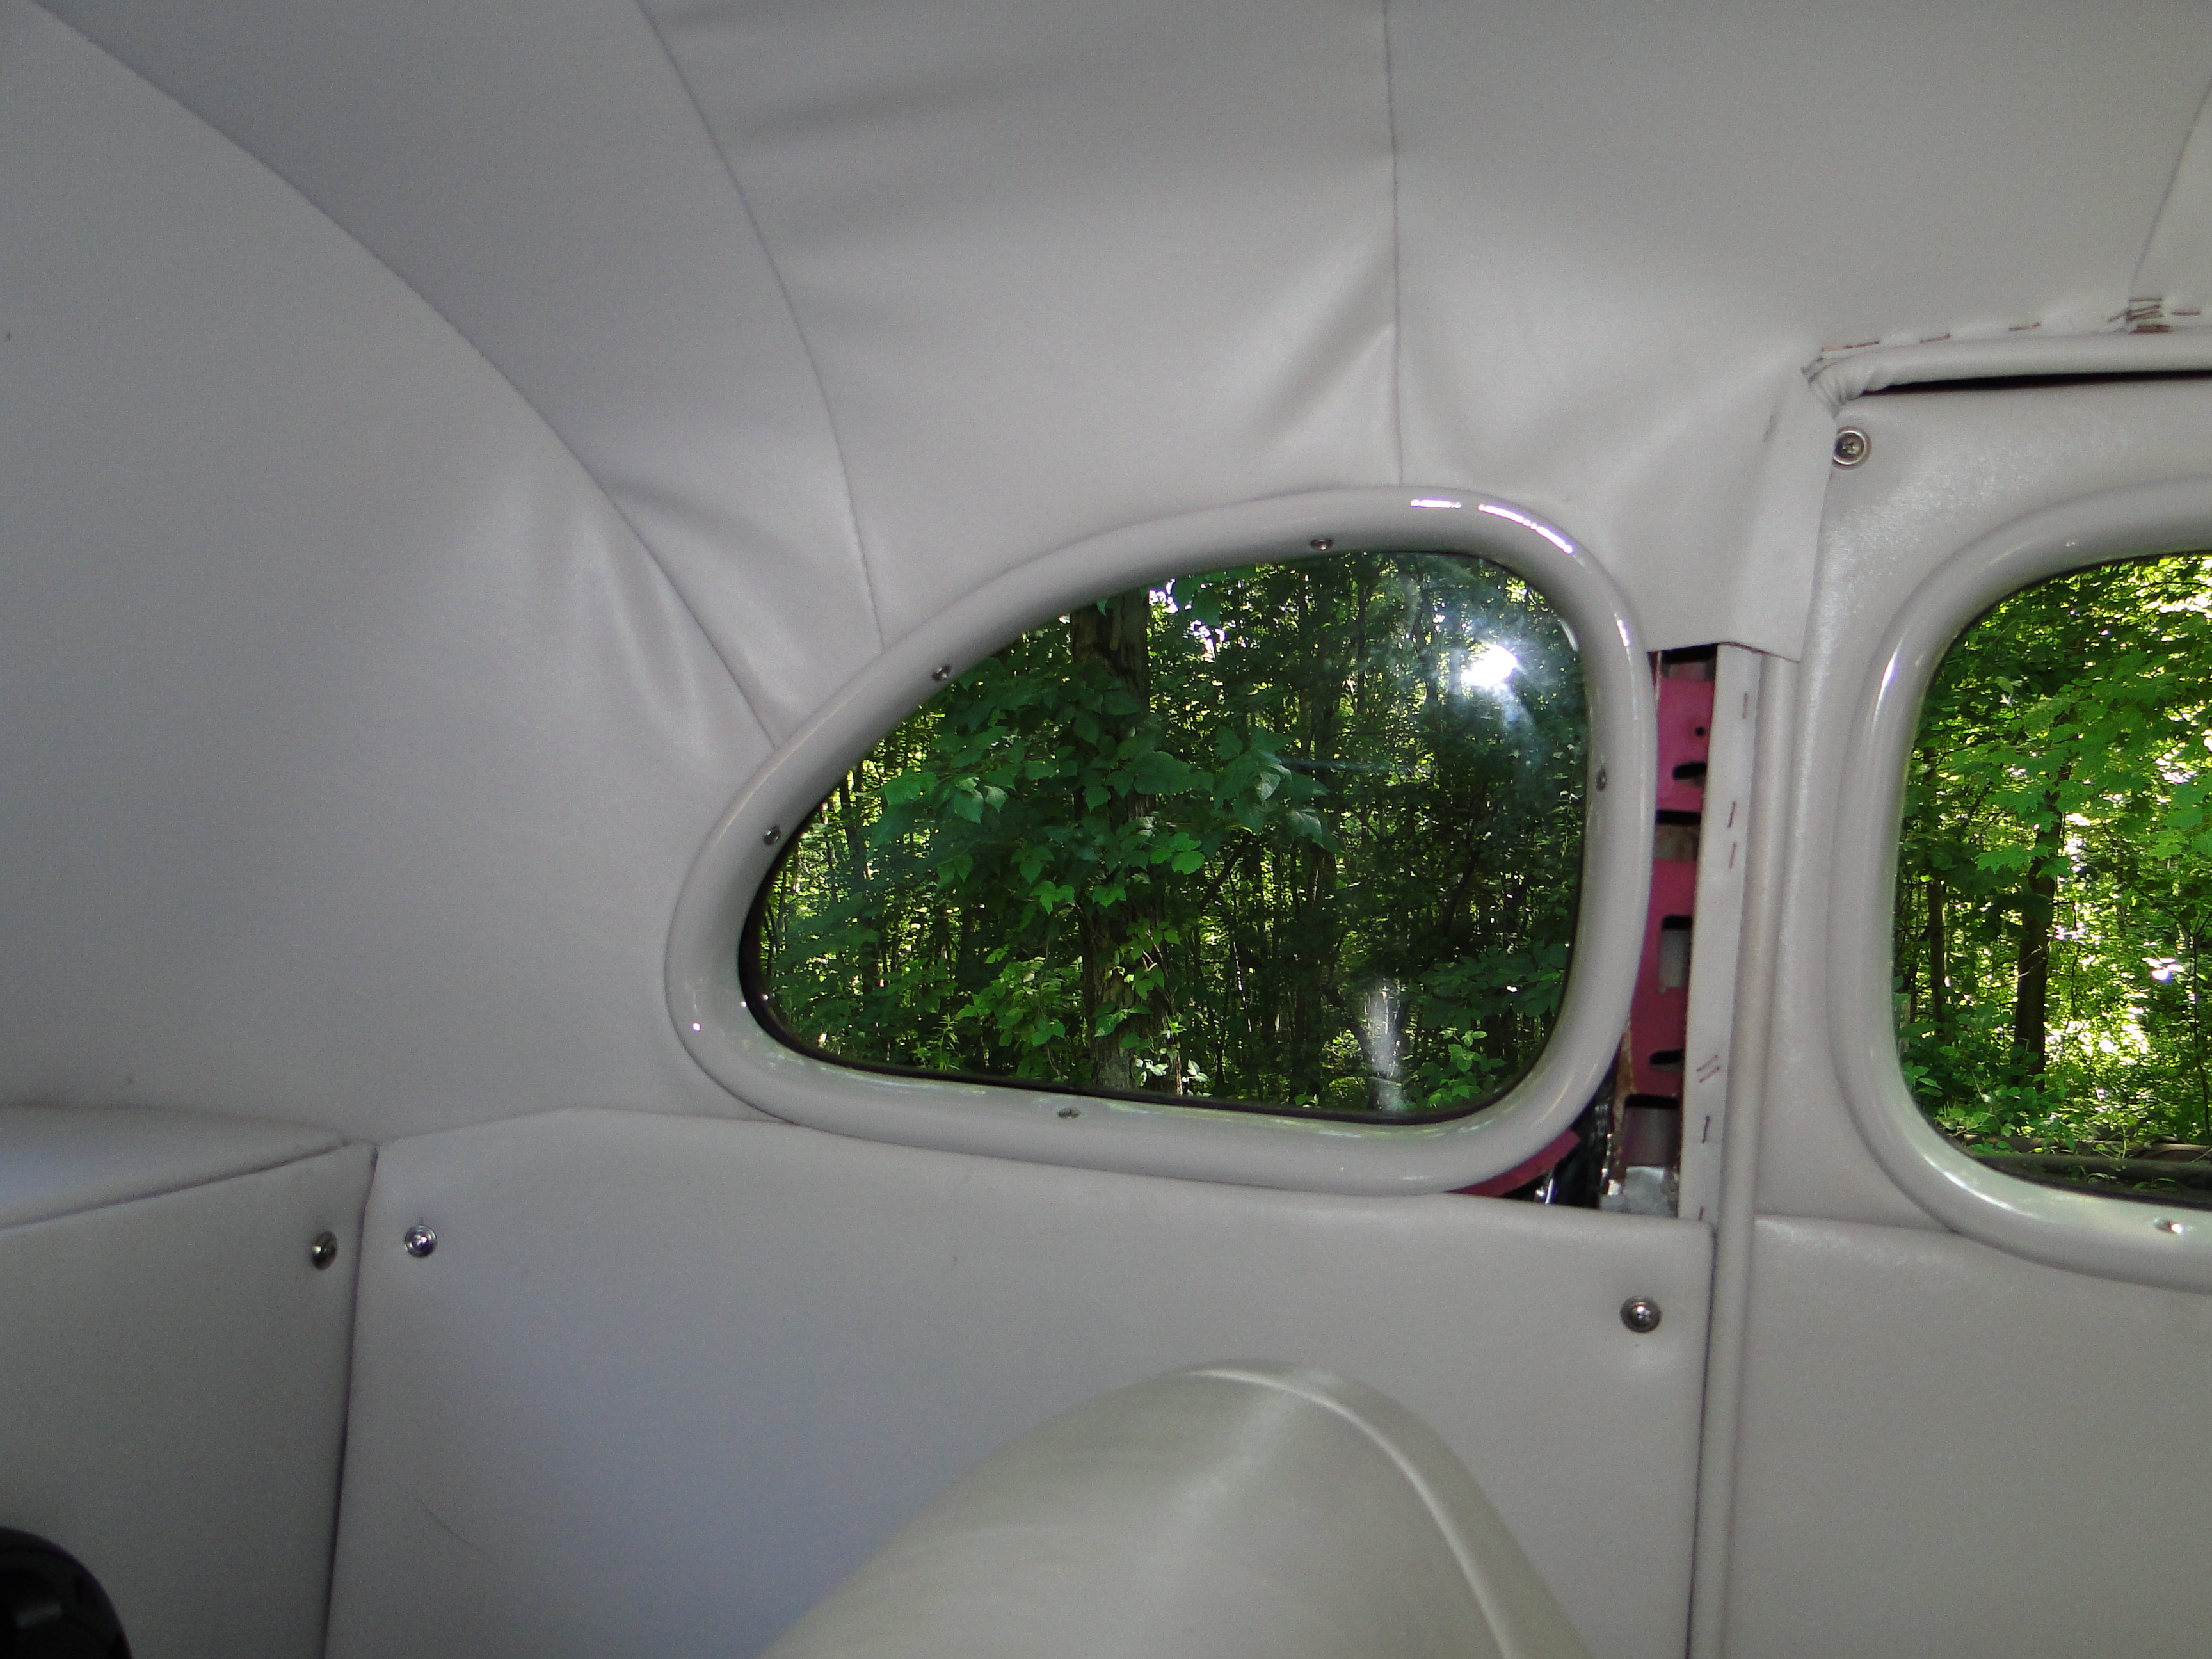
Window Trim fabrication
The next major project was the rest of the window trims, I had to take a rough measurements for each trim piece. Then they had to be cut in quarters so it could be reduced in height and width. After that it needed to be tack welded back together for fit verification in the car. Once I was happy with the fit, the welding, and grinding of the welds began. When that was completed, a little old fashioned body work was needed in order to hide the seams. Finely I could paint them. This took a better part of a months worth of spare time, see photos below.
Click any picture to enlarge.
|
|
|
|
|
|
|


Engine Starting, And Performance Issues Part 3
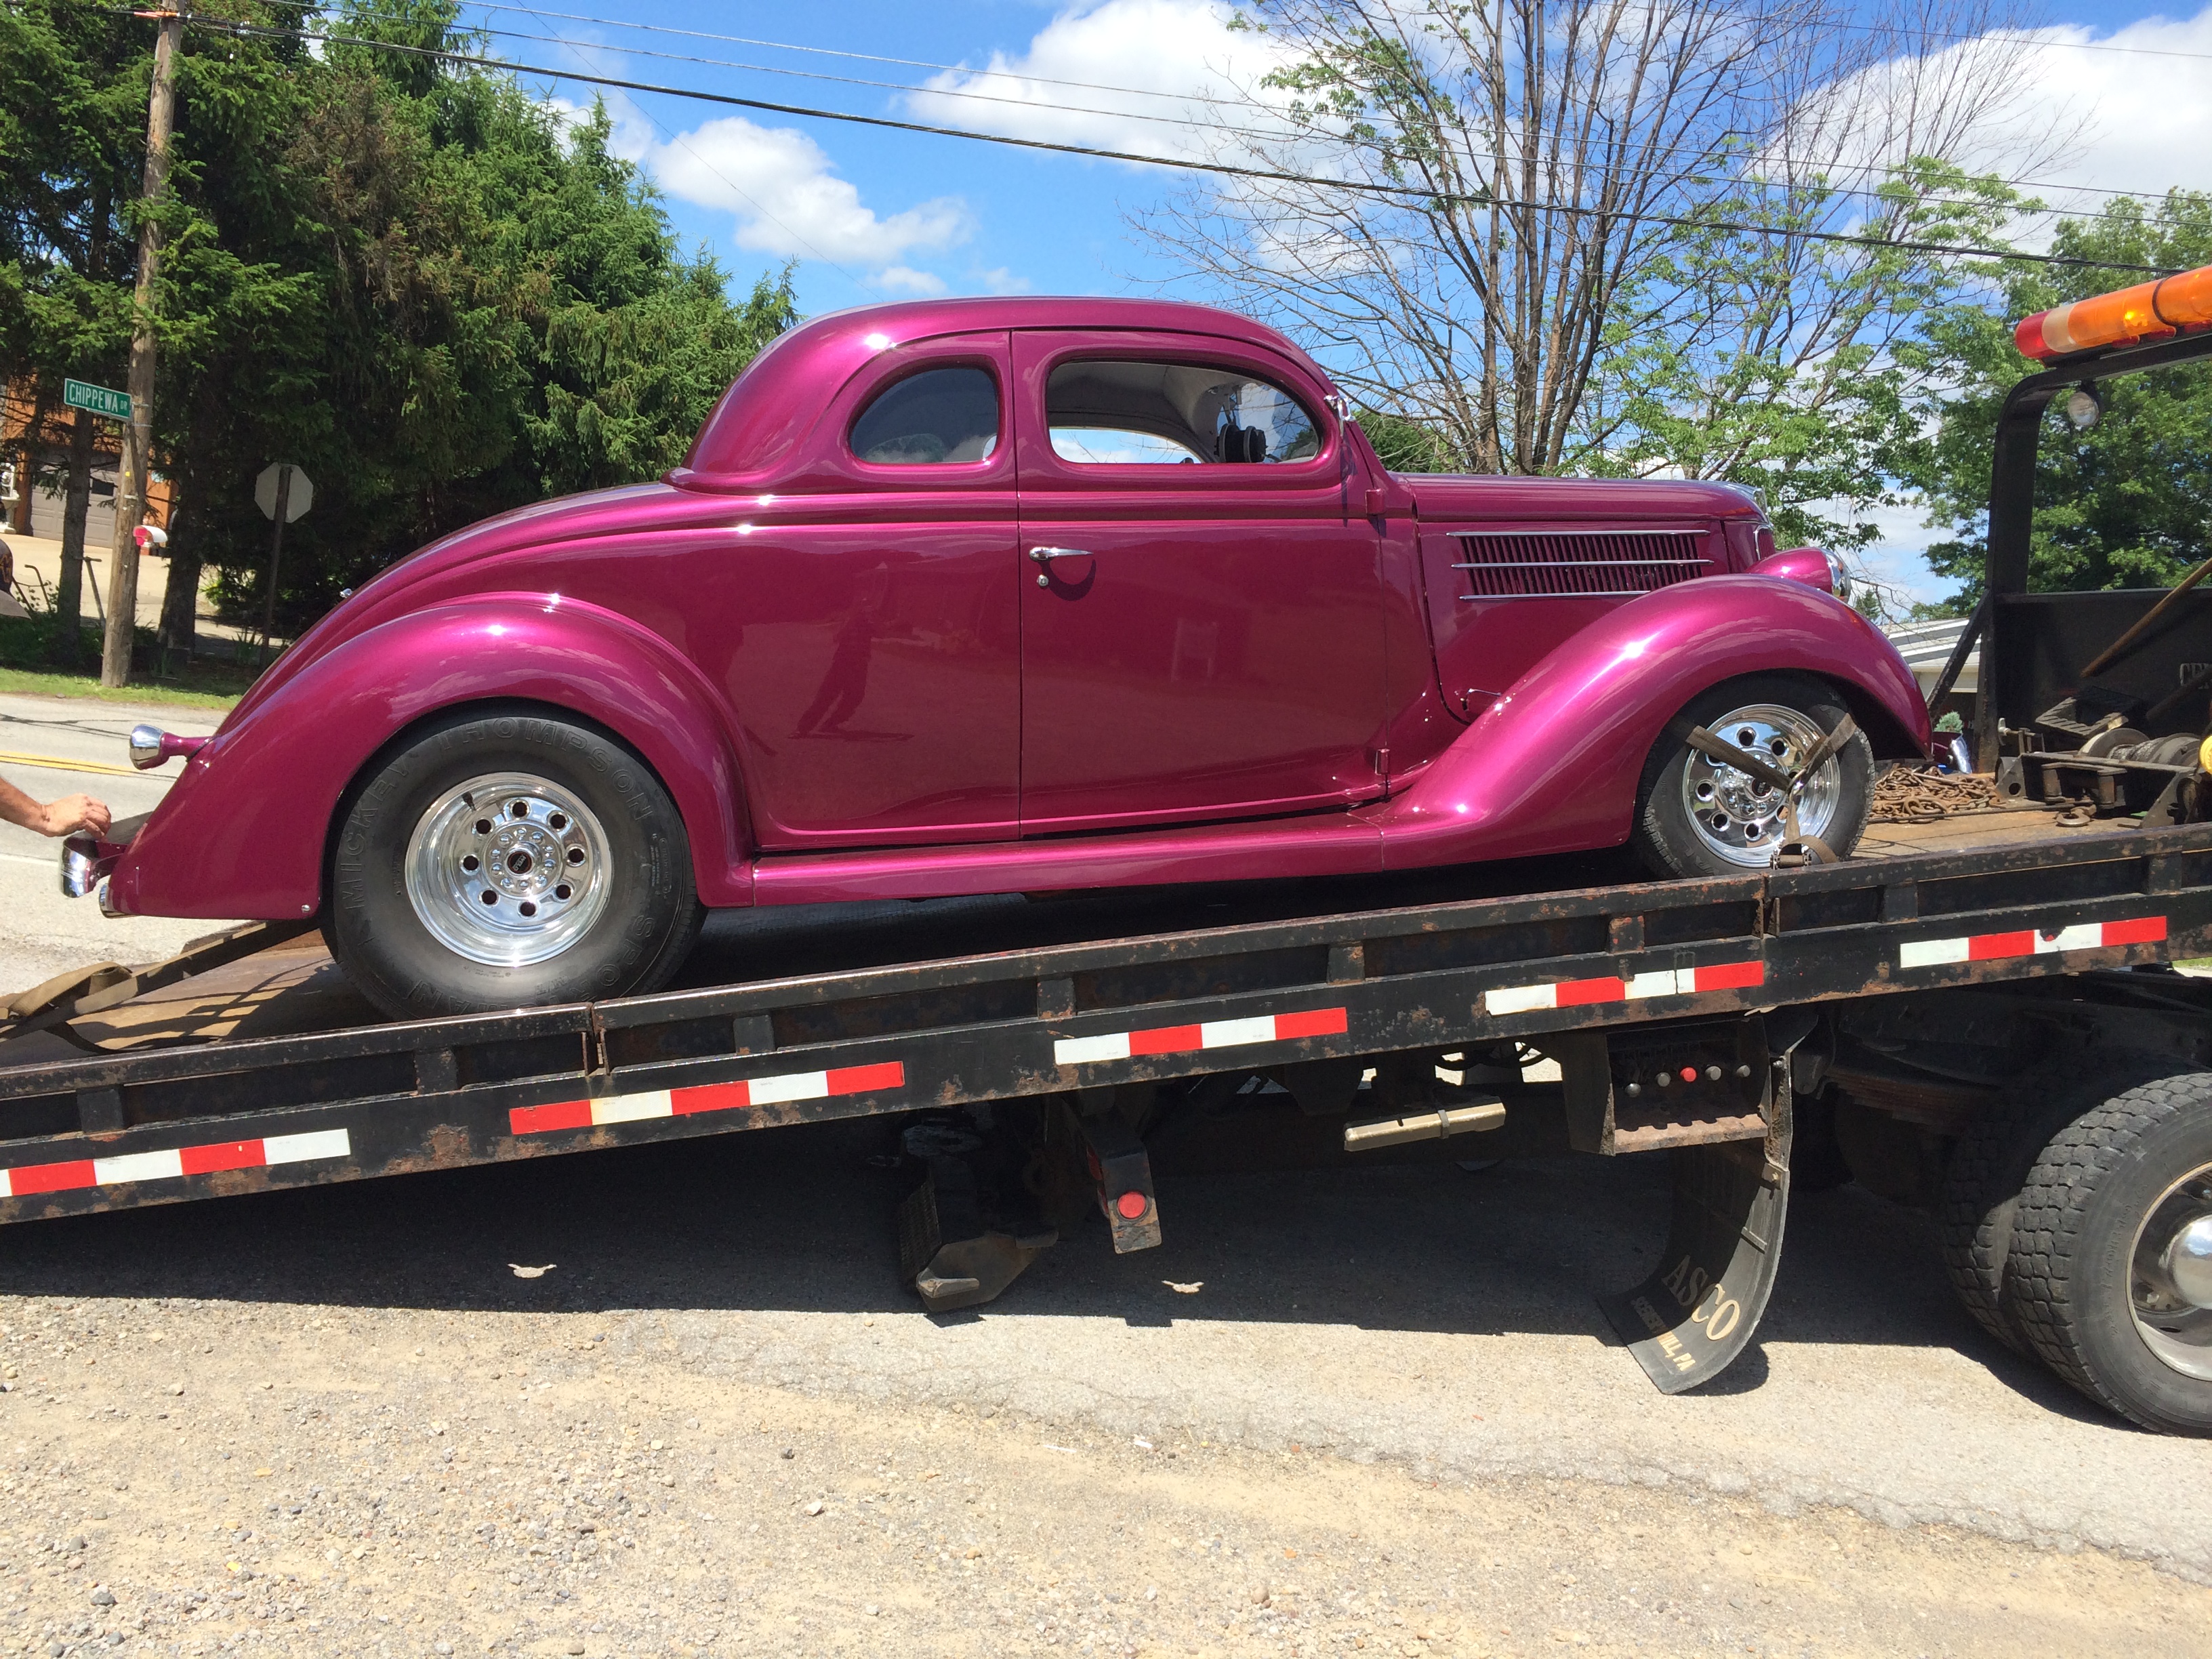
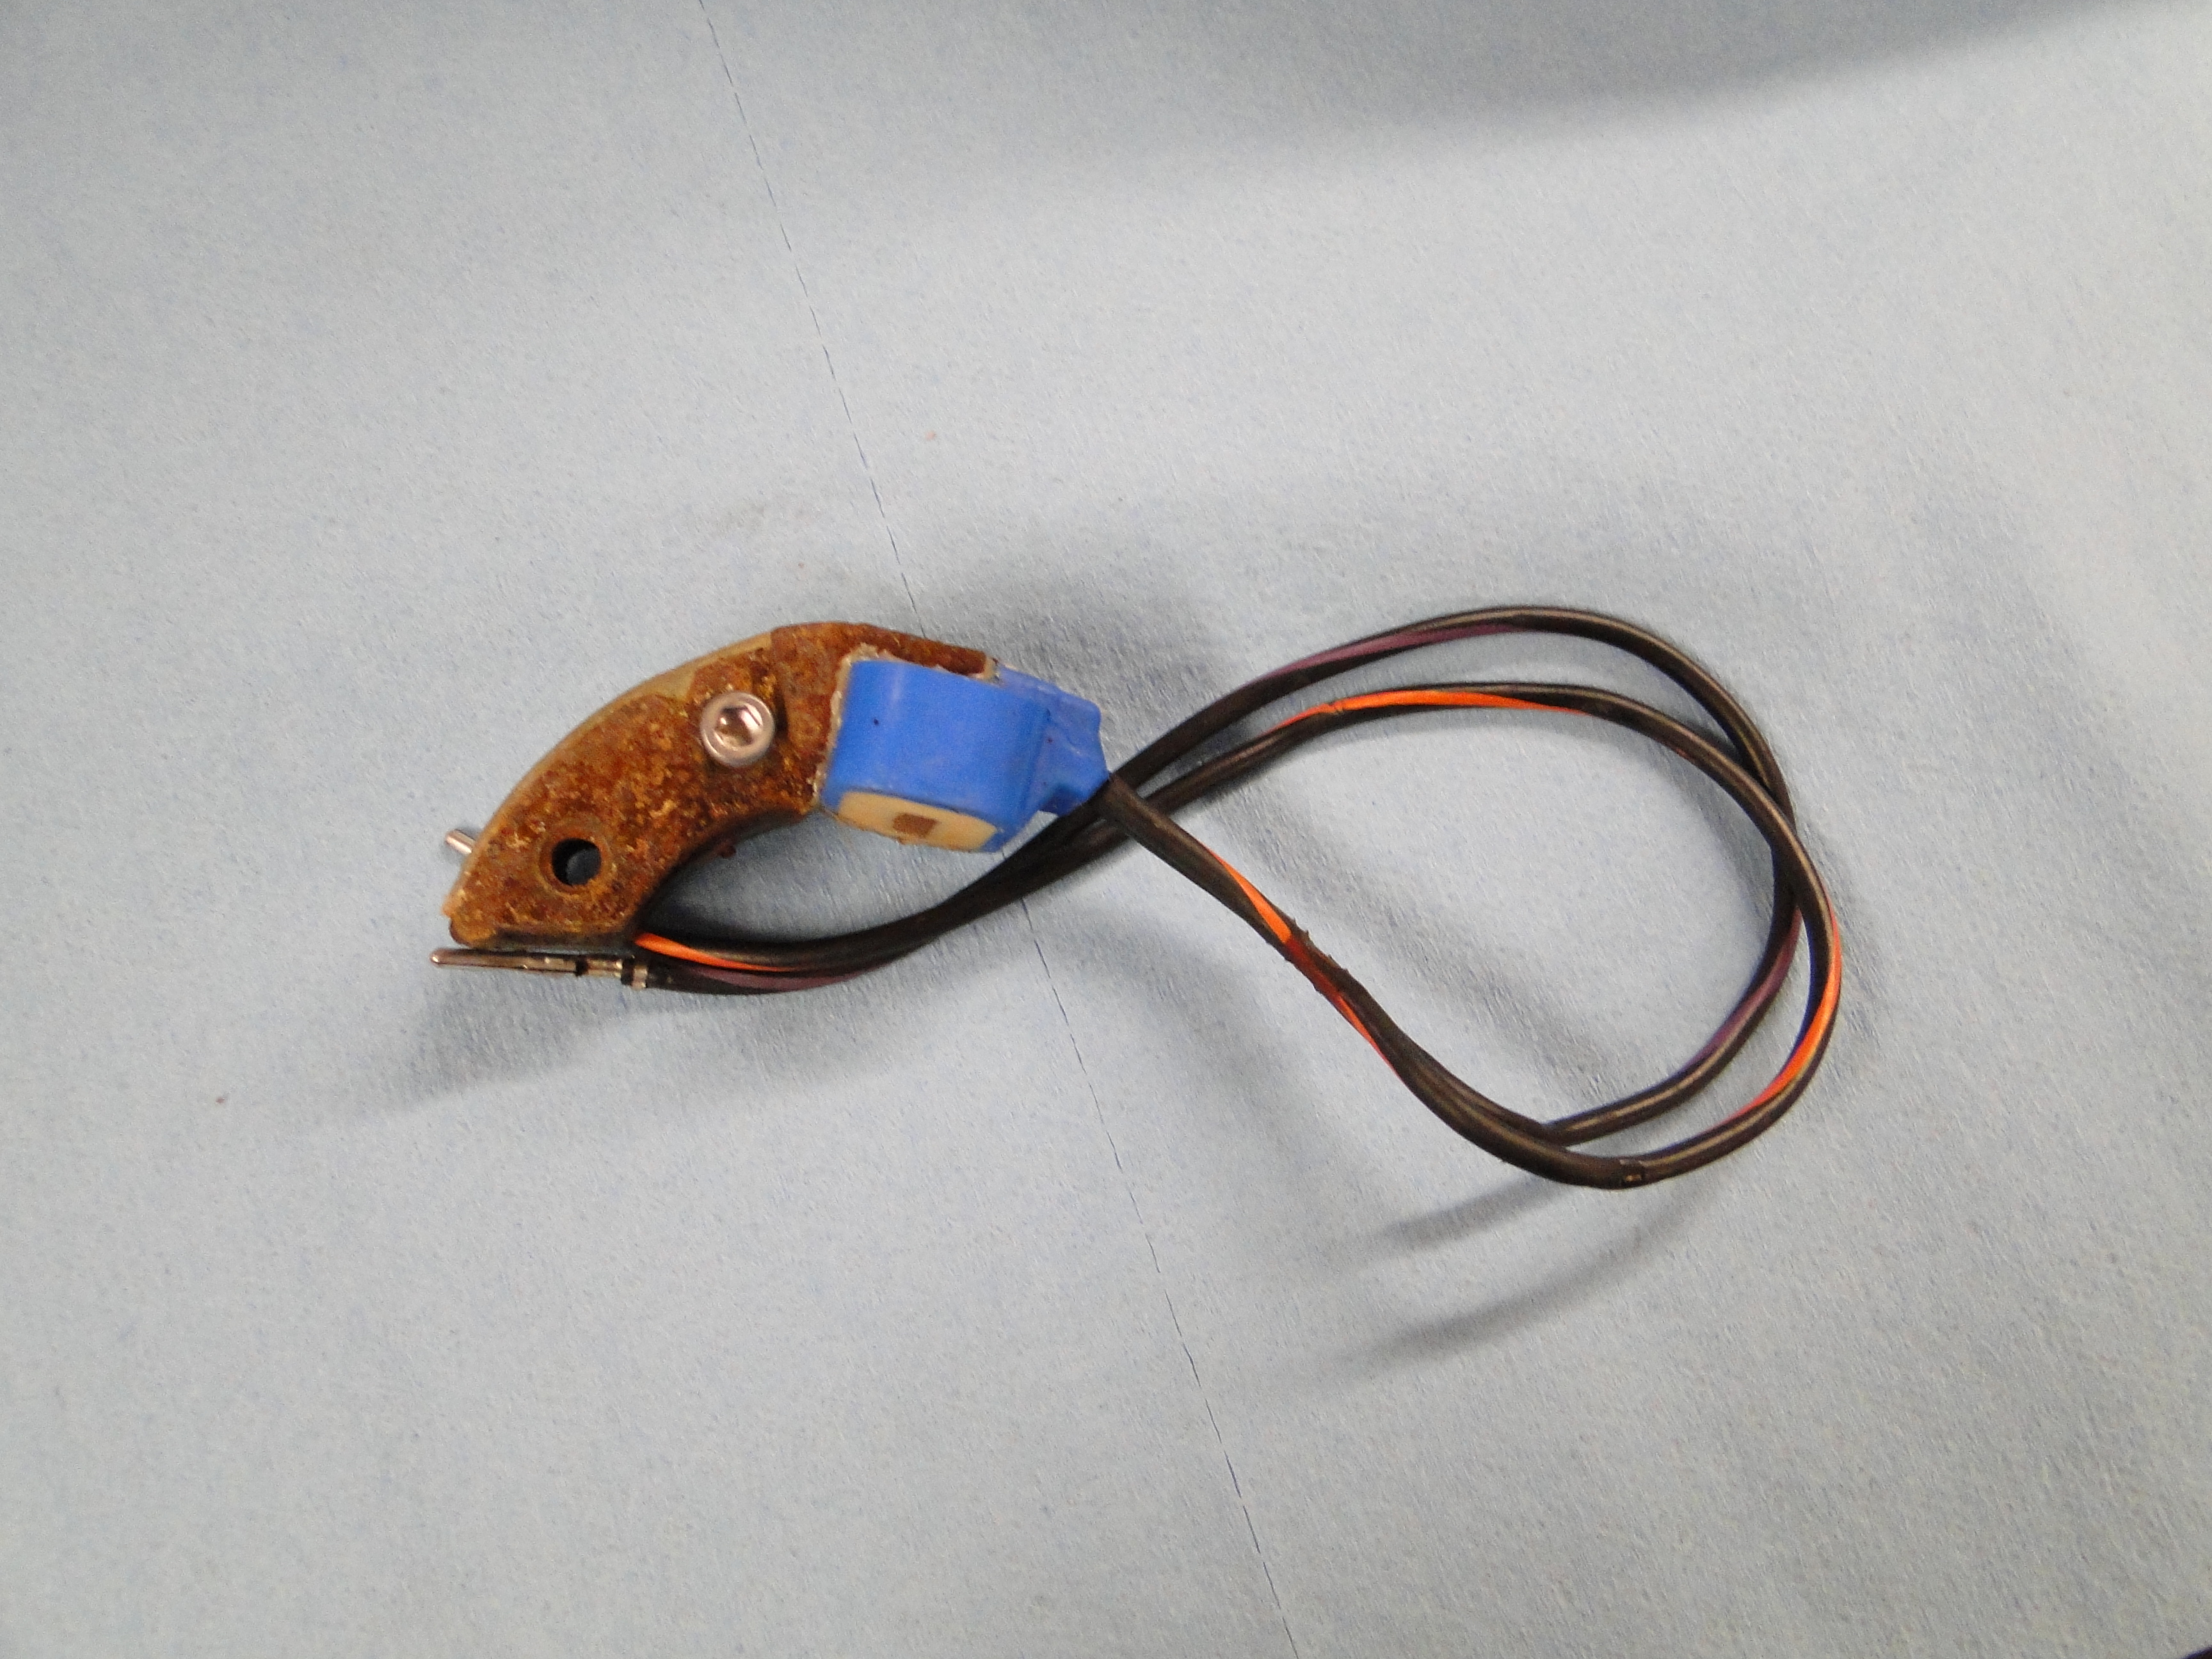
Well we were on the way to to the Beaver Falls car show, and ended up to see the master Jim Boffo at Boffo Motors via tow truck, to take care of the intermittent engine stalling problem, that only seems to occur when the engine is at an idle. Jim was able to quickly determine that the Edelbrock carburetor needed rebuilt, it would seem after eight years of sitting in storage, the carburetor float was sticking, and flooding the engine at an idle. When the carburetor was disassembled, we found the inside covered in brown tarnish, and gue. Jim also adjusted the fuel pressure down from 6 PSI to 4.5 PSI. The next problem we discovered, was an intermittent no spark problem form the MSD distributor. Jim replaced the Magnetic pickup and spark returned to normal.
Click any picture to enlarge.
|
|
|
|
|
June
Window Trim Installation
Now that the window trims are completed, I mounted the trim pieces in the cockpit, and if I don't say so my self, they look really good. I still need to figure out what I am going to do about the gap around the rear window, and above the door trim.
Click any picture to enlarge.
|
|
|
|
|
|
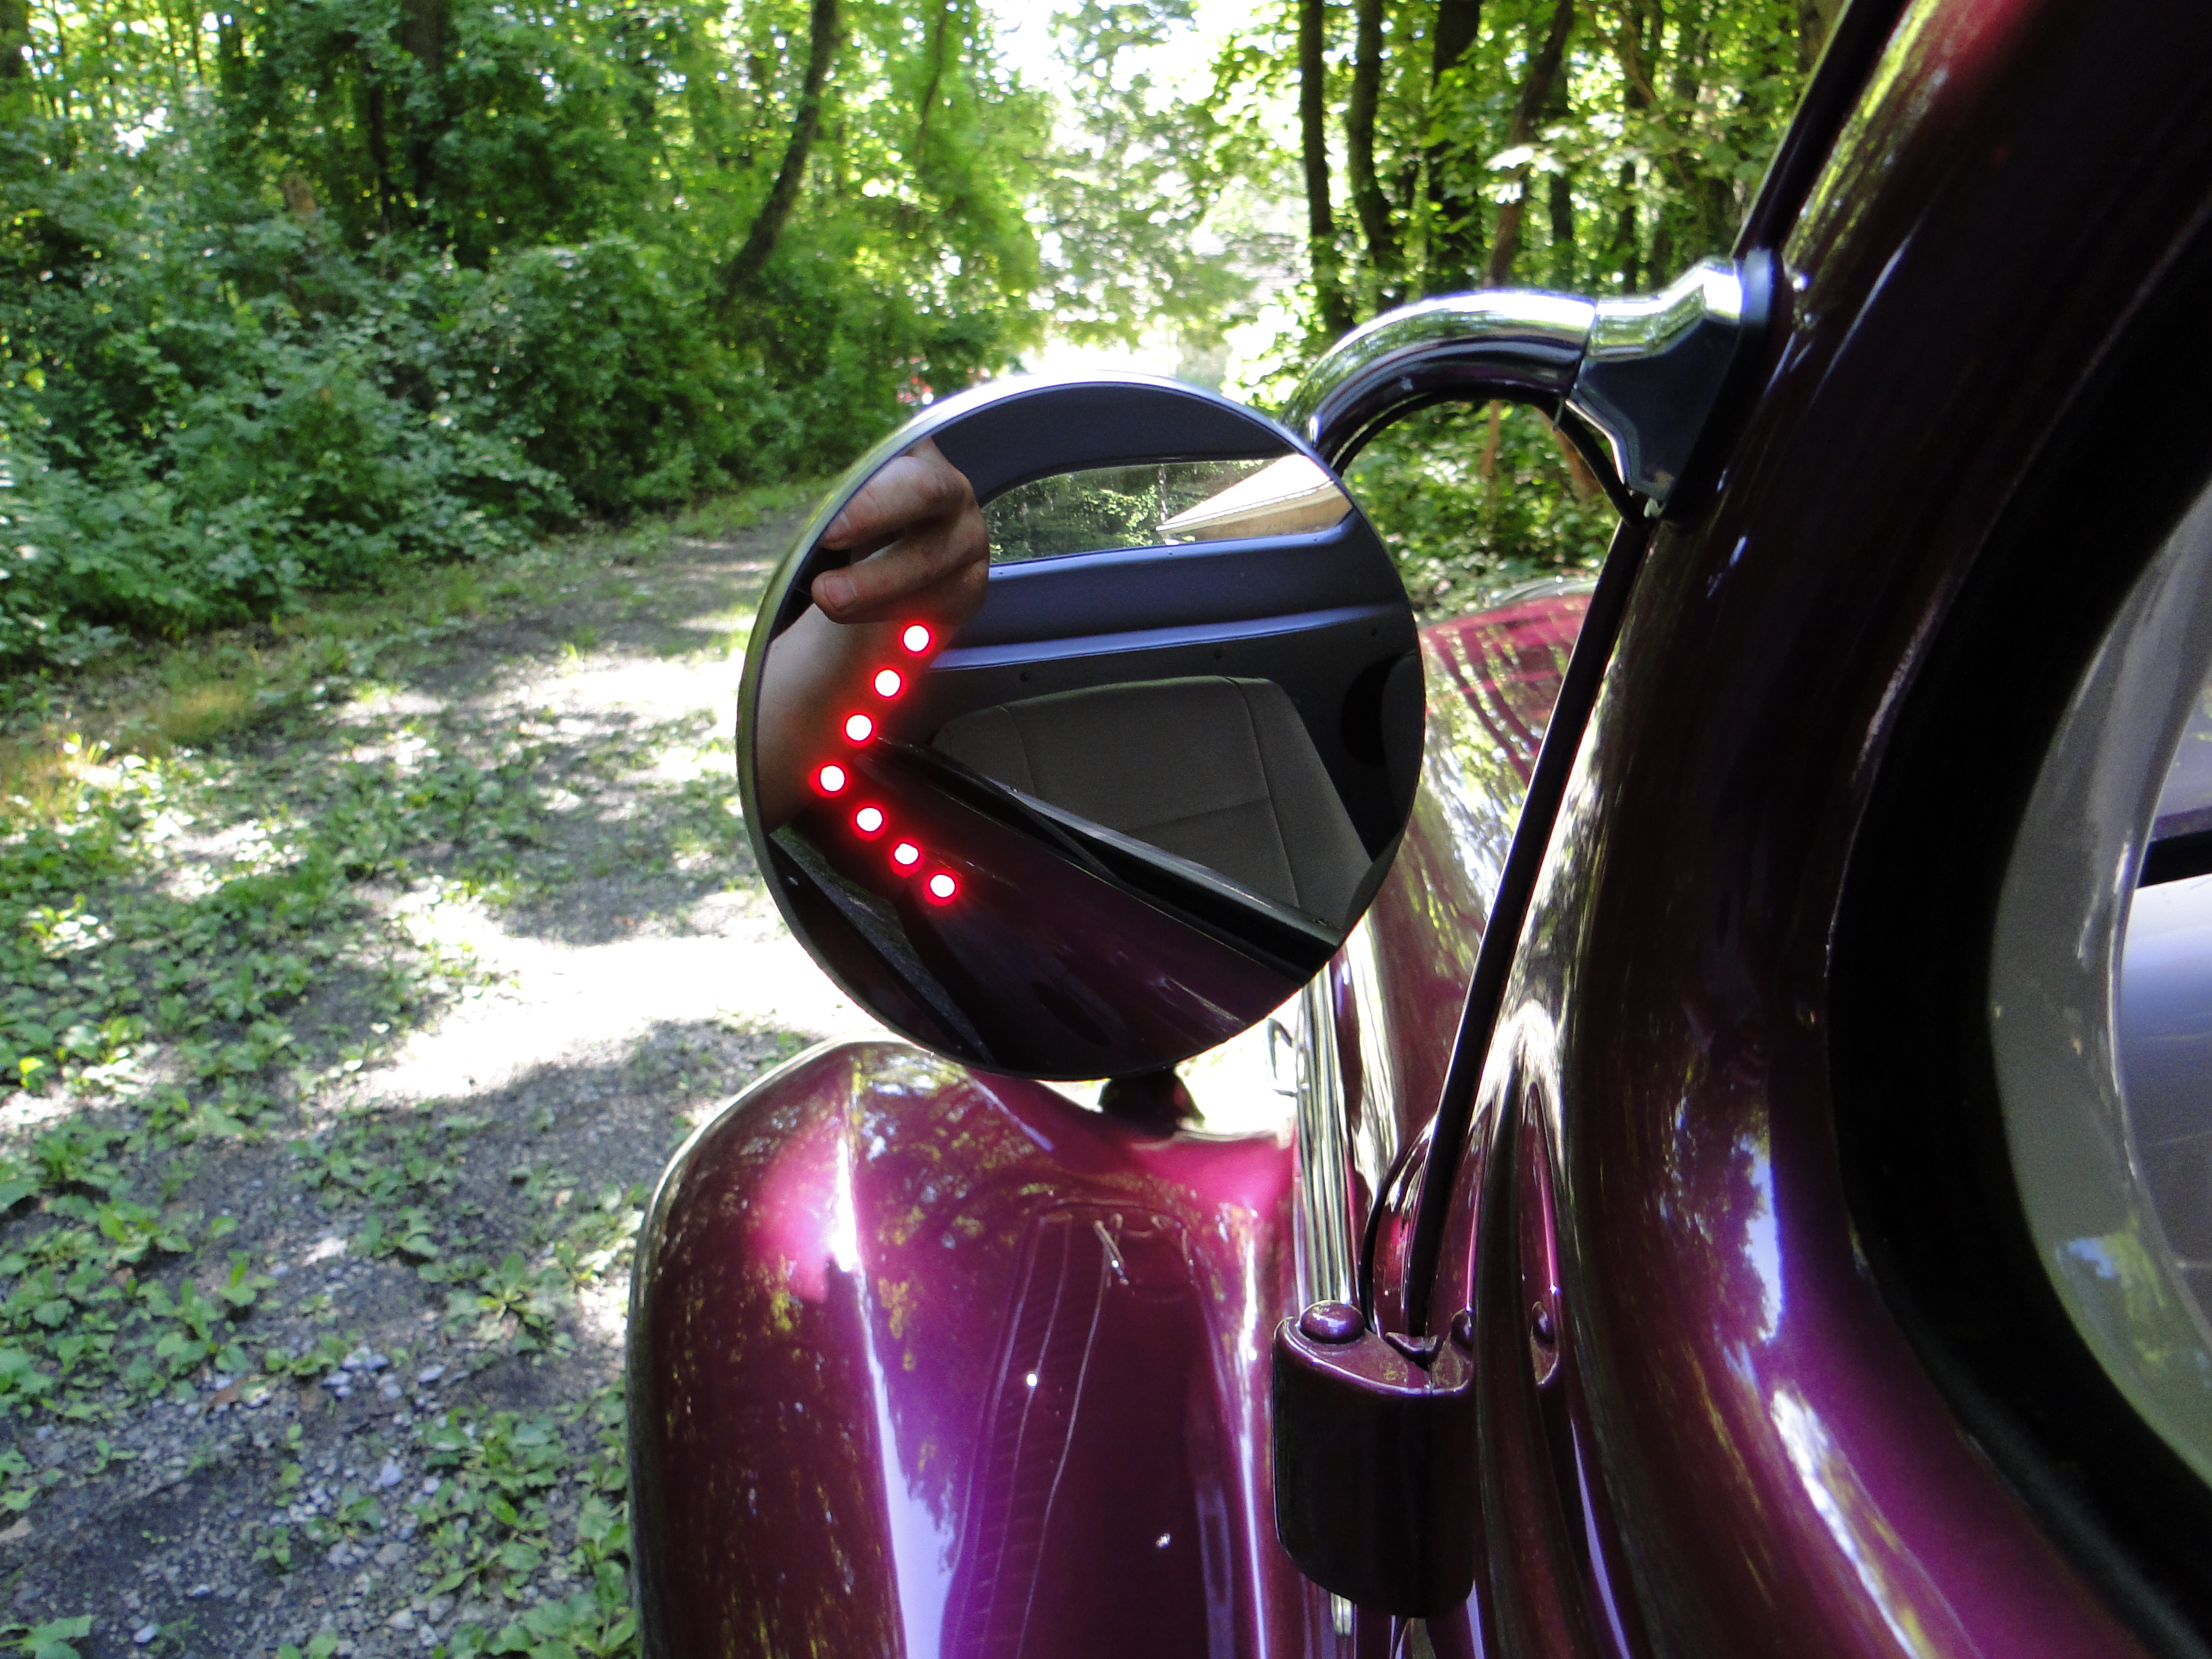
Rear view peep mirrors with hidden turn signal lights in glass installation
When I drive this car, I have found that my visibility is very very poor, I have added rear view mirrors to the doors to rectify most of this problem.
Click any picture to enlarge.
|
|
|

Contact Bob Capo at bob@bobcapo.com for further information
on any of our restorations.Thank You.